Table of Contents
Advertisement
Quick Links
Advertisement
Table of Contents

Subscribe to Our Youtube Channel
Related Manuals for Audient iD4


Summary of Contents for Audient iD4
- Page 1 2in | 2out Audio Interface Manual v1.3...
- Page 2 Audient iD4 Audio Interface Features include: To help get you started please visit audient.com/products/iD4 • 1 x Audient Console Mic Pre to download the latest software • Class Leading Converters and firmware. • 1 x JFET Instrument Input • 2 x Line Outputs Inside the box: •...
-
Page 3: Table Of Contents
Contents iD4 Overview General Operation: Safety Information Sample Rate Declaration of Conformities Buffer Size & Latency Operation on macOS Operation on iOS Mac Installation Operation on Windows Windows Installation Audio Loop-back iOS Installation Product Registration Daw Setups: Firmware Update Logic Pro Setup... -
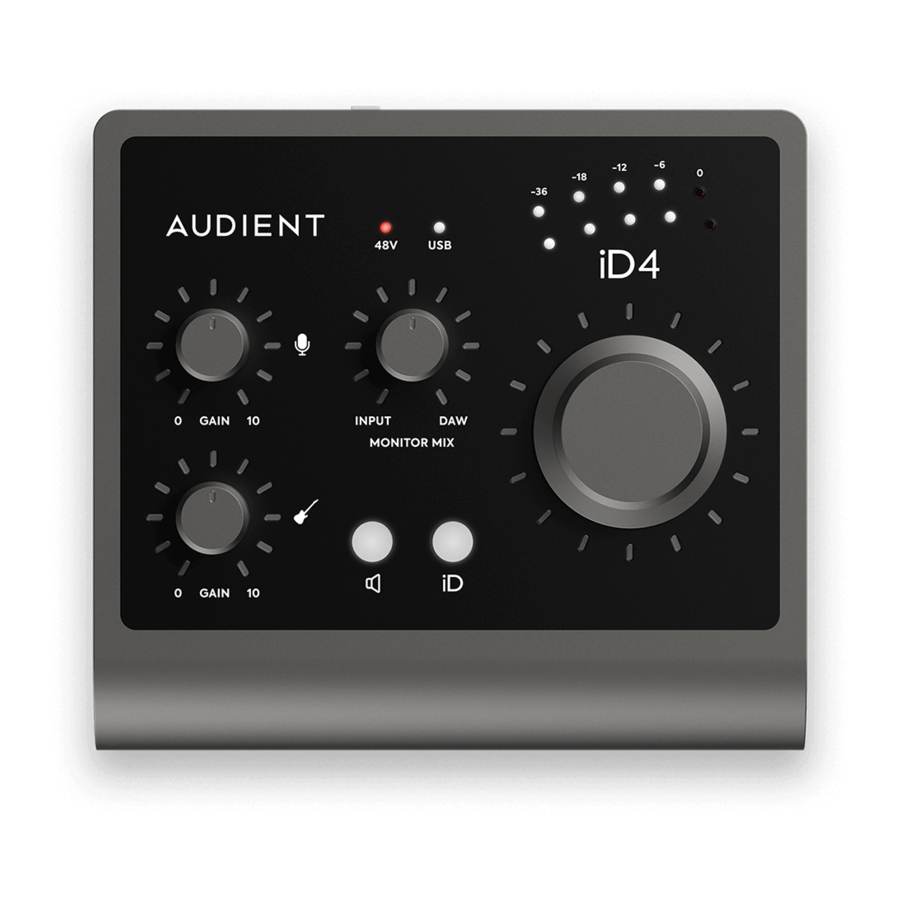
Page 4: Id4 Overview
Overview Monitor Mix Main Meters Channel 1 (Mic/Line Input) Volume Knob Channel 2 (Instrument Input) iD Button Mute Speakers USB-C Speaker Phantom Mic/Line Connection Outputs Power Input Instrument Dual Headphone Input Outputs... -
Page 5: Safety Information
Please read all of these instructions and save them for later reference before connecting the USB cable and powering up iD4. iD4 itself does not operate with any high voltage mains supply inside the unit but appropriate safety measures should still be adhered to prevent electrical shock and fire hazards. In the event of a unit failure, do not attempt to open the iD4 yourself. - Page 6 Safety Information Important Safety Instructions 1. Read these instructions 2. Keep these instructions 3. Heed all warnings 4. Follow all instructions 5. Do not use this equipment near water 6. Clean only with dry cloth 7. Do not install near any heat sources such as radiators, heat registers, stoves, or other equipment (including amplifiers) that produce heat 8.
-
Page 7: Declaration Of Conformities
This device must accept any interference received, including interference that may cause undesired operation We, Audient Ltd, declare that the product, the iD4, to which this declaration relates, is in material conformity with the appropriate CE standards and directives for an audio product designed for consumer use. - Page 8 Installation...
-
Page 9: Mac Installation
1. Connect iD4 USB - C Using the USB - C cable provided, connect iD4 to a USB - C port on your Mac. 2. Check Connectivity Once connected to your computer and powered on, the white USB LED on iD4 will illuminate. -
Page 10: Windows Installation
Windows Installer: audient.com/id4-downloads 2. Connect iD4 Using the USB cable provided, connect iD4 to your computer’s USB port. 3. Run iD Driver Setup Double click on the installer to run the iD installation and follow the onscreen instructions. - Page 11 Once the iD app is installed, the iD icon will Once connected to your computer and be visible in the Windows System Tray (it may powered on, the White USB LED on iD4 will be in the hidden icons area). Right click the illuminate.
-
Page 12: Ios Installation
Installation iOS System Requirements: 1. Connect iD4 to hub iD4 can be used on iOS or iPadOS devices that Using the USB cable provided, connect have lightning ports or USB-C ports providing iD4 to a USB port on the powered USB hub. -
Page 13: Product Registration
You do not need to have the iD app running away. on Mac for regular operation of iD4. Firmware Update Once firmware updates are made available, they need to be applied to iD4. This is done through the iD app. -
Page 14: Firmware Update
‘Check for Updates’. A firmware update is not possible on the iOS platform, so you will need to plug iD4 into a Mac or Windows computer and update the firmware from there. -
Page 15: Hardware Features
Hardware Features... -
Page 16: Microphone & Line Input
Audient’s classic consoles and are the same that are used across our entire product range. The design features discrete, Class-A circuitry providing exceedingly low distortion and noise performance. From a sonic point of view, iD4 is fast, open and detailed. • Amphenol™ XLR/TRS... -
Page 17: Instrument Input
Instrument Input iD4 uses a discrete Class-A JFET instrument (D.I) input on channel 2, which is easily accessible at the front of the unit. Loudspeaker Outputs The D.I input is perfect for plugging in electric or electro-acoustic guitars, as well as basses iD4 has stereo speaker outputs on the and even synthesisers. -
Page 18: Monitor Control
Monitor Control Volume Encoder The Volume encoder allows you to change the volume of the audio for both the speaker and headphone outputs. Pressing the encoder will dim the audio, dropping the level by 15 dB, useful if you want to quickly turn down the level to your speakers/headphones without losing your listening level. -
Page 19: Monitor Pan
Monitor Pan iD4’s Monitor Pan feature enables you to pan both the mic pre and DI input from left to right, making it easy to create a balanced headphone mix that suits you. Press and hold the Mute and iD buttons whilst turning the Volume Encoder to pan the inputs. -
Page 20: Id Button
A desk mounting plate is also available, ScrollControl. please contact Audient for more information. Metering As mentioned in previous sections, the meters change to display positions and values for different settings on iD4, however when not adjusting any settings, it will display the peak output level. -
Page 21: General Operation
General Operation... -
Page 22: Sample Rate
This next section will give some insight on A buffer adds a delay to the signal (known as how to get the most out of iD4, and some of latency), however it is essential for giving the the different settings and options you have computer some time to do other processing. -
Page 23: Operation On Macos
macOS The buffer size is selected from within your DAW, most likely in an audio settings or preferences menu. * Setting buffer size on macOS in Logic Pro X The location of the buffer size setting (or having a setting at all) is dependant on the app that you are using. -
Page 24: Audio Loop-Back
Loop-back 1/2 - The dedicated loop-back In order to allow you to loop audio from one application to another, iD4’s software includes outputs of the iD4, which enables you to loop the Audio Loop-back Mixer. audio without affecting your playback. This would be the audio being sent to outputs 3+4 in your DAW. - Page 25 Finder > Applications > Utilities > Audio MIDI Setup You should now see a list of audio devices currently connected to the Mac. Select the iD4, go to the ‘Output’ panel and click “Configure Speakers”. Now set the Outputs to Loop-back...
-
Page 26: Daw Setups
DAW Setup... -
Page 27: Logic Pro Setup
If you are starting a new With iD4 plugged into your Mac, launch Logic session, be sure to select the appropriate Pro and ensure that iD4 is selected as your sample rate found in: Input and Output Device: File >... -
Page 28: Pro Tools Setup
Pro Tools. Changing these mid session will result in Pro Tools needing to restart. If using the iD4 Monitor Mix knob to monitor your inputs, ensure that the input monitor buttons on the audio tracks are not selected, to avoid duplicate signals. -
Page 29: Cubase/Nuendo Setup
Studio > Studio Setup to the necessary I/O if required. Select VST Audio System in the devices menu. If using the iD4 Monitor Mix knob to monitor your inputs, ensure that input monitoring is Then select the Audient iD4 from the turned off on the track. -
Page 30: Ableton Setup
Ableton. In the Audio tab make sure that iD4 is assigned as the playback device. you can also select the appropriate sample rate for your project, as well as the buffer size. -
Page 31: Troubleshooting & Faq
USB cable. If you are using functional and attached at both ends. Then a USB hub, try plugging iD4 directly into the make sure that iD4 is set as the active playback computer. device in your DAW and computer: “I get clicks and pops on DAW playback”... - Page 32 Speakers button and listen on headphones. “I hear an echo when recording” This is most likely due to input monitoring being enabled in the workstation while also using the zero latency monitoring in iD4. For more information on this see page 13.
-
Page 33: Specifications
Technical Specifications D.I / Instrument Input: Microphone Preamplifier: RANGE: 40dB GAIN RANGE: 58dB LINEUP: 12dBu = 0dBFS LINEUP: 12dBu = 0dBFS THD+N @ 0dBu: 0.1% MIC MAX INPUT LEVEL: 12dBu SNR: 100dBu A-Weighted MAX INPUT LEVEL: 21dBu FREQUENCY RESPONSE - MIN GAIN ±0.5dB 10Hz to 20kHz INPUT IMPEDANCE (Mic): 2.8k... -
Page 34: Dimensions
Dimensions 133mm Weight: 1.0kg 133mm Weight: 1.0kg... -
Page 35: Warranty & Contact
We accept liability to repair or replace your iD4 as described above. We do not accept any additional liability. This warranty does not affect any legal rights you may have against the person who supplied this product - it is additional to those rights. -
Page 36: Service
Your warranty will be void if you tamper with the device at component level. If you have any questions with regard to the repair, please contact Audient Ltd. If your unit is in warranty, please contact your dealer directly for a repair or replacement (at the discretion of the dealer). -
Page 37: Glossary
Glossary Amperes ADAT Alesis Digital Audio Tape Analogue to Digital Converter Digital Audio Workstation Analogue Signal Processing Central Processing Unit Artist Headphone Mix Digital to Analogue Converter Decibel Decibel referenced to 0.775Vrms = 0 dBu dBFS Decibel Full Scale Direct Current Direct Injection (Instrument Input) Declaration of Conformity Digital Signal Processing...
Need help?
Do you have a question about the iD4 and is the answer not in the manual?
Questions and answers