Advertisement
Description
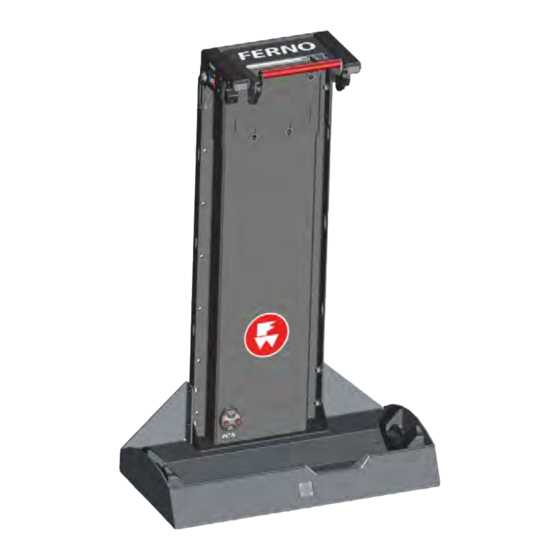
The Ferno® Universal Stair Chair Fastener is designed to secure a
compatible chair to the wall of an ambulance or building. Refer to the
list of compatible products below.
056-7086
Universal Stair Chair Fastener
●
●
056-7087
Universal Stair Chair Fastener (ICS® Ready)
Both models feature an adjustable lock handle and adjustable
wheel blocks. Two plastic-buckle restraints are included. Installation
instructions are the same for both models unless otherwise noted.
Compatible Products
Ferno® Transcend
Series (excluding Evacuation Chair)
™
Ferno® EZ-Glide® Series
Ferno® Venice Series
Ferno® FAST Chair Series
Stryker® Stair PRO® *
Kit 056-7087 Charging Requirements
Compatible
Ferno® Transcend
Series Chair
™
Transcend Serial Number
23C-194167 or higher
Ferno® Battery
Ferno® ICS® kit 056-7082
12 VDC Source Power
* Stryker® and Stair-PRO® are trademarks of Stryker Corporation, Kalamazoo, MI, USA.
** Milwaukee® is a trademark of Milwaukee Electric Tool Corporation, Brookfield, WI, USA
© Ferno / 234-3871-01 / May 2023
Not Compatible
59T EZ-Glide® Series Chairs
Transcend Serial Number
below 23C-194167
Milwaukee® Battery **
Universal Stair Chair Fastener
Kits 056-7086, 056-7087
1
Advertisement
Table of Contents

Subscribe to Our Youtube Channel
Related Manuals for Ferno 056-7086


Summary of Contents for Ferno 056-7086
- Page 1 Universal Stair Chair Fastener Kits 056-7086, 056-7087 Description The Ferno® Universal Stair Chair Fastener is designed to secure a compatible chair to the wall of an ambulance or building. Refer to the list of compatible products below. 056-7086 Universal Stair Chair Fastener ●...
-
Page 2: Safety Information
The symbols defined here are used on the fastener and/or in this’ Failure to follow Notices could result in product or property damage. manual. Ferno uses symbols recognized by the International Standards Organization (ISO), American National Standards Institute (ANSI) and the emergency medical services industry. -
Page 3: Mounting Guidelines
234-3846. Fasteners: It is the responsibility of the installer to select appropriate ● mounting points and fasteners that are strong enough to support the fastener and chair under all conditions of use. © Ferno / 234-3871-01 / May 2023... - Page 4 Milwaukee-brand batteries. Charge only Ferno Refer to publication 234-3846 to install the ICS supply cable. batteries in a Ferno Transcend series chair. Test the power to the ICS supply cable before connecting the cable to the fastener. Using a voltmeter, place the positive (+) probe on the red wire contact and the negative (–) probe on the...
- Page 5 5 mm drill bit (Figure 3). Attach the fastener to the wall using the required button-head hex screws and rivet nuts at each mounting point (A, 12 total, Figure 3). © Ferno / 234-3871-01 / May 2023...
- Page 6 Refer to the table below and Figure 4 for the recommended initial position. Install both wheel blocks at a matching position. Position 3 (Ferno Transcend, EZ-Glide, or Venice Series Chairs) is shown in Figure 5. To adjust or change the position of wheel blocks, use a 5 mm hex wrench to remove the two M6 screws and washers from each block.
- Page 7 (G) from the fastener front (Figure 6). Slide the lock handle assembly (E) up until both side mounting holes are visible. The Ferno FAST Chair uses the lower set of mounting holes (Figure 7). All other compatible chairs use the upper set of mounting holes.
- Page 8 Not all chairs require the bumpers. Ferno FAST Chair, Ferno 59T EZ-Glide Chair Only: Use a 2.5 mm hex wrench to remove the four M4 x 10 screws (I) from the bumpers (J).
- Page 9 (Figure 13). To shorten a strap: Grasp the hemmed tab (N, Figure 13) and pull the webbing through the buckle (L) until the strap is the desired length. © Ferno / 234-3871-01 / May 2023...
- Page 10 If needed, remove the chair and adjust the wheel blocks and/or lock handle. See "Adjusting the Fastener" on page 6. Adjust and buckle both restraints to secure the chair in the fastener (Figure 16). © Ferno / 234-3871-01 / May 2023...
- Page 11 Universal Stair Chair Fastener Removing the Chair from the Fastener Unbuckle the two restraints. Lift the red lock handle (Q), tilt the chair forward, and remove it from the fastener (Figure 17 and Figure 18). © Ferno / 234-3871-01 / May 2023...
- Page 12 PowerTraxx A properly installed and powered Integrated Charging System will recharge the Ferno battery in a 36VDC-powered Ferno Transcend Series Chair when the chair is secured in the fastener. Note: The ICS is not designed to charge the Milwaukee-brand battery.
-
Page 13: Inspection Checklist
To disinfect, remove the chair from the fastener. Wipe all surfaces with disinfectant. Follow the disinfectant manufacturer’s instructions for application method and contact time. Ferno recommends you inspect the fastener for damage as you disinfect it. To clean, first verify that all cords, cables, connectors, etc. are properly connected. -
Page 14: Ferno Customer Relations
Limited Warranty Statement The products sold by Ferno are covered by a limited warranty, which is printed on all Ferno invoices. The complete terms and conditions of the limited warranty, and the limitations of liability and disclaimers, are also available upon request by calling Ferno at 1.800.733.3766 or 1.937.382.1451.
Need help?
Do you have a question about the 056-7086 and is the answer not in the manual?
Questions and answers