
Related Manuals for TypeS T200 PLUS


Summary of Contents for TypeS T200 PLUS
- Page 1 T200 PLUS 2K Full Coverage Dashcam with AI Driver Assistant Functions WP ITM. BT533643 Care & Use Instructions Important, retain for future reference: Read carefully...
-
Page 2: Table Of Contents
TABLE OF CONTENTS 1. Introduction ....................................1 2. Package Contents ...................................2 3. Product Specifications ................................3 4. Dimensions ....................................4 5. Product Overview ..................................5 6. Controlling The Camera ................................6 7. Installing The Cameras ................................6 8. Configuring The Menu Settings ............................9 9. Camera Status & LED Indicators ............................18 10. -
Page 3: Introduction
These instructions are not applicable to all vehicle types and are provided as guidelines to aid in product installation. If you require assistance with camera installation, please feel free to either consult an experienced technician or reach out to TYPE S customer support at 1.866.294.9244. -
Page 4: Package Contents
2. PACKAGE CONTENTS 1. 1 x T200 PLUS Dashcam 2. 1 x Rear Camera 3. 1 x 12/24V Power Adapter 4. 1 x Windshield Mount (Flat) 5. 1 x Windshield Mount (Angled) 6. 1 x Spare 3M VHB™ Double Sided Tape 7. -
Page 5: Product Specifications
3. PRODUCT SPECIFICATIONS T200 PLUS Dashcam Display: 3.0” Video Resolution: QHD 2K (2560 x 1440) / 30 FPS Frequency: 2.4GHz Operating Voltage: DC 12/24V / DC 5.2V (USB-C) 14°F~140°F (-10°C~60°C) Operating Temperature: 123° Lens (View Angle): Image Sensor: Up to 10ft / 3m... -
Page 6: Dimensions
4. DIMENSIONS 3.57 in / 90.6 mm 2.3 in / 58.5 mm 1.73 in / 44 mm 3.7 in / 94 mm 1.55 in / 39.4 mm 1.44 in / 36.5 mm 2.12 in / 53.8 mm... -
Page 7: Product Overview
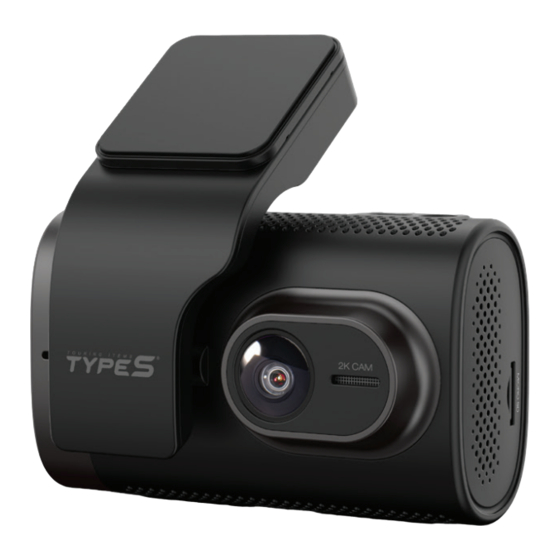
5. PRODUCT OVERVIEW Speaker Event Recording Button Camera Lens LED Indicators MicroSD Card Slot (MicroSD Card Factory-Installed) Display Screen Power Input 10. Function Buttons Rear Camera AV-IN Input 11. Orange Warning Light - Left Blind Spot Microphone 12. Green Warning Light - Right Blind Spot... -
Page 8: Controlling The Camera
6. CONTROLLING THE CAMERA Apply configuration and settings to the dashcam using the 4 function buttons. Please refer to the section below for the functions of Function each button under different modes Buttons Switch between ADAS/PIP/Front/ Rear view (click once) Audio Recording On/Off (click once) Snapshot (click once) Record (press and hold) - Page 9 Attach the windshield mount securely into the socket on the dashcam. Please select the appropriate mount according to your windshield type. For a tilted windshield, use the flat mount. For a vertical windshield, use the angled mount. Mount the dashcam onto the windshield: •...
- Page 10 Route the power cable through the headliner and pillars inside your vehicle. Connect the power adapter to your vehicle's 12/24V DC outlet. To ensure it doesn't obstruct the driver while driving, we recommend passing it through the passenger side. Plug the rear camera into the AV-IN port on the dashcam.
-
Page 11: Configuring The Menu Settings
Mount the rear camera on the rear window inside your vehicle. Adjust the camera to your desired angle. Route and hide the power cable in your vehicle. CAUTION: Before mounting the camera on your rear window, please power on the dashcam to ensure that it is in the correct orientation. - Page 12 Auto-Calibration The dashcam features an Advanced Driver Assistance System (ADAS) function. Upon initial use, the device will automatically calibrate to enhance the accuracy of detecting safety events. Please note that this calibration process may take up to 15 minutes to complete. The calibration will complete once the following conditions are met: - Driving on a straight and level road - Vehicle speed is greater than 13 MPH (20 KM/H)
- Page 13 • Click to switch between ADAS, picture-in-picture, front and rear view. Picture-in-picture and rear views are only available when the rear camera is connected. • Click to turn audio recording on/off. • Press and hold to start/stop recording, or click once to take a photo.
- Page 14 Play Back and Manage Files • Utilize to browse through the previews, then click to open the file in full screen. • During video playback, click to pause and to resume the video. • Click to adjust video speed to x 2, x 4 or x 8. Erase Files •...
- Page 15 1. Forward Collision Warning Select the speed at which you would like the feature to be activated. If you select 20 MPH, this feature will only activate when you're driving at over 20 MPH. - 20 MPH - 25 MPH - 30 MPH - 30 KM/H - 40 KM/H...
- Page 16 3. Pedestrian Collision Warning The dashcam tracks moving and stationary pedestrians in close proximity to your vehicle. When the distance to the pedestrian ahead falls below 1.2 seconds, and your vehicle’s speed is between 0.7 MPH and 40 MPH (1 KM/H and 60 KM/H), an alert will sound and an on-screen warning will appear.
- Page 17 7. Blind Spot Warning The Blind Spot Warning system keeps an eye on vehicles approaching in adjacent lanes and warn if you try to pull out. The detection range increases with higher speeds up to 12.5 meters. Preliminary Alert When your vehicle surpasses a speed of 7 MPH (10 KM/H), an orange warning light on the dashcam will activate if another vehicle approaches from your left rear.
- Page 18 6. Date and TYPE S Logo Stamp Enable or disable the Date and TYPE S Logo Stamp. When set to ON, the date and TYPE S logo will be displayed on all recorded media files. Video Setting 1. Resolution Switch video resolution between 2K (1440P) and FHD (1080P). NOTE: The resolution of the rear camera is fixed at 1080P.
- Page 19 System Setting 1. Screen Save Select the period of inactivity that prompts the activation of screen save mode. While in screen save mode, a digital clock will be displayed on the screen. 2. WiFi The auto-sync feature via WiFi allows you to view/manage/ download files onto your smart device wirelessly via the TYPE S Drive App.
-
Page 20: Camera Status & Led Indicators
9. CAMERA STATUS & LED INDICATORS Power / Mode Status LED Indicators Power On Blue LED light stays on when dashcam is Dashcam powers ON when the engine is turned on. powering on. Recording Red LED light stays on. Recording Stopped Blue LED light stays on. -
Page 21: Downloading The App
12. DOWNLOADING THE APP The auto-sync feature in the TYPE S Drive App allows you to 1) Synchronize the dashcam's time with your phone's time, 2) Manage the dashcam's functions from your phone, and 3) View and download recorded videos. To access this feature, scan the QR code below or search for "TYPE S Drive" on the App Store or Google Play. -
Page 22: Setting Up The App
13. SETTING UP THE APP Auto-sync with the Dashcam 1. Open the dashcam's settings menu and navigate to System Setting. 2. Go to WiFi. The designated QR code will appear. NOTE: Make sure that WiFi is ON. Android Device 3. Run the TYPE S Drive App. Click Allow in the pop-up message when prompted to allow the App to access... - Page 23 6. Scan the QR code on the dashcam. 7. After establishing the connection, you will have the ability to view the live feed from the dashcam through the App. NOTE: After the initial connection, the App retains your dashcam's network information. This ensures that you will be automatically directed to the live view the next time you connect, eliminating the...
- Page 24 6. Scan the QR code on the dashcam. 7. Click Join in the pop-up message when prompted to connect to the dashcam’s WiFi network. 8. (Optional) If there is any issue with the auto pairing, exit the App and navigate to the WiFi setting page on your device.
-
Page 25: Using The App
14. USING THE APP Main Interface Main Menu Audio Recording Display Mode On/Off Record On-screen Instructions Home Screen Gallery Display Mode Select from 5 different viewing modes. Front ADAS Rear + Front Front + Rear Rear NOTE: "Rear", "Front + Rear" and “Rear + Front” modes only available when the rear camera is connected. - Page 26 Change WiFi Password Click to open Main Menu, then navigate to System Setting > Change WiFi Password. Enter your preferred password (must be exactly 8 numeric characters), then click OK. Connect to your dashcam’s WiFi network again with the revised password.
- Page 27 SD CARD Click to download the selected file onto your smart device or to delete the file from the MicroSD card. GPS Information Click to play the footage, and click to view embedded GPS location simultaneously during playback. NOTE: The icon will only appear if the GPS signal was present while the recording took place.
-
Page 28: Safety Information
15. SAFETY INFORMATION IMPORTANT SAFETY INSTRUCTIONS 1. SAVE THESE INSTRUCTIONS – This manual contains important safety and operating instructions of 12/24V car charger for Model BT533643. 2. Before using the product, read all instructions and cautionary markings. 3. Do not expose car charger to rain, moisture, or snow. 4. - Page 29 • The area displayed by the AI Dashcam and Rear Cam is limited. The AI Dashcam does not display objects that are out of the AI Dashcam’s field of view. The area displayed on the screen may vary according to vehicle orientation or road conditions. The Rear Camera does not display objects that are close to or below the bumper, underneath the vehicle, or objects out of the camera’s field of view.
-
Page 30: Maintenance & Warranty
• Be aware of young children. Young children are small and hard to see. • Parents, caregivers and all adults need to be vigilant in supervising children, especially when children are in the yard, driveway or parking lot playing near parked cars. •... - Page 31 4. The replacement of parts is excluded from the warranty when replacement is necessary due to normal wear and tear. 5. Repair or replacement parts supplied by TYPE S under this warranty are protected only for the unexpired portion of the original warranty. 6.
-
Page 32: General Information
The AI Dashcam is not intended to be a substitute for rearview mirrors or for any other motor vehicle equipment mandated by law. Even when properly installed, our AI Dashcam has a limited field of vision and does not provide a comprehensive view of the rear area of the vehicle. TYPE S and/or its affiliates are not responsible for a user’s intended or actual use of the AI Dashcam. - Page 33 In order to avoid the possibility of exceeding the FCC radio frequency exposure limits, human proximity to the antenna shall not be less than 20cm during normal operation. T200 PLUS 2K Full Coverage Dashcam with AI Driver Assistant Functions...
- Page 34 A Horizon Brands Company 2975 Red Hill Ave., Ste. 100, Costa Mesa, CA 92626, U.S.A. 1.866.294.9244 | info@typesauto.com ©2024 TYPE S. All rights reserved. www.typesauto.com ML-533643E_V1...
Need help?
Do you have a question about the T200 PLUS and is the answer not in the manual?
Questions and answers
Does the t200 show an icon if recording is activated in the parking mode?
My t200 recording led blinks and does not stay on as indicated in the manual. Please advise if this normal.