Advertisement
Advertisement
Table of Contents

Related Manuals for Manhattan Comfort Duane Sideboard SB-9GLF


Summary of Contents for Manhattan Comfort Duane Sideboard SB-9GLF
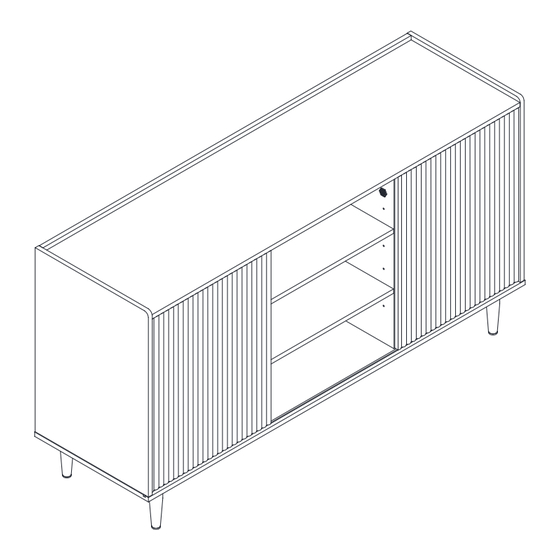
- Page 1 Duane Sideboard SB-9GLF V.05112023...
-
Page 2: For Best Results
STOP! STOP! Before beginning the assembly process, ensure all boxes and parts have been delivered. FOR BEST RESULTS: • Do not throw away packaging materials until assembly is complete. • Assemble item on a soft surface, such as cardboard or carpet, to protect finish. •... -
Page 3: Included In This Package
Included in this package: A. TOP(1) B. BOTTOM(1) C. LEFT END(1) D. RIGHT END(1) E. LEFT UPRIGHT(1) F. RIGHT UPRIGHT(1) G. UPPER BACK(1) H. LOWER BACK(1) J. SHELF(2) K. MIDDLE SHELF(2) N. LEG(2) O. DOOR(2) P. BRACE(2) Page 3 SB-9GLF... -
Page 4: Hardware Identification
Hardware Identifi cation Page 4 SB-9GLF... -
Page 5: Warranty Policy
WARRANTY POLICY All Manhattan Comfort furniture products are warranted, to the original purchaser at the time of purchase and for a period of 30 days thereafter. Our warranty is limited to new products purchased in factory sealed cartons. This warranty is valid in the United States of America and Canada. - Page 6 Page 6 SB-9GLF...
- Page 7 Step 1 ◆ Insert sixteen CAM SCREWS (1) into the TOP (A), ENDS (C and D). Page 7 SB-9GLF...
- Page 8 Step 2 ◆ Push sixteen HIDDEN CAMS (2) into the TOP (A), UPRIGHTS (E and F), BACKS (G and H). Page 8 SB-9GLF...
- Page 9 Step 3 Fasten four L BRACKETS (15) to the ENDS (C & D). Use four PAN HEAD SCREWS (16). ◆ Page 9 SB-9GLF...
- Page 10 Step 4 Insert two WOOD DOWEL (3) into the TOP (A) ◆ Fasten the UPPER RIGHTS (E and F) to the TOP (A). Tighten four HIDDEN CAMS. ◆ Page 10 SB-9GLF...
- Page 11 Step 5 Insert one WOOD DOWEL (3) to the TOP (A). ◆ Fasten the END (D) to the TOP (A). Use two PAN HEAD SCREWS (16), and tighten two HIDDEN CAMS. ◆ Page 11 SB-9GLF...
- Page 12 Step 6 Fasten the BACKS (G and H) to the RIGHT END (D). Tighten four HIDDEN CAMS ◆ Page 12 SB-9GLF...
- Page 13 Step 7 Fasten the BACKS (G and H) to the TOP (A) and UPRIGHTS (E and F). Use eight FLAT HEAD SCREWS (13). ◆ Insert one WOOD DOWEL (3) to the TOP (A). ◆ Fasten the LEFT END (C) to the TOP (A) and BACK (G and H). Use two PAN HEAD SCREWS (16), and tighten ◆...
- Page 14 Step 8 ◆ Push three GROMMET (10) into the LOWER BACK (H). Page 14 SB-9GLF...
- Page 15 Step 9 Insert four BOLT (6) into the holes of the DOORS (O). ◆ Fasten the LOWER BRACKETS (4) to the bottom ◆ of the DOORS (O). Use eight FLAT HEAD SCREWS (14). Page 15 SB-9GLF...
- Page 16 Step 10 Place the bolts of the DOOR (O) to the groove on the TOP (A). ◆ Insert four WOOD DOWELS (3) into the ENDS (C and D) and the UPRIGHTS (E and F). ◆ ◆ Fasten the BOTTOM (B) to the ENDS (C and D), UPRIGHTS (E and F) and the BACK (H). Use twelve FLAT HEAD SCREWS (13).
- Page 17 Step 11 ◆ Fasten the BRACES (P) to the LEGS (N). Tighten four HEX HEAD SCREWS (11) using the L-WRENCH (8). NOTE: You should start each SCREW a few turns before completely tightening any of them. Page 17 SB-9GLF...
- Page 18 Step 12 ◆ Fasten the LEG to the BOTTOM (B). Tighten ten HEX HEAD SCREW (12) using the L-WRENCH (8) . Page 18 SB-9GLF...
- Page 19 Step 13 Insert eight METAL PINS (9) into the hole locations of your ◆ choice in the UPRIGHTS (E and F). Set the SHELVES (K) onto the METAL PINS in the UPRIGHTS (E and F). ◆ Page 19 SB-9GLF...
- Page 20 Step 14 Insert eight METAL PINS (9) into the hole locations of your ◆ choice in the ENDS (C and D) and UPRIGHTS (E and F). Set the SHELVES (J) onto the METAL PINS in the ◆ ENDS (C and D) and UPRIGHTS (E and F). Page 20 SB-9GLF...
- Page 21 Step 15 Peel APPLIQUES from the APPLIQUE CARDS (5) and stick them onto each visible HIDDEN CAM. ◆ Peel the BUMPERS from the BUMPER CARDS (7) and stick them onto the edges of the DOORS (O). ◆ Page 21 SB-9GLF...
Need help?
Do you have a question about the Duane Sideboard SB-9GLF and is the answer not in the manual?
Questions and answers