Advertisement
Quick Links
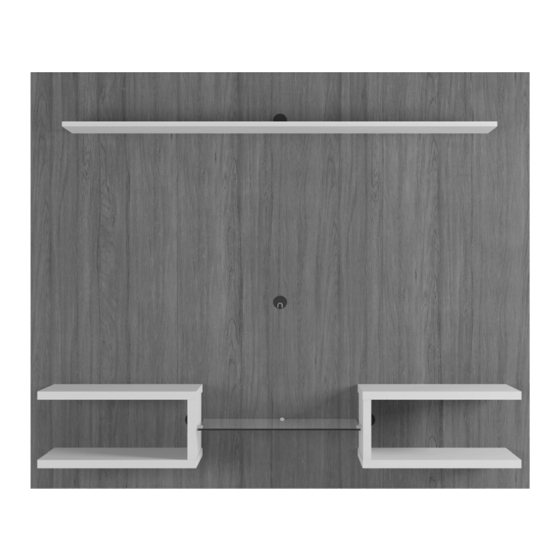
10
lb
40
lb
10
5
lb
lb
10
lb
The indicated values consider static weights and evenly distributed over the parts.
Les valeurs indiquées tiennent compte des poids statiques et uniformément répartis sur les pièces.
10
lb
10
lb
Plaza 64.25
Model # 224BMC1, 224BMC12, 224BMC2, 224BMC21, 224BMC6,
888-230-2225
help@manhattancomfort.com
Panel / Panneau
224BMC8, 224BMC9, 224BMC94
Ed. 004, 2020/10 - Manhattan Comfort.
Advertisement

Related Manuals for Manhattan Comfort Plaza 64.25


Summary of Contents for Manhattan Comfort Plaza 64.25
- Page 1 Model # 224BMC1, 224BMC12, 224BMC2, 224BMC21, 224BMC6, 224BMC8, 224BMC9, 224BMC94 The indicated values consider static weights and evenly distributed over the parts. Les valeurs indiquées tiennent compte des poids statiques et uniformément répartis sur les pièces. Ed. 004, 2020/10 - Manhattan Comfort.
- Page 2 INCLUDED IN THE PACKAGE / INCLUS DANS LE PACKAGE REAR VIEW / VUE ARRIÈRE For fixing behind the panels. Pour fixation derrière les panneaux. For fixing on the wall. Pour fixation au mur. n.° ID Parts Identification (Description) / Identification des pièces (Description) Quantity / Quantité...
- Page 3 TOOLS NEEDED / OUTILS NÉCESSAIRES Manual screwdriver. Simple hammer. Level indicator. Electric drill and electric Tournevis manuel. Marteau simple. Indicateur de niveau. screwdriver with drill bit Ø1/2 inch and phillips tips. Perceuse électrique et tournevis électrique avec foret Ø1/2 pouce et pointes phillips.
- Page 4 STEP 1 / ÉTAPE 1 • Line the floor with the cardboard and the foam mantle of the packing to protect the parts and arrange the Panels (01) and (02) with the rear face upwards, correctly checking the DETAIL 1 position of each according the holes and the drawing.
- Page 5 STEP 4 / ÉTAPE 4 ATTENTION! Before installing the panel, check the conditions of the wall for strength to properly support and anchor the weight of the suspended furniture, including DETAIL 3 the equipment and objects that may be Ø1/2 inch hole in the wall fixed to the panel.
- Page 6 STEP 5 / ÉTAPE 5 Fixed on the wall. Fixé au mur. • With the Panel already assembled, fit the Bar (04) fixed behind the panel in the Bar (11) fixed on the wall. Fixed behind the panel. Avec le Panneau dejà assemblé, Fixé...
Need help?
Do you have a question about the Plaza 64.25 and is the answer not in the manual?
Questions and answers