Table of Contents
Advertisement
Quick Links
Precaution!
The Powder Coating paint process has become the most
common widely used application in the outdoor furniture
category. Unfortunately powder coating is extremely
sensitive to Humidity and Moisture. A simple process to
protect your furniture, especially flat surfaces is to apply a
simple coat of good quality car wax prior to using. If this
process is done every few months it will protect your
furniture for years to come.
ANS Z83.26-2014 • CSA 2.37-2014 Gas-Fired Outdoor Infrared Patio Heaters
ATTACH YOUR RECEIPT HERE
Serial Number
Questions, problems, missing parts? Before returning to your retailer, call our customer
service department at 1-888-775-1330, 7 a.m. - 4 p.m., PST, Monday - Friday.
Purchase Date
1
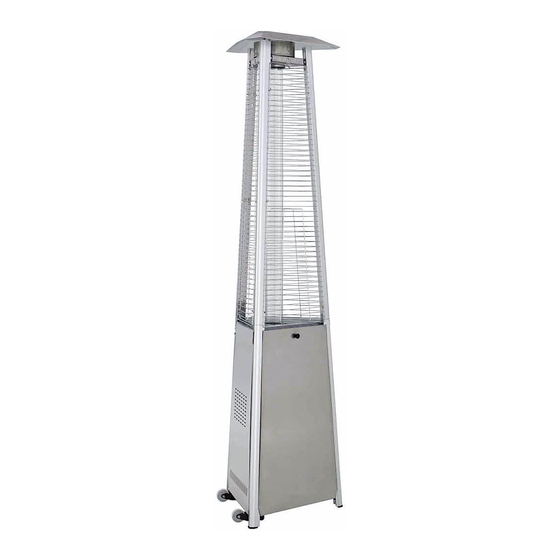
OWNER'S MANUAL
FLAME PATIO HEATER
MODEL #HLDS01-CGTHG
HLDS01-CGTSS
DANGER
FOR YOUR SAFETY
If you smell gas:
1. Shut off gas to the appliance.
2. Extinguish any open flame.
3. If odor continues, keep away from the appliance and
immediately call you gas supplier or fire department.
WARNING
Do not store or use gasoline or other flammable vapors
and liquids in the vicinity of this or any other appliance.
An LP-cylinder not connected for use shall not be
stored in the vicinity of this or any other appliance.
WARNING:
DANGER
CARBON MONOXIDE HAZARD
This appliance can produce
carbon monoxide which has
no odor. Using it in an enclosed
space can kill you. Never use this
appliance in an enclosed space
such as a camper, tent, car or home.
WARNING
Improper installation, adjustment, alteration, service or
maintenance can cause property damage, injury or death.
Read the installation, operation and maintenance
instructions thoroughly before installing or servicing this
equipment.
For Outdoor Use Only
WH16/01
Advertisement
Table of Contents

Related Manuals for Hiland Premium HLDS01-CGTSS


Summary of Contents for Hiland Premium HLDS01-CGTSS
- Page 1 OWNER’S MANUAL FLAME PATIO HEATER MODEL #HLDS01-CGTHG HLDS01-CGTSS DANGER FOR YOUR SAFETY If you smell gas: 1. Shut off gas to the appliance. 2. Extinguish any open flame. 3. If odor continues, keep away from the appliance and immediately call you gas supplier or fire department. WARNING Do not store or use gasoline or other flammable vapors and liquids in the vicinity of this or any other appliance.
-
Page 2: Package Contents
PACKAGE CONTENTS Reflector Mesh Glass Tube Fixer Top Plate Upper Support (Long) Protective Guard Glass Tube Side Panel Black Silicone Ring Control Box Assembly Lower Support (Short) Block Belt Gas Hose & Regulator Wheel Assembly Bottom plate Front Panel Ceramic Fiber QUANTITY QUANTITY Reflector... -
Page 3: Safety Information
HARDWARE CONTENTS (shown actual size) Wing nut Stud Small Flat M5 x 12 mm Screw M6 x 12 mm Bolt Qty. 3 Qty. 3 Washer Qty. 35 Qty. 8 Qty. 6 Chain M4 x 10 mm Knob Qty.1 Screw Qty. 1 Fixing Bracket Qty.1 Qty. -
Page 4: Service Safety
SAFETY INFORMATION DANGER DANGER • EXPLOSION - FIRE HAZARD • CARBON MONOXIDE HAZARD • Keep solid combustibles, such as building materials, • This heater is a combustion appliance. All paper or cardboard, a safe distance away from the combustion appliances produce carbon monoxide heater as recommended by the instructions. -
Page 5: Burn Hazard
SAFETY INFORMATION WARNING WARNING California Proposition 65 • This product is fueled by propane gas. Propane gas Combustion by-products produced when using is invisible, odorless, and flammable. An odorant is this product contain chemicals known to the State normally added to help detect leaks and can be of California to cause cancer, birth defects, and described as a “rotten egg”... - Page 6 ASSEMBLY INSTRUCTIONS 1-1. Unscrew the switch button, load small battery, tighten the switch button. 1-2.Insert the hoods of bottom plate (O) to the lower holes of the three lower supports (K) Insert the hoods of control box assembly (J) AA Battery (1.5 V) to the upper holes of the three lower support (K).
- Page 7 ASSEMBLY INSTRUCTIONS Use Phillips screwdriver (LL) to fasten the control box assembly (J) and the bottom plate (O) with M5 x 12 mm screws (DD). Hardware Used M5 x 12 mm Screw Phillips Screwdriver 4.Use Phillips screwdriver (LL) to secure the top plate (D) to the upper supports (E) with M5 x 12 mm screws (DD).
- Page 8 ASSEMBLY INSTRUCTIONS Using wrench (KK) to assemble the wheel assembly (N) to the bottom plate (O) with M6 x 12 mm bolts (EE). Hardware Used M6 x 12 mm Bolt Wrench 6. Use Phillips screwdriver (LL) to secure the block belt (L) to the lower supports (K) with M5 x 12 mm screws (DD).
- Page 9 ASSEMBLY INSTRUCTIONS 7. Carefully install the glass tube (G) between the center of top plate (D) and control box assembly (J). Make sure the end of the glass tube (G) is inserted securely into the three clips of the control box assembly (J). 8.
- Page 10 ASSEMBLY INSTRUCTIONS 9. Use Phillips screwdriver (LL) to install side panels (H) to bottom of assembly with M5 x 12 mm screws (DD). Note: Do not cover the panel where the magnet is. Hardware Used M5 x 12 mm Screw x 12 Phillips Screwdriver...
- Page 11 ASSEMBLY INSTRUCTIONS 11. Assebmly the protective guard and mesh Insert the hooks of protective guard (F) to the holes of upper supports (E). Put the mesh (B) on the top plate (D). Make sure the screw holes align the holes of top plate (D). Use Phillips screwdriver (LL) to secure the mesh (B) and protective guard (F) to the top...
- Page 12 ASSEMBLY INSTRUCTIONS 13. Connect regulator to cylinder.Install cylinder, and secure with the propane block belt tightly. Complete installation. Note: The propane gas and cylinder are sold separately. Warning: Use a standard 20 lb. propane cylinder only. Use this heater only with a propane vapour withdrawal supply system.
- Page 13 ASSEMBLY INSTRUCTIONS Warning: A dented, rusted or damaged propane cylinder may be hazardous and should be checked by your propane supplier. Never use a propane cylinder with a damaged valve connection. The propane cylinder must be constructed and marked in accordance with the specifications for LP gas cylinders of the U.S.
- Page 14 OPERATION INSTRUCTIONS Leak Check WARNING • Perform all leak tests outdoors. • Extinguish all open flames. • NEVER smoke while carrying out the leak test. • Do not use the heater until all connections have been leak tested and do not leak. Hose / Regulator connection Regulator / Cylinder...
-
Page 15: Carbon Monoxide Hazard
OPERATION INSTRUCTIONS DANGER • CARBON MONOXIDE HAZARD • For outdoor use only. Never use inside house, or other unventilated or enclosed areas. This heater consumes air (oxygen). Do not use in unventilated or enclosed areas to avoid endangering your life. Caution: Do not attempt to operate until you have read and understand all General Safety Information in this manual and all assembly is complete and leak checks have been performed. - Page 16 OPERATION INSTRUCTIONS 4. Push and release the igniter button until pilot flame is visible through the glass tube. 5. Once the pilot is lit, continue to depress the control knob for 30 seconds. 6. If the pilot does not stay lit, repeat steps 4 to 6. 7.
-
Page 17: For Your Safety
OPERATION INSTRUCTIONS WARNING FOR YOUR SAFETY Be careful when attempting to manually ignite this heater. Holding in the control knob for more than 20 seconds before igniting the gas will cause a ball of flame upon ignition. When heater is ON: The flame should be blue with straight yellow tops. -
Page 18: Care And Maintenance
OPERATION INSTRUCTIONS 9. Heater is away from gasoline or other flammable liquids or vapours. 10. Heater is away from windows, air intake openings, sprinklers and other water sources. 11. Heater is located at least 24" (top) / 36" (sides) from combustible materials. 12. -
Page 19: Troubleshooting
TROUBLESHOOTING PROBLEM POSSIBLE CAUSE CORRECTIVE ACTION Cylinder valve is closed Open valve Clean or replace orifice or Blockage in orifice or pilot tube pilot tube Open gas line and bleed it Pilot won’t light Air in gas line (pressing control knob in) for no more than 1 - 2 minutes or until you smell gas Low gas pressure with cylinder valve... - Page 20 CARE AND MAINTENANCE Spiders and insects can nest in burner or orifices. This dangerous condition can damage heater and render it unsafe for use. Clean burner holes by using a heavy-duty pipe cleaner. Compressed air may help clear away smaller particles. Carbon deposits may create a fire hazard.
-
Page 21: One-Year Limited Warranty
ONE-YEAR LIMITED WARRANTY CUSTOMERS IN USA Do not return this product to the store where you purchased it. Please call 1-888-775-1330 for assistance. CUSTOMERS IN CANADA IMPORTANT Only return this product to the store if it was purchased within 90 days. If you have problems after 90 days of purchase, please CALL 1-888-775-1330 DATED PROOF OF PURCHASE REQUIRED FOR WARRANTY SERVICE. -
Page 22: Replacement Parts List
REPLACEMENT PARTS LIST Reflector Mesh Glass Tube Fixer Top Plate Upper Support (Long) Protective Guard Glass Tube Side Panel Black Silicone Ring Control Box Assembly Lower Support (Short) Block Belt Gas Hose & Regulator Wheel Assembly Bottom plate Front Panel Ceramic Fiber QUANTITY QUANTITY...
Need help?
Do you have a question about the Premium HLDS01-CGTSS and is the answer not in the manual?
Questions and answers