Table of Contents
Advertisement
Quick Links
Advertisement
Table of Contents

Related Manuals for Hyundai power products HG4000I-A1


Summary of Contents for Hyundai power products HG4000I-A1
- Page 1 WARNING: Read thoroughly the instruction manual before us ing .
-
Page 2: Safety Instruction
1. SAFETY INSTRUCTION Warning: 1. Attention! Exhaust gases are toxic. Do not operate the generator in a room without ventilation system! 2. Children should be protected by keeping them at a safe distance from the generator set! 3. Refilling of the generating sets are not allowed during the operation! 4. - Page 3 Run the generator in respect of the power indicated in the user’s manual. Do not run the generator with an overload or at excessive speed. The silencer of the generator becomes extremely hot when the motor runs or even for a time after it has stopped.
- Page 4 Before use, the generating set and its electrical equipment (including lines and plug connections) should be checked to ensure that they are not defective. Protection against electrical shock depends on circuit breakers specially matched to the generating set. If the circuit breakers require replacement, they should be replaced with a circuit breaker having identical ratings and performances characteristics.
- Page 5 While using or transporting the generator, make sure you keep the generator upright, otherwise the fuel may escape from the carburettor or the fuel tank. Electrical safety Before each use ensure that the load to be connected does not exceed the power of the current produced by the generator.
- Page 6 2. SYMBOLS The following symbols are used in this manual to allow differentiating different types of information. The safety symbol is used as a keyword to warn you of potential hazards in operating and owning power equipment. Observe all safety instructions to avoid or limit the risk of serious injury or even death. This is the safety alert symbol.
- Page 7 Guaranteed noise emission level. This symbol indicates the surface is very hot and not touching Exhaust emissions are harmful to health of body No naked fire near the machine! Danger ! Electrical shock !
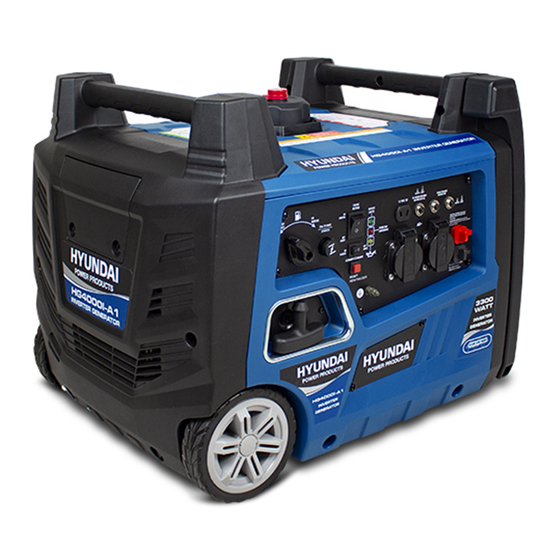
- Page 8 3. CONTROLS AN FEATURES Read this owner’s manual before operating your generator. Familiarize yourself with the location and function of the controls and features. Save this manual for future reference. Inverter (1) Fuel Cap – Remove to add fuel. (5) Maintenance Cover...
-
Page 9: Parts Included
(2) Recoil Starter – Used to start the engine. (6) Never Flat Wheels (3) Power Panel (7) Carrying Handle (4) Muffler Parts Included Your Gasoline Powered Generator is shipped with the following parts: – Oil funnel............1 – Spark plug socket..........1 –... - Page 10 Parallel socket – Use this socket with the generator against electrical overload. parallel kit to connect two HG4000i-A1. *Warning: Do not operate a device while it is plugged into the 12 V DC outlet. Prolonged exposure to engine exhaust can cause serious injury or death. While charging a device do no place on the exhaust side of the generator.
- Page 11 Add Engine Oil 1. Place the generator on a flat, level surface. 2. Loosen the cover screw and remove the cover for maintenance. 3. Remove oil fill cap / dipstick to add oil. 4. Add up to 0.6 qt. (0.6 L) of oil and replace oil fill cap / dipstick.
- Page 12 6. Screw on the fuel cap and wipe away any spilled fuel. Grounding Your generator must be properly connected to an appropriate ground to help prevent electric shock. A ground terminal connected to the frame of the generator has been provided on the power panel. For remote grounding, connect of a length of heavy gauge (12 AWG minimum) copper wire between the generator ground terminal and a copper rod driven into the...
-
Page 13: Operation
OPERATION Generator Location Grounding NEVER operate the generator inside any building, The generator system ground connects the frame to the including garages, basements, crawlspaces and ground terminals on the power panel. sheds, enclosure or compartment, including the – The generator (stator winding) is isolated from the generator compartment of a recreational vehicle. - Page 14 Engine Start (continued) Connecting Electrical Loads 6. Pull the starter cord slowly until resistance is felt 1. Let the engine stabilize and warm up for a few and then pull rapidly. minutes after starting 7. As engine warms up, push the choke lever in to the 2.
- Page 15 products. Confirm your accessory input voltage range 3. Turn the Fuel Valve to the “OFF” position. is at least 12-21 V DC. When using the DC outlet turn 4. Let the engine run until fuel starvation has stopped the Economy mode switch to the “OFF” position. the engine.
-
Page 16: Maintenance And Storage
6. MAINTENANCE AND STORAGE Overload Operation 2. Loosen the cover screws and remove the maintenance cover. The overload indicator light will turn on when the 3. Pop up the rubber maintenance plug, from below rated load is exceeded. When the maximum load is the drain bolt. - Page 17 2. Locate the air filter plastic cover. 3. Unsnap the locking hinge on the cover. 4. Remove the old filter. 5. Place the new filter in the assembly. 6. Re-snap the hinge on the air filter cover. 7. Reinstall the maintenance cover and tighten the cover screw securely.
-
Page 18: Generator Storage
Generator Maintenance Storage Make certain that the generator is kept clean and The generator should be started at least once every stored properly. Only operate the unit on a flat, level 14 days and allowed to run for at least 20 minutes. surface in a clean, dry operating environment. -
Page 19: Technical Specifications
7. TECHNICAL SPECIFICATIONS Engine Specifications ‒ Type: Four-stroke engine with overhead valve ‒ Start Type: recoil start ‒ Rating power 4.2kW,3800/min ‒ Max power: 4.4 kW, ‒ Displacement: 192 cm ‒ Fuel capacity: 6 L ‒Engine oil capacity: 0.6 L ‒Sound power level guatanteed: 96dB(A) ‒Sound power level measured at 4 m: = 82.64 dB (A) -
Page 21: Troubleshooting
TROUBLESHOOTING Problem Cause Solution Generator will not start No fuel Add fuel Faulty spark plug Replace spark plug Unit loaded during start up Remove load from unit Generator starts but runs Low oil level Fill crankcase to the proper level roughly Place generator on a flat, level surface Choke in the wrong position... -
Page 22: Ec Declaration Of Conformity
32, rue Aristide Bergès - ZI 31270 Cugnaux – France Phone: +33 (0)5.34.502.502 Fax: +33 (0)5.34.502.503 declares that the machine designation: GASOLINE INVERTER GENERATOR HG4000I-A1 Serial number: 20230217920-20230218389 Is in conformity with the European Directives: Machine Directive 2006/42/EC This product is in conformity with the following European standards:... -
Page 23: Warranty
WARRANTY WARRANTY The manufacturer guarantees the product against defects in material and workmanship for a period of 2 years from the date of the original purchase. The warranty only applies if the product is for household use. The warranty does not cover breakdowns due to normal wear and tear. The manufacturer agrees to replace parts identified as defective by the designated distributor. -
Page 24: Product Failure
PRODUCT FAILURE WHAT TO DO IF MY MACHINE BREAKS DOWN? If you bought your product in a store: a) Empty the fuel tank. b) Make sure that your machine is complete with all accessories supplied, and clean! If this is not the case, the repairer will refuse the machine. -
Page 25: Warranty Exclusions
WARRANTY EXCLUSIONS THE WARRANTY DOES NOT COVER: • Start-up and setting up of the product. • Damage resulting from normal wear and tear of the product. • Damage resulting from improper use of the product. • Damage resulting from assembly or start-up not in accordance with the user manual. •...
Need help?
Do you have a question about the HG4000I-A1 and is the answer not in the manual?
Questions and answers