Table of Contents
Advertisement
Advertisement
Table of Contents

Related Manuals for Sennheiser EK 1038


Summary of Contents for Sennheiser EK 1038
- Page 1 Instructions for use...
-
Page 3: Table Of Contents
Important safety instructions ........5... - Page 4 Exiting the operating menu ........48...
-
Page 5: Important Safety Instructions
A grounding type plug has two blades and a third grounding prong. The wide blade or the third prong are provided for your safety. If the provided plug does not fit into your outlet, consult an electrician for replacement of the obsolete outlet. - Page 6 Power source This device should be operated only from the type of power source indicated on the type plate. If you are not sure of the type of power supply to your building, consult your dealer or local power company.
- Page 7 Please understand that Sennheiser does not accept liability for damage arising from abuse or misuse. Keep away from children. Observe correct polarity. Do not heat above 70°C/158°F, e.g. do not Switch rechargeable battery-powered expose to sunlight or throw into a fire.
-
Page 8: The Tourguide Uhf System
The tourguide UHF system The tourguide UHF system The tourguide UHF system consists of the EK 1038 receiver in com- bination with a transmitter of the evolution wireless series G2. The system offers optimum speech transmission for guided tours and interpretation applications with one or several speakers. -
Page 9: Ek 1038 Receiver
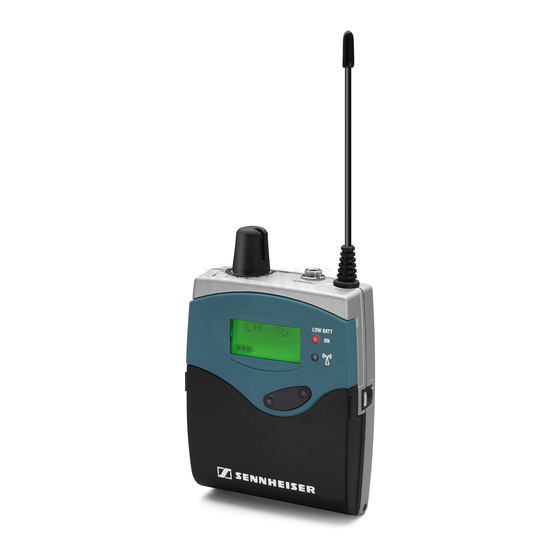
Special features The EK 1038 receiver is a small and reliable bodypack receiver that can easily be attachted to the clothing by the means of a belt clip. 16 factory-preset UHF frequencies which are intermodulation-free and four freely selectable frequencies ensure a high level of flexibil- ity and operational reliability. -
Page 10: Indications
The red LED (LOW BAT/ON) provides information on the current operating state of the receiver: Red LED lit up: The receiver is switched on and the capacity of the batteries/rechargeable battery BA 2015 is suffi- cient. Red LED flashing:The batteries are/the rechargeable battery BA... -
Page 11: Preparing For Use
Batteries and rechargeable battery cells have different discharging curves. The receiver is able to identify the BA 2015 battery pack and to use it to full capacity. It also adapts the battery status display according to the type of power supply used (batteries or battery pack). -
Page 12: Using The Receiver
Switching the channel If several guided tours take place within a building and several transmission links are operated at the same time, the user can switch the channel of the receiver to the channel that is stated by the guide. -
Page 13: The Operating Menu Of The Receiver
Using the receiver Note: It is only possible to switch the channel if the lock mode is deac- tivated. If it is deactivated, no lock mode icon appears on the display (see “Activating/deactivating the lock mode” on page 20). Use the... - Page 14 Using the receiver Starting the setup menu In order to get into the configuration menu, the receiver must be switched off. Open the battery compartment. Press the SET button and keep it pressed. At the same time, turn the volume control clockwise until it clicks to switch the receiver on.
- Page 15 Press the / rocker button (UP/DOWN) to select the menu you would like to adjust the setting. The current setting that can be adjusted flashes on the display. The setup menu comprises six menus that can be chosen in the fol- lowing order: Display Function of the menu...
-
Page 16: Operating Menu Of The Receiver
“SETUP“. The last menu remains unchanged. An exception is the “TUNE“ menu. When canceling the entry with this menu, you will stay in the setting mode of the menu but you return to the display of the current channel (e.g. “CH 01“). It is then possible to restart your entry. - Page 17 833.1 00 833.12 5 MH z current fraquency of Receiving frequency in steps of 25-kHz, selected channel "– – –.– – – MHz" to lock channel STORED SQ LO, SQ MID, Current setting of Adjusting the SQ HI, SQ OFF...
-
Page 18: Adjustment Tips For The Setup Menu
This mode locks the / rocker button (UP/DOWN) so that the user cannot change the preset channel. The lock mode icon on the display of the user interface (user menu) indicates that the lock mode is activated. To deactivate the lock mode you have to select “LOC.OFF“ within the menu “LOCK“... -
Page 19: Adjusting The Squelch Threshold
The user can now select the channel again. SQELCH Adjusting the squelch threshold The receiver is equipped with a squelch that can be adjusted via the “SQELCH” menu. The squelch eliminates annoying noise when the transmitter is switched off. It also suppresses sudden noise when there is no longer sufficient transmitter power received by the receiver. -
Page 20: Limiting The Volume At The Headphone Output
Limiting the volume at the headphone output Via the “LTD” menu, you can switch the limiter on and off. With the limiter switched on, the maximum possible volume of the head- phone output will be reduced about approx. 15 dB. - Page 21 Therefore, position the receivers so that Slave any possible interference caused by extraneous light is avoided. The arrow in the diagram on the left indicates the direction from which the IR radiation must impinge upon the receiver.
-
Page 22: L 2015 Quick Charger
The BA 2015 battery pack is delivered as accessory with the EK 1038 receiver and fits to the Sennheiser bodypack receivers ew series G2 as well (see “SK 100 G2 / SK 300 G2 / SK 500 G2 bodypack transmitters” on page 34). -
Page 23: Operating Controls
Air vent Mains connection Guiding slot with internal rail (2 x) LED indications Each charging compartment has two LEDs which indicate the fol- lowing operating states: The charging compartment is ready for operation (provided that the charger is No LED lit: connected to the mains), no rechargeable battery is identified. -
Page 24: Preparing For Use
NT 1 up to 3 NT 3 Setting up the charger The charger has four plastic feet to ensure that it cannot slip on the surface on which it is placed. Risk of staining of furniture surfaces! CAUTION! Some furniture surfaces have been treated with var- nish, polish or synthetics which might cause stains when they come into contact with other synthetics. -
Page 25: Using The Charger
Care and maintenance Use a slightly damp cloth to clean the switched-off charger from time to time. Use a brush or similar to remove dust from the charg- ing compartments. Do not use any cleansing agents or solvents. -
Page 26: The Channel Bank System
20 Frei wählbare Frequenz Kanal 20 Each of the channels in the channel banks “1” to “8” has been fac- tory-preset to a transmission frequency (see enclosed frequency table). These transmission frequencies cannot be changed but have... - Page 27 The channel bank “U” (user bank) allows you to store your selection out of 1440 transmission frequencies that are freely selectable within the preset frequency range.
-
Page 28: Skm 100 G2 / Skm 300 G2 / Skm 500 G2 Radiomicrophones
SKM 100 G2 / SKM 300 G2 / SKM 500 G2 radiomicrophones SKM 100 G2 / SKM 300 G2 / SKM 500 G2 radiomicrophones Delivery includes The packaging contains the following items: 1 radiomicrophone 2 batteries 1 microphone clamp 1 pouch... -
Page 29: Preparing For Use
Slide back the display section as far as it will go. Open the battery compartment Insert the 9 V PP3 alkaline battery (IEC 6 LR 61) or the BA 2015 accupack. Please observe correct polarity when inserting the bat- tery. -
Page 30: Using The Radiomicrophone
Each microphone head comes with a color-coded iden- tification ring to distinguish different microphone heads from each other (green = MD 835, blue = MD 845, red = ME 865). Using the radiomicrophone Switching the radiomicrophone on/off The radiomicrophone can only be switched off when the standard display is shown on the display panel. -
Page 31: Care And Maintenance
SKM 100 G2 / SKM 300 G2 / SKM 500 G2 radiomicrophones Muting the radiomicrophone The radiomicrophone has a MUTE switch that noiselessly mutes the audio signal without switching the radiomicrophone off. Turn the protective cap at the bottom of the radiomicrophone... -
Page 32: Sk 100 G2 / Sk 300 G2 / Sk 500 G2 Bodypack Transmitters
SK 100 G2 / SK 300 G2 / SK 500 G2 bodypack transmitters SK 100 G2 / SK 300 G2 / SK 500 G2 bodypack transmitters Delivery includes The packaging contains the following items: 1 bodypack transmitter 2 batteries 1 BPP 1 bodypack pouch... - Page 33 SK 100 G2 / SK 300 G2 / SK 500 G2 bodypack transmitters Press the two unlocking buttons and open the battery com- partment cover Insert the two batteries as shown above. Please observe correct polarity when inserting the batteries.
- Page 34 SK 100 G2 / SK 300 G2 / SK 500 G2 bodypack transmitters The prevention of improper charging of inserted primary cells (batteries). Due to the missing sensor, individual rechargeable battery cells will also not be charged in the L 2015 charger.
-
Page 35: Using The Bodypack Transmitter
SK 100 G2 / SK 300 G2 / SK 500 G2 bodypack transmitters Using the bodypack transmitter Switching the transmitter on/off The transmitter can only be switched off when the standard display is shown on the display panel. When in the operating menu, briefly... -
Page 36: Skp 100 G2 / Skp 500 G2 Plug-On Transmitters
The packaging contains the following items: 1 plug-on transmitter 2 batteries 1 POP 1 plug-on pouch Suitable microphones (to be ordered separately) for the plug-on transmitter: Dynamic microphones Condenser microphones with internal power supply Condenser microphones with 48 V phantom powering... -
Page 37: Preparing For Use
The rechargeable battery is fitted with an integrated sensor which is – via a third contact – monitored by the electronics of the plug-on transmitter and the charger. The sensor is necessary for the following control purposes: The taking into account of the different voltage characteristics of primary cells (batteries) and accupacks. - Page 38 BAT/ON) provides information on the current operating state of the plug-on transmitter: Red LED lit up: The plug-on transmitter is switched on and the capacity of the batteries/BA 2015 rechargeable battery is suffi- cient. Red LED flashing:The batteries are/the BA 2015 rechargeable bat-...
-
Page 39: Lc Display Panel Of The Evolution Wireless Transmitters G 2
Modulation display The level display for audio signal “AF” shows the modulation of the plug-on transmitter. When the audio input level is excessively high, the level display for audio signal “AF” shows full deflection for the duration of the overmodulation. - Page 40 LC display panel of the evolution wireless transmitters G 2 “PILOT” display The “PILOT” display appears on the display panel when the pilot tone transmission is activated. Display backlighting After pressing a button, the display remains backlit for approx. 15 seconds.
-
Page 41: The Operating Menu Of The Transmitters Evolution Wireless Series
The operating menu of the transmitters evolution wireless series G 2 The operating menu of the transmitters evolution wireless series G 2 With the exception of one transmitter, the operating menu of the transmitters of the evolution wireless G2 series is equal for all trans- mitters. Overview of menus Display... -
Page 42: Working With The Operating Menu
The operating menu of the transmitters evolution wireless series G 2 Working with the operating menu By way of example of the “TUNE” menu, this section describes how to use the operating menu. After switching the transmitter on, the standard display is shown on the display panel. -
Page 43: Overview Of The Operating Menu Of The Transmitters
The operating menu of the transmitters evolution wireless series G 2 Overview of the operating menu of the transmitters EXIT BANK BANK BANK Changing the channel Current channel bank 1...8, U (User bank Bank) Stores the setting STORED 1.03 1.02 CHAN B.CH... - Page 44 The operating menu of the transmitters evolution wireless series G 2...
-
Page 45: Adjustment Tips For The Operating Menu
Switching between channel banks Via the “BANK” menu, you can switch between the transmitter’s nine channel banks. Each of the channel banks “1” to “8” has up to 20 switchable channels that are factory-preset to a transmission frequency. The channel bank “U” (user bank) has up to 20 switcha-... -
Page 46: Switching The Phantom Powering On/Off (Skp 500 G2 Only)
(AF peak), the level display for audio signal (AF) shows full deflection. If, on the other hand, the sensitivity is adjusted too low, the trans- mission link will be undermodulated, which would result in a signal with high background noise. -
Page 47: Selecting The Standard Display
() - . _ and spaces. To enter a name, proceed as follows: After you have entered into the setting mode of the menu, the first segment starts flashing on the display. With the / buttons you can now select a character. By briefly pressing a button, the display jumps either forwards or back- wards to the next character. -
Page 48: Activating/Deactivating The Pilot Tone Transmission (Pilot)
“LOC.OFF”. If you confirm your selection by pressing the button, the buttons can be operated as usual. EXIT Exiting the operating menu Via the “EXIT” menu, you can exit the operating menu and return to the standard display. -
Page 49: Troubleshooting
Batteries (primary cells) or individual rechargeable batteries have been Only charge the BA 2015 accupack! inserted If still operating problems with your transmission installation occur, please contact your local Sennhe- iser agent for assistance. -
Page 50: Recommendations And Tips
Make sure that the antenna and the microphone cable do not cross. The antenna should hang or stand freely and be at least 1 cm away from the body. The antenna must not be in direct contact with the skin. -
Page 51: Hdx Noise Reduction
RF link. A 110 dB dynamic range sig- nal is thus transmitted with an effective dynamic range of only 55 dB, which is above the 60 dB noise floor of the RF link. In the receiver the signal is expanded in an identical and opposite way in a 1:2 ratio to restore the original signal, at the same time reducing the RF noise to below the noise floor of the receiver. -
Page 52: Accessories And Spare Parts
UK mains connector, 230 V NT 3-120 with USA mains connector, 110 V Transmitters of the evolution wireless series, G 2 SKM 100 G2 / SKM 300 G2 / SKM 500 G2 radiomicrophone MD 835 Microphone head (green identification ring) dynamic, cardioid MD 845... - Page 53 Accessories and spare parts SK 100 G2 / SK 300 G2 / SK 500 G2 bodypack transmitter ME 2 Clip-on microphone, condenser, omni-directional MKE 2-ew Clip-on microphone , black or beige, condenser, omni-directional ME 4 Clip-on microphone, condenser, cardioid ME 3...
-
Page 54: Specifications
Dimensions 82 x 64 x 24 mm Weight incl. accupack approx. 185 g L 2015charger Input voltage: 10 - 20 V DC via hollow jack socket Hollow jack: Input current: 400 - 750 mA Charging voltage: 2 x 2.9 V... -
Page 55: Plug-In Mains Units
Weight: approx. 310 g Plug-in mains units NT 1-EU (Cat. No. 09828), 230 V ±10 %, 1,8 A, 50 Hz Plug-in mains unit for 1 charger NT 1-UK (Cat. No. 04787), 230 V ±10 %, 1,9 A, 50 Hz NT 3-EU (Cat. No. 04863), 230 V ±10 %, 1,8 A, 50 Hz... -
Page 56: Channel Assignment
“TUNE“ “CHAN“ “CHAN“ “CHAN“ 863,100 863,500 864,300 864,900 854,100 854,600 855,300 856,200 857,300 859,700 861,150 861,600 838,100 839,400 841,100 849,100 You must check whether or not the product needs to be licensed by the national approval authorities. -
Page 57: Manufacturer Declarations
Sennhe- iser service partner, you will be obliged to pay for any repairs that are car- ried out. Proof of purchase must state the date of purchase and name of the product. - Page 58 Statements regarding FCC and industry Canada This equipment has been tested and found to comply with the limits for a Class B digital device, pursuant to Part 15 of the FCC Rules. These limits are designed to provide reasonable protection against harmful interference in a residential installation.
- Page 59 Manufacturer declarations...
- Page 60 Sennheiser electronic GmbH & Co. KG Am Labor 1 30900 Wedemark, Germany Phone +49 (5130) 600 0 Printed in Germany Fax +49 (5130) 600 300 Publ. 01/08 www.sennheiser.com 512883/A02...
Need help?
Do you have a question about the EK 1038 and is the answer not in the manual?
Questions and answers