
Subscribe to Our Youtube Channel
Related Manuals for WamBam SLIM JIM AF14001


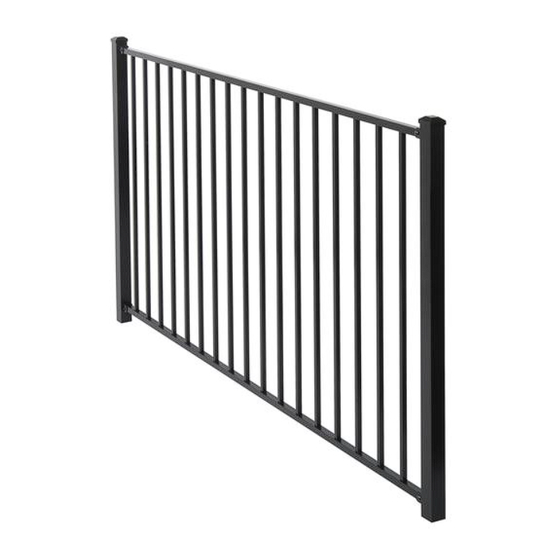
Summary of Contents for WamBam SLIM JIM AF14001
- Page 1 AF14001 ASSEMBLY INSTRUCTIONS SLIM JIM ASSEMBLY INSTRUCTIONS ALUMINUM FENCE AF14001 60 MIN Want to see a video on how to assemble this product? Scan the QR code WWW.WAMBAMFENCE.COM WWW.WAMBAMFENCE.COM VER. 110822...
- Page 2 AF14001 ASSEMBLY INSTRUCTIONS GENERAL IMPORTANT INFORMATION Check the inside of the larger pieces in your box for other materials packed inside. When assembling components, place on a non-abrasive surface (i.e. shipping box) to avoid scratching. We recommend an area approximately 5’x 8’ for unobstructed assembling.
- Page 3 Joe’s job is to help you perform the task of installing an a-kind and there are many scenarios you could encounter WamBam is available to help you. Please feel free to call us - we’d love to help you out.
- Page 4 REALITY CHECK ROME WASN’T BUILT IN A DAY, AND YOUR FENCE PROBABLY WON’T BE EITHER. Time is your friend when installing your WamBam Fence. So chill out. Relax. Do a yoga pose. Take plenty of breaks. you’re mistaken. Yeah, we know your dog and kids are running loose and your neighbor is...
- Page 5 AF14001 ASSEMBLY INSTRUCTIONS JUST A COUPLE MORE THINGS OTHER STUFF YOU NEED TO KNOW Draw a sketch layout of the proposed fence lines and logically look it over. If it doesn’t make sense on paper, chances are it won’t make sense in your yard. Ask for some help.
- Page 6 AF14001 ASSEMBLY INSTRUCTIONS PITFALLS! HAVE YOU CONTACTED your fence to avoid puncturing any unseen underground YOUR LOCAL UTILITIES? is made easy for you. Simply call 811 in the US or visit www.call811.com. In Canada, visit www.transcanada.com/contactus.html for a list of phone numbers by province. HAVE YOU CHECKED YOUR Local zoning laws and Home Owners Associations may regulate LOCAL ZONING LAWS?
- Page 7 AF14001 ASSEMBLY INSTRUCTIONS TOOLS AND MATERIALS YOU’LL NEED Safety Glasses WamBam Pipe Pounder (Purchase or rent a similar product from Home 2in. x 2in. x 6in. Inch Wood “Spacer” Block Cordless Drill Shovel Toothed Blade String Line Stakes Spool of String...
- Page 8 AF14001 ASSEMBLY INSTRUCTIONS MURPHY’S ALUMINUM FENCE LAWS To get started, we are going to walk you through how you would install the fence illustrated below. work out evenly, the birds are chirping, and the sky is blue. obstacles you could run into while installing your fence and how to overcome them. You WWW.WAMBAMFENCE.COM...
- Page 9 DETAILED PRODUCT DIMENSIONS AND SPECIFICATIONS This fence can be trimmed down both in width 82in. 3.97in. 4.59in. (o.c.) 51.4in. 36in. 48in. Ground 2in. String Line 84in. 3in. Ground Center to Center 42in. WamBam Ornamental Anchor 1.06in. 1.00in. .07in. .65in. Top & Bottom Rails WWW.WAMBAMFENCE.COM...
- Page 10 AF14001 ASSEMBLY INSTRUCTIONS MATERIALS STEP 1: 2. Nut and Bolt (4) (17) Top Rail (1) 1” x 1” x 81¾” 1” x 1” x 81¾” ” Self-Drilling Stainless Steel Screw (34) WWW.WAMBAMFENCE.COM...
- Page 11 AF14001 ASSEMBLY INSTRUCTIONS STEP 2: STEP 2.1 STEP 2.2 Slide the leveling donut over the pipe anchor. surface to leave room for the post. Make sure your level with the ground and not sloped at an angle. STEP 2.3 Use a post pounder to stabilize the pipe anchor in the anchor WWW.WAMBAMFENCE.COM...
- Page 12 AF14001 ASSEMBLY INSTRUCTIONS STEP 2.4 STEP 2.5 Drive the pipe anchor 42” At 6” intervals, check that the pipe anchor is into the ground. 36” of the level. Pounding the pipe anchor from all four pipe anchor should be above sides will help to achieve this.
- Page 13 AF14001 ASSEMBLY INSTRUCTIONS STEP 4: STEP 4.1 Lay out one of the rails along the string line. STEP 4.2 the end of the rail. Repeat this step for all of your anchor Top View Side View Use the same fence rail as a spacer for ease of use and scratching on all of Rail...
- Page 14 AF14001 ASSEMBLY INSTRUCTIONS SOIL AND STEP 5: STEP 5.1 (OPTIONAL) buried in the ground, remove about 3” of soil from STEP 5.2 STEP 5.3 included in the post box, through the anchor Adjust your string line to the string line The hex head tek screws are packaged adjust both up and down on the pipe anchor the post.
- Page 15 AF14001 ASSEMBLY INSTRUCTIONS LEVELING DONUTS STEP 6: STEP 6.1 ing tek screws included in the donut packaging. The donut can be level should sit adjusted to compensate for a slightly crooked pipe of the anchor anchor. Slide the donut a level plane between the donut.
- Page 16 AF14001 ASSEMBLY INSTRUCTIONS STEP 7.2 STEP 7.3 tek screw from the post box Repeat step 7 for all through the post, anchor posts. FENCE PANELS STEP 8: STEP 8.1 STEP 8.2 Insert (17) Pickets Insert the pickets into the Top Rail Rail and align the holes in the pickets and align the holes in the pickets with...
- Page 17 AF14001 ASSEMBLY INSTRUCTIONS STEP 8.3 Steel Screws screws, you will strip them. STEP 9: STEP 9.1 STEP 9.2 Using the Rail Bracket (A), measure about stainless steel hex screw. If you force the proper side of the post, through the post screws, you will strip them.
- Page 18 AF14001 ASSEMBLY INSTRUCTIONS STEP 9.3 Install the top rail bracket. The distance the opposite post. ATTACH PANELS TO POSTS STEP 10: STEP 10.1 STEP 10.2 Slide the fence panel in between Fasten the fence panel with the bolts and nuts the rail brackets.
- Page 19 AF14001 ASSEMBLY INSTRUCTIONS STEP 10.3 remaining fence panels as shown. WWW.WAMBAMFENCE.COM...
- Page 20 AF14001 ASSEMBLY INSTRUCTIONS 6935 Reames Rd. Ste. K. hmmm@wambamfence.com 704-892-5222 877-778-5733 WWW.WAMBAMFENCE.COM WWW.WAMBAMFENCE.COM...
Need help?
Do you have a question about the SLIM JIM AF14001 and is the answer not in the manual?
Questions and answers