Advertisement
Quick Links
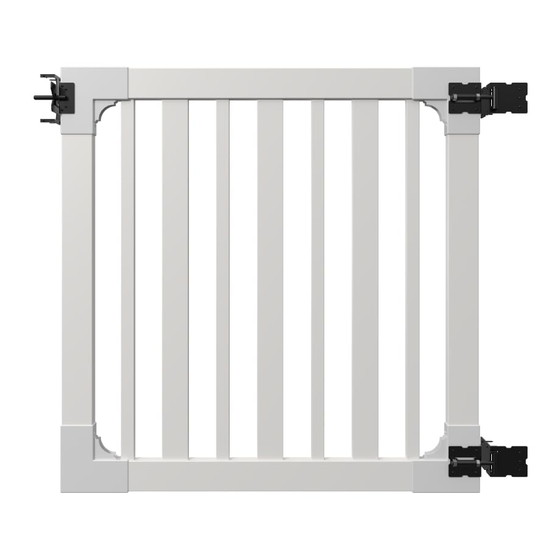
ASSEMBLY INSTRUCTIONS
STURBRIDGE
VINYL YARD AND
POOL GATE WITH
STAINLESS STEEL
HARDWARE
(48"H X 48"W)
Approximate assembly time
Want to see a video on how to
assemble this product?
Scan the QR code
WWW.WAMBAMFENCE.COM
WWW.WAMBAMFENCE.COM
60 MIN
ASSEMBLY
INSTRUCTIONS
BL19104
BL19104
VER. 021521
1
Advertisement

Related Manuals for WamBam STURBRIDGE BL19104


Summary of Contents for WamBam STURBRIDGE BL19104
- Page 1 BL19104 ASSEMBLY INSTRUCTIONS STURBRIDGE ASSEMBLY INSTRUCTIONS VINYL YARD AND BL19104 POOL GATE WITH STAINLESS STEEL HARDWARE (48”H X 48”W) 60 MIN Approximate assembly time Want to see a video on how to assemble this product? Scan the QR code WWW.WAMBAMFENCE.COM VER.
- Page 2 BL19104 ASSEMBLY INSTRUCTIONS GENERAL IMPORTANT INFORMATION Check the inside of the larger pieces in your box for other materials packed inside. When assembling components, place on a non-abrasive surface (i.e. shipping box) to avoid scratching. We recommend an area approximately 5’x 8’ for unobstructed assembling.
- Page 3 BL19104 ASSEMBLY INSTRUCTIONS INFORMATION GENERAL 1. Read over fence instructions first. Your gate and fence will work better together if you first take the time to read and understand your fence. 2. Pre-assemble the gate frame. Please do not screw the gate frame together until you have temporarily assembled the gate frame.
- Page 4 BL19104 ASSEMBLY INSTRUCTIONS DETAILED PRODUCT DIMENSIONS AND SPECIFICATIONS 3.22 in 1.5 in 3 in 7.75 in Profile Dimensions 3.5 in 1.5in. 3.5in. 33.25 in 1.5in. 3.5in. 7.75 in 3.5 in 48 in 3.5in. 1.5in. 48 in 1.5in. 3.5in. 51 in 3.0 in .875 in 27.5 in...
- Page 5 BL19104 ASSEMBLY INSTRUCTIONS LAY OUT MATERIALS STEP 1: Latch Finger (1) Corner Bracket (4) Top Rail (1) 1½” x 3½” x 47¾” Latch Catch (1) 11/4” Self-Drilling Stainless Steel Screw (16) Thin Picket (4) Vertical Stile (2) Wide Picket (3) 1½”...
- Page 6 BL19104 ASSEMBLY INSTRUCTIONS ASSEMBLE GATE FRAME STEP 2: STEP 2.1 STEP 2.2 Insert the Bottom Rail all the way into the Insert the bottom rail all the way into the Corner Bracket until it hits the back of the opposite corner bracket until it hits the corner bracket as illustrated.
- Page 7 BL19104 ASSEMBLY INSTRUCTIONS STEP 2.5 STEP 2.6 Insert the Top Rail all the Insert the top rail all the way way into a corner bracket until it into the opposite corner bracket hits the corner of the bracket as until it hits the corner of the illustrated.
- Page 8 BL19104 ASSEMBLY INSTRUCTIONS SCREW GATE FRAME TOGETHER STEP 4: STEP 4.1 Fasten the gate frame together using (16) 11/4” Self-Drilling Stainless Steel Screws (J). Note: Do not screw here as it will be needed for future hinge installation. Note: Do not screw here as it will be needed for future hinge installation.
- Page 9 BL19104 ASSEMBLY INSTRUCTIONS FASTEN GATE HINGES AND GATE LATCH STEP 5: STEP 5.1 Fasten (2) Hinges onto the corner brackets with (8) 1 1/4” Self-Drilling Black Stainless Steel Screws (K). Fasten the Latch Finger onto the upper corner bracket with (6) 1 1/4” Self-Drilling Black Stainless Steel Screws.
- Page 10 BL19104 ASSEMBLY INSTRUCTIONS STEP 6.2 Fasten the hinges to the fence post using (6) 1 1/4” black self-drilling stainless steel screws. LEVEL GATE AND ADJUST HINGES STEP 7: STEP 7.1 STEP 7.2 Level the gate to the fence post. Check the Fasten the hinges to the inside of the fence gate to make sure it functions correctly.
- Page 11 BL19104 ASSEMBLY INSTRUCTIONS ALIGN AND INSTALL LATCH CATCH STEP 8: STEP 8.1 Align and fasten the Latch Catch to the fence post by using (6) 1 1/4” self-drilling black stainless steel screws. Note: The latch is designed for left and right hand applications. To reverse the latch, temporarily remove the spring and bolt, and reverse the paddle portion as...
- Page 12 BL19104 ASSEMBLY INSTRUCTIONS 6935 Reames Rd. Ste. K. Charlotte, NC 28216 hmmm@wambamfence.com 704-892-5222 877-778-5733 WWW.WAMBAMFENCE.COM WWW.WAMBAMFENCE.COM...
Need help?
Do you have a question about the STURBRIDGE BL19104 and is the answer not in the manual?
Questions and answers