
Subscribe to Our Youtube Channel
Related Manuals for WamBam Steady Freddy


Summary of Contents for WamBam Steady Freddy
- Page 1 Steady Freddy Vinyl Fence Important stuff to know about installing your WamBam fence. 1-877-778-5733 www.wambamfence.com CLEVER JOE Your Installation Buddy 1/11/14...
-
Page 2: Table Of Contents
Positioner....16 Step 6 - Level Your String Line..........17 Step 7 - Leveling and Securing WamBam Donuts....18 Step 8 - Place Vinyl Posts Over WamBam Anchors....20 Step 9 - Install Your Fence Panels...........21 Step 10 - Secure Panels to the Posts........22 Step 11 - Place Screws into the Posts and the Rails....23... -
Page 3: Welcome To The World Of Wambam
Howdy! They call me Clever Joe because for the past 12 years or so, I've worked on inventing, re-inventing and perfecting the world of digless fence. I've profes- sionally installed countless fences the WamBam way and I love it because I know it works. -
Page 4: Reality Check
If you expect to Please refer to our be able to WamBam your fence out in an hour, "Murphy's Vinyl you’re mistaken. Yeah, I know your Fence Laws" for more dog and kids are running in-depth information. -
Page 5: Just A Couple More Things
It is crucial that you follow the checklist on page 4 before you begin building. And Finally... Believe me, after the past 12 years or so of installing countless fences the WamBam way, the success of your installation is going to depend on three things: 1. Site conditions... -
Page 6: Before You Begin
Before You Begin Avoid These Pitfalls! Have you contacted local utilities? This unfortunately is not a laughing matter, but rather one of potentially deadly consequences. You must call before you start to install your fence to avoid puncturing any unseen underground utilities, especially electrical or gas lines. -
Page 7: Tools You'll Need
Safety Glasses Line Level 4ft. Level, 1ft. Torpedo Level (optional String Line Level) WamBam Anchor or Pipe Pounder (or rent a similar product from Home Depot or Lowes) 2in. x 2in. x 6in. Inch Wood “Spacer” Blocks (2 for each panel) 5/16in. -
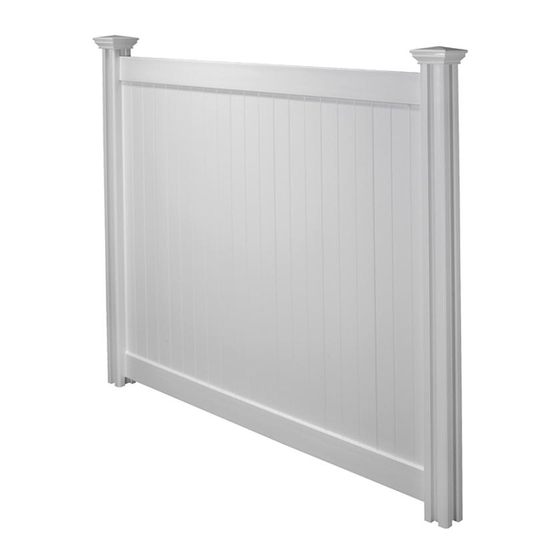
Page 8: Product Overview
Steady Freddy Vinyl Fence PRODUCT OVERVIEW This fence can be trimmed down both in width and height to accommodate custom applications. 1.5in. 5.5in. 48in. 5.5in. .090in. wall thickness 72in. 59in. 77.5in. Ground 5.5in. WamBam Anchor Ground 2in. (Large) 3in. 79.5in. -
Page 9: Box Contents
Steady Freddy Vinyl Fence Box Contents .050in. wall thickness Each Fence Panel Box Includes: • Top Rail (1) • C-Channels (2) • 1.25in. Stainless Steel Screws (4) • Privacy Boards (7) • 3.5in. Stainless Steel Screws (4) • Bottom Rail (1) Sold Separately: •... -
Page 10: The Secret Weapons Of Wambam
The Secret Weapons of WamBam Leveling Large WamBam Anchor Anchor Donut Positioner The Problem? For the past 100 years or so, driving an anchor (or pipe) deep into the ground has been known as a great way to install a fence post versus having to dig holes and use concrete. But up until now, there has always been at least two problems. -
Page 11: Quickie Overview
Quickie Overview This is designed to give you a general overview and should not be used as a substitute for the instructions. Top View of Post • Post • Anchor Positioner • Leveling Donut DETAILED INSTALLATION INSTRUCTIONS ON FOLLOWING PAGES. Ground For installation videos and more information, visit www.wambamfence.com... - Page 12 Steady Freddy Vinyl Fence Quickie Overview Continued... For installation videos and more information, visit www.wambamfence.com...
-
Page 13: Murphy's Vinyl Fence Laws
Murphy’s Vinyl Fence Laws Let’s Pretend (Just for a Moment) That You Live in a Perfect World To get started, we are going to walk you through how you would install the fence illustrated below. This is the perfect scenario with no curve balls. The ground is level, your fence sections all work out evenly, the birds are chirping and the sky is blue (and your children got accepted to Harvard on full scholarships). - Page 14 Steady Freddy Vinyl Fence Detailed Installation Instructions Locate & Pound Your First WamBam Anchor Into Place STEP 1 2in. A - Identify location of first Anchor Positioner B - Slide Leveling Donut over WamBam Anchor either now or after being driven into the •...
-
Page 15: Step 2 How To Lay Out Your First String Line
Step 1 continued... 48in. E - Level at 6 inch intervals (both ways) during F - Drive WamBam Anchor 42 inches into the ground penetration into the ground • Ideal anchor height should be 48 inches above the ground • In typical ground, the anchor will require 25 to 50 •... -
Page 16: Step 3 - How To Use Your Rail As A Spacing Guide
Steady Freddy Vinyl Fence Step 3 continued... B - Bring the next Anchor Positioner into alignment C - Identify property line or corner post with the string line and the end of your fence rail • Stay back at least 4 inches minimum from property line to... -
Page 17: Step 4 - Continue Pounding Anchors
Steady Freddy Vinyl Fence Continue Pounding Anchors Along String Line STEP 4 3ft. 4ft. 5ft. A - How to plot a right angle with a string line (if necessary) Use the same fence rail as a spacer due to potential scratching and ease of use. -
Page 18: Step 5 Remove Soil And Secure Anchor Positioner
Steady Freddy Vinyl Fence Remove Soil and Secure Anchor Positioner STEP 5 3in. Deep Technically, this step is only recommended if you desire your finished fence post to appear buried into the ground. We strongly recommend. A / B - Remove approximately 3 inches of soil underneath the anchor positioner. -
Page 19: Step 6 Level Your String Line
Steady Freddy Vinyl Fence Level Your String Line STEP 6 Line Level Slide Anchor Positioners up or down to determine level fence post installation. A - Adjust your Anchor Positioners to the string B - Ensure that your string line is level to the string... -
Page 20: Step 7 - Leveling And Securing Wambam Donuts
Steady Freddy Vinyl Fence Leveling and Securing WamBam Leveling Donuts STEP 7 Important: Please note where the level should sit on the bottom of Anchor Positioner (see Figure C) A - Lift the Leveling Donut to within 1 inch top... - Page 21 Steady Freddy Vinyl Fence F / G - As necessary slide the donut either left or right on the pipe to create a level plain between the anchor positioner and the donut. This will ensure that your vinyl post once installed will be level.
-
Page 22: Step 8 Place Vinyl Posts Over Wambam Anchors
Steady Freddy Vinyl Fence Place Vinyl Posts Over WamBam Anchors STEP 8 Approximately 74.5in. Vinyl post will rest on this edge. A - Place a vinyl post over the first anchor B - Vinyl post will rest on the edge of the Anchor... -
Page 23: Step 9 Install Your Fence Panels
Steady Freddy Vinyl Fence Install Your Fence Panels STEP 9 Fence rails may need to be trimmed down to fit. See “How to Trim Down Your Fence Panel” in our “Murphy’s Vinyl Fence Laws” guide. A - Place wood spacers next to the vinyl posts... -
Page 24: Step 10 Secure Panels To The Posts
Steady Freddy Vinyl Fence Secure Panels to the Posts STEP 10 A - Slide the first privacy tongue & groove board into B - Slide the top rail into place. Allow enough space the channel in the post, followed by the above your toprail to accomodate for your future remaining boards (they will slide into each other). -
Page 25: Step 11 - Place Screws Into The Posts And The Rails
Being able to moderately adjust the height of your fence to level at this stage is another perk that a WamBam vinyl fence offers that most traditional vinyl fences do not. C - Final adjust your bottom rail up (use shims as necessary) or down to create a fence level that is pleasing to the eye. - Page 26 Steady Freddy Vinyl Fence Place Screws into the Posts and the Rails STEP 11 Do not overtighten screws as it will cause the vinyl to dimple. VERY IMPORTANT Screws must be inserted straight and into the correct area of the post/rail as indicated.
- Page 27 Steady Freddy Vinyl Fence VERY IMPORTANT C - Place two 1.25 inch screws in the top rail Screws must be inserted into the correct area of the rails/boards as indicated. D - Place two 1.25 inch screws into the bottom rail...
-
Page 28: Step 12 - Glue Caps On Posts
Steady Freddy Vinyl Fence Glue Caps on the Posts STEP 12 Cap'n Jack Cap'n America Cap'n Morgan Gluing your post caps permanently in place is optional but recommended. Purchase glue separately. A - Put a small bead of vinyl glue or weld (purchased...
Need help?
Do you have a question about the Steady Freddy and is the answer not in the manual?
Questions and answers