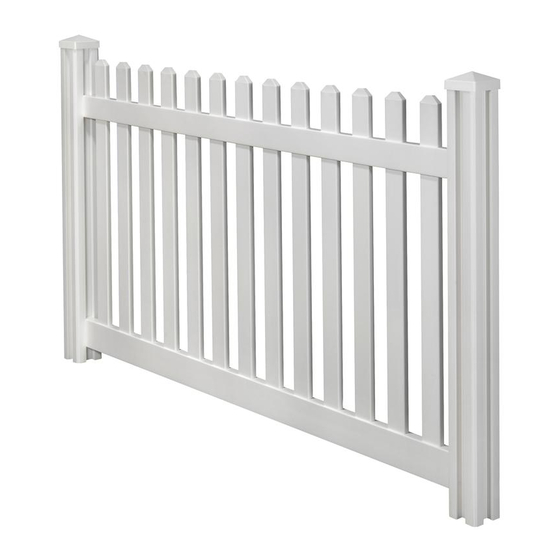
Summary of Contents for WamBam TRADITIONAL CLASSIC VF13003
- Page 1 VF13003 ASSEMBLY INSTRUCTIONS CLASSIC ASSEMBLY INSTRUCTIONS VINYL PICKET VF13003 FENCE (4’H X 7’W) 60 MIN Approximate assembly time Want to see a video on how to assemble this product? Scan the QR code WWW.WAMBAMFENCE.COM WWW.WAMBAMFENCE.COM VER. 022321...
- Page 2 VF13003 ASSEMBLY INSTRUCTIONS GENERAL IMPORTANT INFORMATION Check the inside of the larger pieces in your box for other materials packed inside. When assembling components, place on a non-abrasive surface (i.e. shipping box) to avoid scratching. We recommend an area approximately 5’x 8’ for unobstructed assembling.
- Page 3 VF13003 ASSEMBLY INSTRUCTIONS AVOID THESE PITFALLS! HAVE YOU CONTACTED You must call your local utilities before you start installing your fence to avoid puncturing any unseen underground YOUR LOCAL UTILITIES? utilities, especially electrical or gas lines. Fortunately, this is made easy for you. k Simply call 811 in the US or visit www.call811.com.
- Page 4 VF13003 ASSEMBLY INSTRUCTIONS TOOLS AND MATERIALS YOU’LL NEED Safety Glasses 1ft. Torpedo Level 4ft. Level (optional String Line Level) 2in. x 2in. x 6in. Inch Wood “Spacer” Block (2 for each panel) Cordless Drill (preferably with a high-torque setting) Auger (optional) Shovel (optional)
- Page 5 VF13003 ASSEMBLY INSTRUCTIONS MURPHY’S VINYL FENCE LAWS LET’S PRETEND (JUST FOR A MOMENT) THAT YOU LIVE IN A PERFECT WORLD. To get started, we are going to walk you through how you would install the fence illustrated below. This is the perfect scenario with no curve balls. The ground is level, your fence sections all work out evenly, the birds are chirping, and the sky is blue.
- Page 6 VF13003 ASSEMBLY INSTRUCTIONS This fence can be trimmed down both in width and height to accommodate custom applications. Top View 4.5in. 4.5in. 3.5in. Screw 3in. 2.9in. 1.5in. 6in. 3.5in. 3.5in. .090in. Wall Thickness 72in. 48in. 32in. 1.5in. 2in. 4.5in. 4.5in. Concrete Footing Ground 79.5in.
- Page 7 VF13003 ASSEMBLY INSTRUCTIONS LAY OUT MATERIALS STEP 1: Post Cap (1) Top Rail (1) 1½” x 3½” x 81½” 3½” Self-Drilling Stainless Steel Screw (4) Post (1) Picket Cap (13) 4½” x 4½” x 72” 1¼” Self-Drilling Stainless Steel Screw (4) Picket (13) Bottom Rail (1) Tube of Glue (1)
- Page 8 VF13003 ASSEMBLY INSTRUCTIONS INSTALL POSTS STEP 2: STEP 2.1 STEP 2.2 Add approximately 18” of concrete After stringing your fence line, dig to the bottom of the hole. Then, install your first post hole 10” diameter x Posts straight and level. Add more 36”...
- Page 9 VF13003 ASSEMBLY INSTRUCTIONS STEP 3.4 Drive (4) 1¼” Self-Drilling Stainless Steel Screws through the middle of the top rail and upper cavity of the bottom rail as illustrated. The height of the rails can now be adjusted as needed. STEP 3.5 Note: Do not over-tighten the Note:...
- Page 10 VF13003 ASSEMBLY INSTRUCTIONS STEP 3.6 Repeat in each remaining rail corner using (3) total 3½” self-drilling stainless steel screws. Note: This step will ensure that your fence rails will never fall out of your posts like traditional vinyl fence rails sometimes do.
- Page 11 VF13003 ASSEMBLY INSTRUCTIONS STEP 4.2 Put a small bead of vinyl glue or weld along the inside of the Post Cap (A). Place the glued post cap on the post and allow to set for 5-10 minutes. WWW.WAMBAMFENCE.COM...
- Page 12 VF13003 ASSEMBLY INSTRUCTIONS YOUR FENCE DESIGN CUSTOMIZE Use the cutting guide below to trim pickets to create a custom fence design. 441/4” 423/8” 407/8” 393/4” 387/8” 383/8” 381/4” 381/4” 411/2” 42” 423/4” 431/2” 44” 441/4” Most yards are relatively level and will allow for a fairly simple installation. If your yard is steeply pitched, or is very uneven, you may need to stair-step your panels as illustrated below.
- Page 13 VF13003 ASSEMBLY INSTRUCTIONS 6935 Reames Rd. Ste. K. Charlotte, NC 28216 hmmm@wambamfence.com 704-892-5222 877-778-5733 WWW.WAMBAMFENCE.COM WWW.WAMBAMFENCE.COM...


Need help?
Do you have a question about the TRADITIONAL CLASSIC VF13003 and is the answer not in the manual?
Questions and answers