
Related Manuals for WamBam Steady Freddy


Summary of Contents for WamBam Steady Freddy
- Page 1 Steady Freddy Vinyl Gate Important stuff to know about installing your WamBam gate. 1-877-778-5733 www.wambamfence.com This Gate is Also Designed to Fit the CLEVER JOE Big Ben and Curious George Fence Styles Your Installation Buddy 02.2017...
- Page 2 Reality Check 1 - Read Over Fence Instructions First Your gate and fence will work better together as an integrated solution if you rst take the time to read and understand your fence instructions. Especially pay attention to the principles of anchor installation.
- Page 3 4 - Ideally, Do Not Hang Your Gate System Off a Single Non-Supported Post. Your gate will perform better and last longer if your hinge post is connected to a panel of fence which is connected to another post. The weight strain will be transferred unto two posts versus just one. Installing fence panels on both sides of your gate is the ideal in all situations.
-
Page 4: Box Contents
Steady Freddy Vinyl Gate Box Contents .050in. wall .090in. wall Each Gate Box Includes: thickness thickness • Gate Brace (1) • Gate Arch (1) • Privacy Boards (4) • Gate Arch Top Bracket (2) • Gate Latch (1) • Vertical Stile (2) •... -
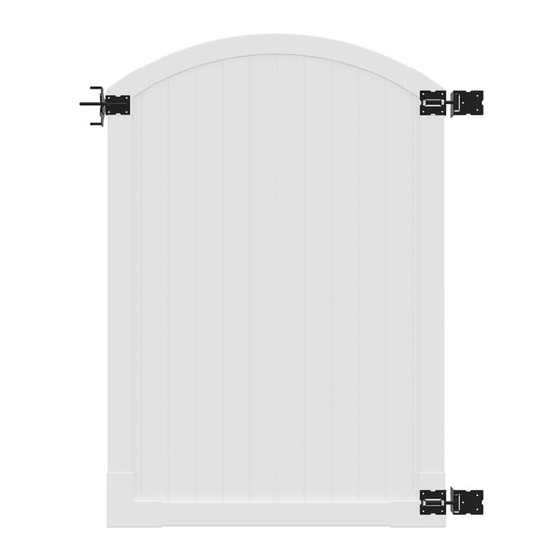
Page 5: Product Overview
Steady Freddy Vinyl Gate PRODUCT OVERVIEW Gate Assembly Gate Installation 48in. 3.5in. 11.75in. 73.5in. 70in. 50.45in. 62.7in. 72in. 48in. 2in. 7.8in. 4in. 3.8in. Ground 7.8in. 32.4in. 7.8in. 50in. 48in. 42in. 54.5in. WamBam Anchor 1.5in. 1.5in. (Large Only) 3.5in. 1.5in. 3.5in. -
Page 6: Detailed Installation Instructions
Steady Freddy Vinyl Gate Detailed Installation Instructions STEP 1 Excavate & Install Gate Jig, Metal post stabilizer to be used only Anchors, & Fence Posts on hinge post Temporarily place the anchor positioner into the metal post stabilizer and determine position. - Page 7 Steady Freddy Vinyl Gate Assemble the Gate Frame Bottom & Sides STEP 2 Completely assembled gate shown UNEVEN EVEN Note that the bottom rail Insert fully to this point. is Ribbed internally. A - Insert the bottom rail ALL THE WAY until it BOTTOMS OUT inside gate bracket IMPORTANT! Insert fully to this point.
- Page 8 Steady Freddy Vinyl Gate Insert Boards & Assemble the Gate Frame Top STEP 3 Please ensure your privacy boards fits snug into the vertical gate stile. A - Insert tongue and groove privacy board 1 B - Privacy boards 2, 3, and 4 should bottom out...
- Page 9 Steady Freddy Vinyl Gate Fasten Gate Brackets & Attach Gate Hardware STEP 4 48in. A - ENSURE YOUR GATE IS SQUARE! The corner- B - Fasten gate brackets to internal members to-corner measurement must be the same, and using screws the width of the gate should be 48”...
- Page 10 Steady Freddy Vinyl Gate Assemble & Fasten Gate Brace STEP 5 Gate Brace Parts Hex Bolts Lock Washers Nuts Screws Bottom Bar Top Bar A - Assemble gate brace by B - Re-confirm the gate is square, and screw bracing into place.
- Page 11 Steady Freddy Vinyl Gate STEP 6 Position, Adjust & Align Gate/Secure Hinges to Posts A - Use temporary spacers or blocks to rest the gate on during alignment and installation See next page on how to position screws on the post side of the hinge.
-
Page 12: Top View
Steady Freddy Vinyl Gate How to Position Screws on the Post Side of the Hinge ANGLE your drill to pierce into angled portion of post as illustrated. TOP VIEW A - Using a 1/8” drill bit, pre-drill the holes for hinge screws as illustrated. - Page 13 Steady Freddy Vinyl Gate Level Gate & Adjust Hinges STEP 7 LEVEL A - Fasten gate hinges accordingly B - Check for level, fit and function to latching post Adjust the spring tension in gates as necessary. Use steel insert pin.
- Page 14 Steady Freddy Vinyl Gate How to Set the Tension on Your Gate Hinge E - Insert small steel pin into one of the holes F - Remove pin and place in forward hole to on hinge and rotate tensioner tool to release increase tension, &...
- Page 15 Steady Freddy Vinyl Gate Align & Install Latch STEP 8 A / B - Align and fasten the gate latch catch to fit and function with the gate finger. Congratulations! You did it! Go grab a beverage of your choice, admire your...
- Page 16 Steady Freddy Vinyl Gate FROM PAGE 1 Sidewalk/Path If sidewalk is less than 52 inches, then use the gate jig as a temporary spacer: Side Walk/Path Trim bottom plate of anchor positioner if it interferes with sidewalk as necessary. Drive wood wedge in...
- Page 17 Steady Freddy Vinyl Gate Drill Directly Through Concrete OPTION ONE - Sidewalk/Path If sidewalk is wider than 52”, you may consider drilling directly through it. Use vinyl gate jig to mark holes Use a 1 5/8in. concrete drill bit, extension Drill both pre-marked holes for drilling.
- Page 18 Steady Freddy Vinyl Gate OPTION TWO Sidewalk/Path If sidewalk is wider than 52 inches, then use Surface Mounts (purchase separately): Side Walk/Path Use the gate jig to ensure proper spacing. For installation videos and more information, visit www.wambamfence.com...
- Page 19 Steady Freddy Vinyl Gate Double Gate Applications You can use two standard gates to create wider opening up to 99”. More details are included at the back of this manual on how this can be accomplished. 99in Metal Post Stabilizers Ground 103.5 in...
- Page 20 Steady Freddy Vinyl Gate How to Use Vinyl Gate Jigs Provided to Create Double Gate Jig You can overlap both of your vinyl gate jigs to create a double gate jig. Locate 103.5 inch centers of the holes and fasten jigs.
- Page 21 Steady Freddy Vinyl Gate Double Gate Installation 5.5 in 110 in 6 in A - Create a trench as per the illustration above. Bottom of trench should be level. 103.5 in B - Identify the locations of metal post stabilizers and pound ush into the ground.
- Page 22 Steady Freddy Vinyl Gate C - Place jig over the metal post stabilizers. The hole on the stabilizers should align with the holes on the jig. D - Ensure that jig is level. E - Align the anchor positioners with the holes in the jig and metal post stabilizer.
- Page 23 Steady Freddy Vinyl Gate See fence instructions if necessary for more information on how to install anchors, adjust leveling donuts and install vinyl posts. H - Pound your anchors into place. I - Slide vinyl post over anchors and fasten accordingly to internal steel pipe.
- Page 24 Steady Freddy Vinyl Gate How to Use Latch Provided for a Double Gate Back Front Install one of the latches and ngers provided as illustrated. Instead of the regular six points of contact for screws on the latch portion, you will only be able to use four.
- Page 25 Drop Rod Gate Detailed Installation Instructions Purchase Separately. STEP 1 Install Drop Rod Not included. A - Center and level the bottom B - Insert drop rod into the top C - Mark the location of the drop bracket as shown. Fasten with bracket and insert into bottom rod on the ground surface and the two provided screws.
- Page 26 Operations STEP 2 Ground Surface A - To lock the gate rod in A - To lock the gate rod in B - To drop the rod in the UP POSITION DOWN POSITION down position, turn the the up position, raise the the up position, raise the gate rod 90°...
- Page 27 Options for Gate Installation with Space Restriction OPTION 1 Short Panel Installed to Support Hinge Post Only Ground Your gate style may not be as illustrated. A - If a small panel of fence (as illustrated), can be installed to support the hinge post only, that is the ideal. OPTION 2 Add Concrete After Gate Installation CONCRETE...
- Page 28 Options for Gate Installation with Space Restriction OPTION 3 Secure Hinge Post to Pre-Existing Wall Galvanized L-Bracket A - If you have a pre-existing wall, you may want to consider securing the top of the hinge post directly to the wall using a galvanized L-bracket as illustrated. Galvanized L-Bracket For installation videos and more information, visit www.wambamfence.com...
Need help?
Do you have a question about the Steady Freddy and is the answer not in the manual?
Questions and answers