Advertisement
Quick Links
Sportgeräte 2000 GmbH
Schinkelstraße 15
31137 Hildesheim
Hinweis!
Bevor Sie zusammenbauen, prüfen Sie die
Sendung auf Vollständigkeit und Unversehrtheit.
Reklamationen
sind
technischen Gründen nur innerhalb von 24 h ab
Lieferzeitpunkt möglich.
Detaillierte Montageanleitung
über den untenstehenden
Pfad oder den QR-Code zu finden
www.helo-sports.de/fileadmin/Download-Montageanleitung/M-00086.pdf
M-00086-Montageanleitung
F1874
für klappbare Rollen B00300,
B00301
Modell- und technische Änderungen sowie Irrtümer vorbehalten. Alle Inhalte sind urheberrechtlich geschützt. /
Montageanleitung
Mounting instruction
Für klappbare Rollen
For folding wheels
F1874
B00300 / B00301
aus
versicherungs-
Revision 4 vom 18.07.2019
Models and technical details subject to change, errors excepted. All contents are copyrighted.
Note!
Before assembly you must verify all parts are
present and undamaged. For warranty purposes,
you must notify your retailer within 24 hours if
parts are missing or damaged.
Detailed mounting instruction
over the below
path or the QR code
10
M-00086
20
30
40
50
60
70
80
90
100
110
120
130
140
150
160
170
180
190
200
210
220
230
240
250
260
270
280
Seite 1 von 14
290
In mm
Advertisement

Subscribe to Our Youtube Channel
Related Manuals for KÜBLER SPORT F1874


Summary of Contents for KÜBLER SPORT F1874
- Page 1 Mounting instruction Für klappbare Rollen Sportgeräte 2000 GmbH For folding wheels Schinkelstraße 15 31137 Hildesheim F1874 B00300 / B00301 Hinweis! Note! Bevor Sie zusammenbauen, prüfen Sie die Before assembly you must verify all parts are Sendung auf Vollständigkeit und Unversehrtheit.
- Page 2 K-02430 Spacer sleeve Zwischenscheibe KU K-02436 Shim washer PE M-00086-Montageanleitung F1874 Revision 4 vom 18.07.2019 für klappbare Rollen B00300, Seite 2 von 14 B00301 Modell- und technische Änderungen sowie Irrtümer vorbehalten. Alle Inhalte sind urheberrechtlich geschützt. / Models and technical details subject to change, errors excepted. All contents are copyrighted.
- Page 3 K-02154 Washer DIN 9021 - M10 Distanzhülse M10 K-02462 Spacer sleeve M10 M-00086-Montageanleitung F1874 Revision 4 vom 18.07.2019 für klappbare Rollen B00300, Seite 3 von 14 B00301 Modell- und technische Änderungen sowie Irrtümer vorbehalten. Alle Inhalte sind urheberrechtlich geschützt. /...
- Page 4 Put on the thread of the sleeve nut (7) 6mm Sechskantschlüssel K-00962 6mm Allen wrench M-00086-Montageanleitung F1874 Revision 4 vom 18.07.2019 für klappbare Rollen B00300, Seite 4 von 14 B00301 Modell- und technische Änderungen sowie Irrtümer vorbehalten. Alle Inhalte sind urheberrechtlich geschützt. /...
- Page 5 M-00086-Montageanleitung Revision 4 vom 18.07.2019 für klappbare Rollen B00300, Seite 5 von 14 B00301 Modell- und technische Änderungen sowie Irrtümer vorbehalten. Alle Inhalte sind urheberrechtlich geschützt. / Models and technical details subject to change, errors excepted. All contents are copyrighted.
- Page 6 Benötigte Hilfsmittel: Required tool: Pos.Nr. Bezeichnung Anmerkung Pos.No. Description Comment Bohrmaschine Drilling machine Ø10,5mm Bohrer (Länge ab 110mm Bohrtiefe) Ø10,5mm Drill bit (Length from 110mm drilling depth) 17mm Schraubenschlüssel 17mm Wrench Schnittgefahr an Sicherheitshandschuh den Profilen Safety gloves Danger of cutting on the profile Sicherheitsschuhe Safety shoes...
- Page 7 Arbeitsschritte zur Montage Working steps to assembly Explosionsdarstellung Exploded view Bohrbild zum Nachrüsten an Toren mit Bore pattern for retrofitting to goals with Oval-Bodenrahmen: oval ground frame: Detail X / detail X Detail Y / detail Y Die Bohrungen Ø10,5mm sind durch The holes Ø10.5mm are to be drilled das komplette Profil und auf beiden through the complete profile and on...
- Page 8 Bohrbild zum Nachrüsten an Toren mit Bore pattern for retrofitting to goals with 75x50-Bodenrahmen: 75x50 ground frame: Detail Y / detail Y Detail X / detail X Die Bohrungen Ø10,5mm sind durch The holes Ø10.5 mm are to be drilled das komplette Profil und auf beiden through the complete profile and on Seiten zu bohren.
- Page 9 Eine Abschlussplatte (3) und eine Slide one end plate (3) and one shim Zwischenscheibe washer PE (5) onto the sticking out lens herausschauenden Linsenkopf- head screws M10x110 (2). schrauben M10x110 (2) schieben. Das Gewinde der Hülsenmutter M10 (7) Lube the thread of the sleeve nut M10 mit dem Sicherungslack einschmieren.
- Page 10 Einen Rollenträger One wheel carrier (6) slide on the Distanzbuchsen schieben. spacer sleeves (4). The sleeve nut M10 Hülsenmutter M10 (7) nun ein wenig auf (7) screw a little bit onto the lens head die Linsenkopfschraube M10x110 (2) screw M10x110 (2). aufschrauben.
- Page 11 Durch andere Bohrung Through the other hole of the end plate Abschlussplatte ebenfalls eine (3) slide a second sleeve nut M10 (7) zweite Hülsenmutter M10 (7) schieben and put two spacer sleeve onto the und zwei Distanzbuchsen (4) auf die sleeve nut M10 (7) Hülsenmutter M10 (7) stecken.
- Page 12 Die Schlossschraube M10x110 (8) The carriage bolt M10x110 (8) durch den Radträger (6) schieben und through the wheel carrier (6) and screw die Sechskantmutter M10 (9) bis zum the hexagon nut M10 (9) to the carriage Ende Schlossschraube bolt M10x110 (8). M10x110 (8) schrauben.
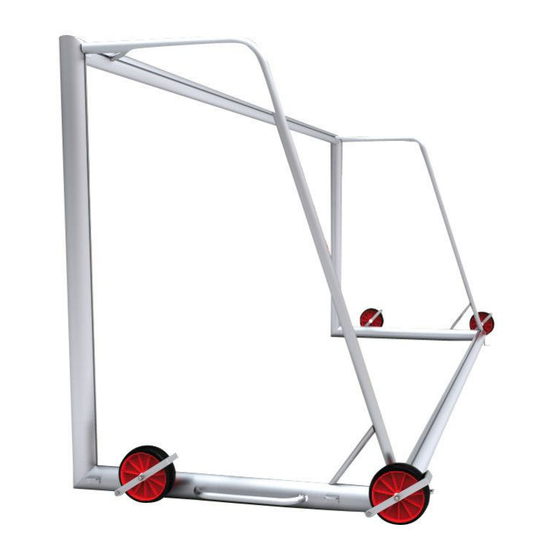
- Page 13 Achtung: Beim Umklappen der Rollen Attention: It exist crushing hazard if besteht Quetschgefahr!!! the wheels get folded down!!! Daher besonders vorsichtig und achtsam Be very careful and attentive. vorgehen. Wir empfehlen die Rollen mit nicht weniger We recommend to fold the wheels als zwei Personen umzuklappen! down with no less than two people! Um das Tor transportieren zu...
-
Page 14: Maintenance Instructions
Wartungshinweise Maintenance instructions • Einmal im Monat müssen die Schraub- • Once a month the screws must be verbindungen überprüft werden und checked and possibly tightened. eventuell wieder festgezogen werden. • Regelmäßige Kontrolle auf Beschä- • Regular checks on damage and digungen und Bruchstellen.
Need help?
Do you have a question about the F1874 and is the answer not in the manual?
Questions and answers