Advertisement
Quick Links
Advertisement

Subscribe to Our Youtube Channel
Related Manuals for Leica AT500


Summary of Contents for Leica AT500
- Page 1 Leica AT500 Quick Guide Version 1.0 English...
- Page 2 Intended use Measuring coordinates • Recording measurements • Computing with software • Automatic target search, recognition and tracking • Remote control of product • Data communication with external appliances • Laser products The AT500 instrument contains the following laser products:...
- Page 3 Laser product Laser class Classification ADM (Absolute Distance Meter) Class 2 IEC 60825-1 (2014-05) with Laser Pointer ATR (Automatic Target Recogni- Class 1 IEC 60825-1 (2014-05) tion) Exempt Group IEC 62471 (2006-07) PowerLock Exempt Group IEC 62471 (2006-07) LED status indicator Important Information about your Instrument...
- Page 4 Important Information about your Instrument Locations of laser apertures LED Status Indicators PowerLock ADM, ATR, Laser Pointer 0024639_001...
- Page 5 Avoid pointing the beam at other people or at animals. ☞ The AT500 is classified as a laser class 2 system although some individual laser sources are classified differently. The possibility of simultaneous emission of the individual laser sources results in an overall classification as laser class 2.
- Page 6 Important Information about your Instrument NOTICE Risk of damage by overheating If the product is covered by the protective cover while being switched on, the product may be damaged by overheating. Precautions: ▶ Ensure that the product is switched off before covering it with the protect- ive cover.
- Page 7 For the AC/DC power supply: WARNING Electric shock due to use under wet and severe conditions If unit becomes wet, it may cause you to receive an electric shock. Precautions: ▶ If the product becomes humid, it must not be used! ▶...
- Page 8 Either of the following actions may cause you to receive an electric shock: Touching live components • Using the product after incorrect attempts were made to carry out repairs • Precautions: ▶ Do not open the product! ▶ Only Leica Geosystems authorised service centres are entitled to repair these products.
- Page 9 For the AC/DC power supply: WARNING Electric shock due to missing ground connection If unit is not connected to ground, death or serious injury can occur. Precautions: ▶ The power cable and power outlet must be grounded! The product must not be disposed with household waste. Important Information about your Instrument...
-
Page 10: Conformity To National Regulations
Important Information about your Instrument Conformity to National Regulations For products with radio transmitter or receiver: Labelling 24799_001... - Page 11 IC: 22172-MORIN01 IC 3147A-BL654 R 204-760001 R 201-180112 Model: AT500 Art.No.: 577440 Power: 30-48V / 4A max. Leica Geosystems AG S.No.: CH-9435 Heerbrugg 393403 Manufactured: 01.2022 Made in Switzerland Standard applied: IEC 60825-1:2014 visible invisible invisible Maximum average radiant power 0.35 mW...
- Page 12 Important Information about your Instrument Hereby, Leica Geosystems AG declares that the radio equipment type AT500 is in compliance with Directive 2014/53/EU and other applicable European Directives. The full text of the EU declaration of conformity is available at the following Internet address: http://www.leica-geosystems.com/ce.
- Page 13 The full text of the EU declaration of conformity is available at the following Internet address: http://www.leica-geosystems.com/ce. FCC Part 15 B Changes or modifications not expressly approved by Leica Geosystems for compli- ance could void the user's authority to operate the equipment. Canada CAN ICES-003 B/NMB-003 B...
- Page 14 ☞ Leica Geosystems has developed Guidelines on “How to carry Leica products” and “How to ship Leica products” with Lithium bat- teries. Before any transportation of a Leica product, we ask you to consult these guidelines on our web page (http://www.leica-geo-...
-
Page 15: Container Contents
AT Remote Control 400 Universal Stand Fixture Wooden box containing 1.5” Red Ring Reflector AT500 instrument B-Probe plus – optional 2 × GEB364 batteries Power cable 24611_001 External temperature sensor Ethernet cable MCA134 LAN-Cable RJ-45 Cat6: For usage with AT500 Tracker Container Contents... -
Page 16: Technical Data
Technical Data Environmental Temperature specifications Type Operating temperature Storage temperature [°C] [°C] AT500 instrument ±0 to +40 −25 to +70 AC Power supply ±0 to +60 −25 to +80 Battery Charging: ±0 to +50 −40 to +40 Discharging: −20 to +60 ☞... - Page 17 Humidity Maximum 95%, non condensing. To avoid the effects of condensation, periodically dry out the instrument. Technical Data...
-
Page 18: Care And Transport
Care and Transport Care and Transport On-site transport When transporting the equipment on site, always make sure that you carry the product in its original container, • or attached to the Tracker Stand. • ☞ Ensure that the working site is level and free of obstruction. ☞... -
Page 19: Operation
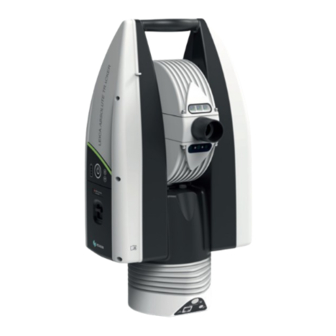
Operation System Compon- ents AT500 24610_001 AT500 instru- Absolute Tracker of highest accuracy for measuring, calcu- ment lating and capturing data. Application Third-party metrology software with an interface to the Software Absolute Tracker for acquisition, analysis, management, automation and reporting of measurement data. - Page 20 Operation Absolute Smartphone application with a basic interface to the Abso- Tracker Con- lute Tracker to configure connectivity. nect...
- Page 21 Setup Setup Step-by- step 0024614_001 Screw the Quick Release onto the Tracker Stand and tighten it using the hinged hook wrench. Setup...
- Page 22 Setup ☞ Ensure that the locking lever of the Quick Release is in unlocked position. Set the AT500 instrument onto the Quick Release. Close the locking lever to lock the Absolute Tracker on the Quick Release. ☞ Do not remove the locking lever of the Quick Release while the sensor is attached to the Quick Release.
- Page 23 ☞ Refer to the relevant application manual for further details on carry- ing out measurements. CAUTION Mounting the sensor on unstable or uneven ground This may cause the sensor to tip over or cause unreliable measurement results. Precautions: ▶ Ensure the ground is stable and even. Do not place the sensor over cracks in the floor.
- Page 24 Startup Startup Startup Set up the Absolute Tracker system according to Setup. Power up the system with the main power switch on the side cover. Start the application software and connect to the Absolute Tracker. Initialise the system.
- Page 25 AT500 Instrument Status LEDs Status LEDs Description The AT500 has Light Emitting Diode indicators at the front side of the telescope. They indicate the following states. Diagram of the Status LEDs LED with various colours LED with various colours LED with various colours...
- Page 26 AT500 Instrument Status LEDs Description of the Status LEDs Symbol Description Symbol Description Status indicator, Status indicator, red continuous ON red flashing Status indicator, Status indicator, green continuous ON green flashing Status indicator, Status indicator, blue continuous ON blue flashing...
- Page 27 Pattern None None None The system is booted and no LEDs reflector is locked. PowerLock is active. Pattern The system is booted and no LEDs reflector is locked. PowerLock is inact- ive. Pattern None None AT500 Instrument Status LEDs...
- Page 28 AT500 Instrument Status LEDs LED State Status Information Target is out of LEDs range. Pattern None None Laser off: LEDs Stand-by mode Pattern None None Target locked. Ready LEDs to measure. Pattern...
- Page 29 LED State Status Information Measurement is in LEDs progress. Pattern PowerLock is tem- poraly suspended LEDs while laser is point- Pattern AT500 Instrument Status LEDs...
-
Page 30: Eu Declaration Of Conformity
EU Declaration of Conformity EU Declaration of Conformity EU Declaration of We, Leica Geosystems AG, CH-9435 Heerbrugg, declare under our sole Conformity responsibility that the product AT500 following the provisions of Directive(s) This corresponds 2011/65/EU Restriction of hazardous substances (RoHS) •... - Page 32 958662-1.0.0en Original text (958662-1.0.0en) Printed in Switzerland, © 2022 Leica Geosystems AG Leica Geosystems AG Heinrich-Wild-Strasse 9435 Heerbrugg Switzerland www.leica-geosystems.com...
Need help?
Do you have a question about the AT500 and is the answer not in the manual?
Questions and answers