
Related Manuals for HBK B&K 2245


Summary of Contents for HBK B&K 2245
- Page 1 B&K 2245 and HBK 2255 with Noise Partner User Guide for Version 1.8.1 BN 2376–21 Copyright © Hottinger Brüel & Kjær A/S. All rights reserved. 2024.0...
-
Page 3: Table Of Contents
Connect the mobile app to the instrument CONFIGURE YOUR INSTRUMENT Access instrument settings on the instrument Access instrument settings on the mobile app Setup mode Input settings TEDS, Microphones and HBK 2255 Microphone database Measurement control Broadband parameters Display settings Regional settings... - Page 4 Table of contents Power management Data management Network settings External devices Voltage output Metadata Lock the settings CALIBRATION CHECK How to perform a calibration check Calibration history Calibration settings MEASUREMENTS Data explorer Review measurements Measurements (mobile) Measurement views (mobile) Review measurements (mobile app) ANNOTATIONS How to make annotations How to attach unattached annotations...
- Page 5 Table of contents TERMINOLOGY...
-
Page 6: Overview
OVERVIEW Your instrument works with applications: Noise Partner for general-purpose, basic sound level measurements Enviro Noise Partner for measuring and analysing sound levels in the world around us Work Noise Partner for determining sound exposure levels in the workplace Product Noise Partner for testing noise emission levels of products Building Acoustics Partner for testing sound insulation in buildings There is a mobile version and a PC version of each application. - Page 7 Overview BZ-7300: Noise Partner This licence enables you to make simple, broadband measurements, to make general-purpose sound pressure level measurements, and to make basic occupational, product and environmental measurements. Measure broadband parameters. Connect to Noise Partner mobile app and PC application. BZ-7301: Enviro Noise Partner This licence enables you to measure and report on environmental noise concerns.
-
Page 8: About The Instrument
The instrument takes single measurements. In other words, the instrument calculates a single value for each measured parameter for the total measurement time. HBK 2255 The instrument measures sound level meter parameters (Leq, Lpeak, Lmax, Lmin, L(SPL), L) with up to three sim- ultaneous frequency weightings (A, B, C, Z) and up to three simultaneous time weightings (F, S, I) for the exponential averaging. -
Page 9: About The Pc Application
Overview About the PC application Functionality of the PC version of Noise Partner: View measurements and annotations. Create projects from measurements stored on the instrument. Add measurements stored on the instrument to an existing project. Share projects via the cloud. Export projects to another file format (for sharing or reporting). -
Page 10: Data Storage
Service and support Standard warranty B&K 2245 has a two-year warranty that is valid from the delivery of the product. HBK 2255 has a two-year warranty that is valid from the delivery of the product. Updates Instrument Update firmware and install new licences over the Internet. - Page 11 Overview ✐ Note: When you return your instrument for service, the firmware will be updated to the latest version. For type-approved firmware versions, you may need to return the instrument to a certified service centre to update the firmware. Check with your type-approving authority before updating the firmware. Any new languages are installed with the update of the firmware.
-
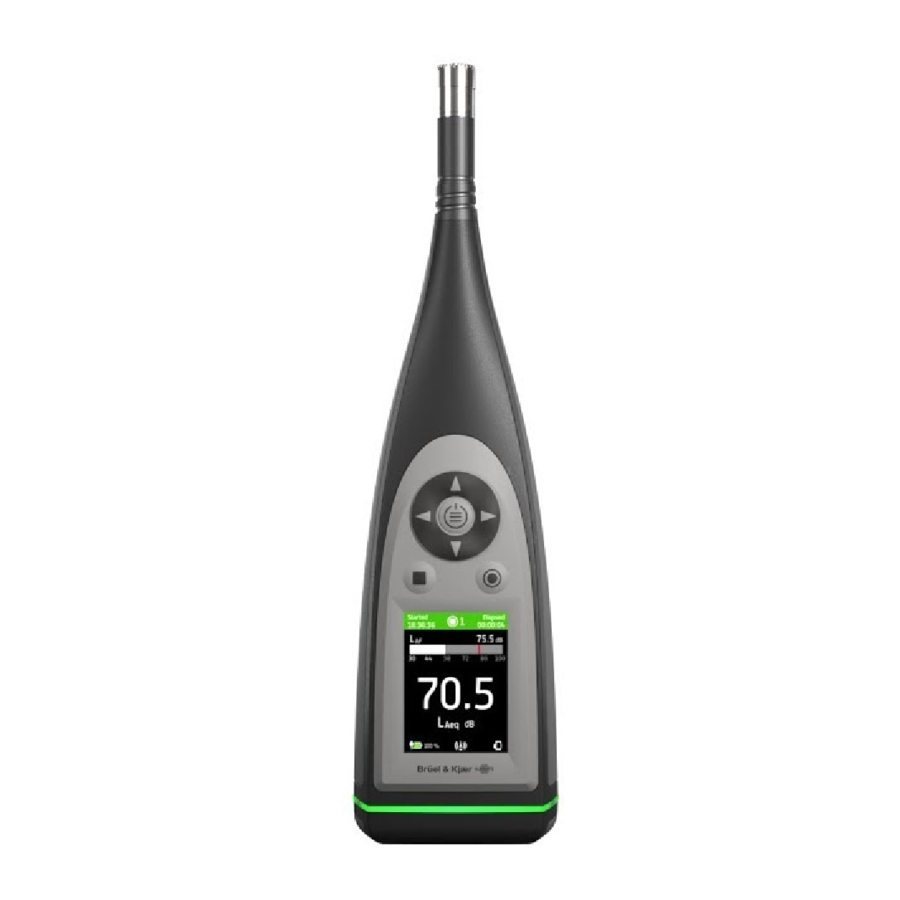
Page 12: The Instrument
The microphone and preamplifier are at the top of the instrument. B&K 2245 has a removable microphone cartridge and a built-in microphone preamplifier. HBK 2255 has a removable microphone preamplifier and supports TEDS (transducer electronic data sheet). is the power/menu/reboot button. - Page 13 The instrument is the stop/reset button. Press the button once to stop a measurement. At this point, averaged measurement parameters will stop updating and you can review the results. Press the button again to clear the results and reset the instrument for the next measurement.
-
Page 14: Instrument Gui
The instrument The light ring is colour-coded to reflect the status of the instrument. The light ring is solid green while measuring. The light ring flashes yellow slowly while idle or quickly while paused (measuring). The light ring flashes red quickly for intermittent overloads. The light ring is solid purple for latched overloads. - Page 15 The instrument When idle, the instrument displays the current time (to the left) and input settings (to the right). : Indicates that the clock is estimated to be more than 2 s wrong. : Indicates that Sound field is set to Free-field and there is not a windscreen. : Indicates that Sound field is set to Free-field and there is a windscreen.
- Page 16 The instrument In the middle is the measurement display. There are views for broadband para- meters (SLM view and List view) and a view for information about your data (About data view). Press briefly to scroll through measurement displays. Press briefly to scroll through the parameters for each display.
-
Page 17: Web Server Display
The instrument The bottom region provides information about the system: battery, network, and connectivity status. The battery icons show the status of the battery. For example, (charging) or (full). The network icons show the current network settings and its status. For example, (connected to a wireless network), (acting as a hotspot), (Ethernet con-... -
Page 18: Charge The Battery
The instrument This is one way to network your devices: a. On the instrument, go to: System settings > Network settings > Wi-Fi settings > Wi-Fi mode. b. Select Act as hotspot. c. Make note of the hotspot name (example: BK2245-000000 or BK2255-000000) and password. d. -
Page 19: Fix An Unresponsive Instrument
The instrument Display settings > Screen brightness System settings > Network settings > Web server display Battery calibration To improve the accuracy of battery readings, it is recommended to calibrate the battery regularly. 1. Press briefly to open the menu. 2. - Page 20 The instrument Where can water get in? It is possible for water to enter the space between the microphone cartridge and the microphone preamplifier when, for example, the instrument is exposed to heavy rain. Also, water may enter the instrument body if, for example, the instru- ment is submerged in water.
-
Page 21: Download The Apps
Microsoft Office 2016 or later Procedure: 1. Go to: www.bksv.com/downloads. 2. From the list of available downloads, expand B&K 2245 and HBK 2255 Software, Manuals and Compliance Information. 3. Click B&K 2245 and HBK 2255 Software Downloads. 4. Scroll down to the application. - Page 22 Download the apps Updates You will be informed of updates via the application.
-
Page 23: Connect Devices
CONNECT DEVICES Communication between the instrument and the devices running the applications is an essential part of using the instru- ment. Once you understand the ways in which the devices can communicate, you will be able to change connections to suit your circumstances. -
Page 24: Remote Connections
Connect devices Use the instrument as a hotspot Connect your mobile device and / or PC to the instrument's hotspot so that the devices can communicate. 1. On the instrument, go to: System settings > Network settings > Wi-Fi settings > Wi-Fi mode. 2. - Page 25 Connect devices Is your ISP blocking any instrument ports? ✐ Note: The instrument uses ports 80, 443 and 8700 to 8720. It is not possible to change these ports. There- fore, remote connection is not possible if your ISP blocks any of those ports. What you will need: An instrument that is connected to the network (either by Wi-Fi®...
-
Page 26: Connect The Mobile App To The Instrument
Connect devices ✐ Note: You can also test the setup using the PC application. Click to open the import dialog then click and select Add instrument from IP address. How to connect remotely via an IPv6 address You do not have to set up port forwarding when using an IPv6 address. To test the remote connection, try to connect to the instrument from a different network. - Page 27 Connect devices How to connect 1. Turn on the instrument. 2. Open the mobile app. A list of detected instruments sorted by nickname, type and serial number opens. 3. Tap on your instrument to connect. Hint: Give the instrument a nickname (System settings > Network settings > Nickname). A nickname can make it easier to find your instrument in a list.
- Page 28 Connect devices How to disconnect devices Disconnect the instrument from the mobile app if you wish to connect the mobile app to another instrument. When you disconnect the instrument, the mobile app will not connect to the instrument automatically. 1. In the mobile app, tap to open the instrument menu. 2.
- Page 29 Connect devices The mobile app displays the same colour, status icon and measurement number as the instrument. Tap to open the Setup screen. Open the Setup screen to access instrument settings and view status information about the instrument. You can edit many of the instrument set- tings using the mobile app.
- Page 30 Connect devices to access information about the mobile app and help. Use the navigation bar to change between Total (left) and Annotations (right). Total displays instantaneous parameters and parameters that are cal- culated for the total measurement time. It is the main display for single measurements.
- Page 31 Connect devices Annotations is the list of annotations. Tap an annotation to review it. Swipe left on an annotation to delete it. While measuring or reviewing a measurement, tap Attach to add an unattached annotation to the meas- urement. During a measurement, the mobile app shows the measurement start time ( ) and the measurement duration time (...
- Page 32 Connect devices to reset the instrument for the next measurement. to open the annotation menu. to start a measurement. During a measurement, slide to the right to stop or slide to the left to pause.
-
Page 33: Configure Your Instrument
To handle such different applications and to make it easier to set up and use the instrument, HBK 2255 has different setup modes. The Setup mode setting filters the instrument settings to provide a dedicated user interface for the different types of applications. -
Page 34: Input Settings
Microphone setting. HBK 2255 is designed to be used with different combinations of microphone cartridges and microphone preamplifiers, which enables the instrument to perform a variety of applications. HBK 2255 uses TEDS (transducer electronic data... - Page 35 Disabled: Specify the windscreen manually under Windscreen type. Frequency range HBK 2255 has a few options for extending the lower limit of the frequency range of your measurements. The options available will vary according to the licences installed and enabled on your instrument.
-
Page 36: Teds, Microphones And Hbk 2255
TEDS, Microphones and HBK 2255 TEDS HBK 2255 uses TEDS (transducer electronic data sheet) to detect the attached microphone (microphone cart- ridge/preamplifier pair), add new microphones to the microphone database and set the attached microphone as the input. If the TEDS information changes (that is, if you change the microphone), the instrument changes its configuration accordingly. - Page 37 Configure your instrument Standard combinations for HBK 2255 using Preamplifier ZC-0043: Type 4966-Z-041: 1/2-inch Microphone Cartridge Type 4966 + ZC-0043 Type 4964-Z-041: 1/2-inch Microphone Cartridge Type 4964 + ZC-0043 Combined microphone cartridge Type 4954-Z-047: 1/4-inch Microphone Cartridge Type 4954 + and preamplifier Adapter UA-0056 + ZC-0043 Type 4944-Z-047: 1/4-inch Microphone Cartridge Type 4944 +...
-
Page 38: Microphone Database
The microphone database stores the type and serial number, sensitivity and sound field for indi- vidual microphone cartridges. HBK 2255 has a detachable microphone preamplifier. The instrument can be used with different combinations of micro- phone cartridges and microphone preamplifiers. The instrument uses TEDS to detect the attached microphone and add new microphones to the microphone database. - Page 39 You cannot delete the microphone that the instrument is currently set to use. For HBK 2255, the ability to edit or delete microphones in the database depends on the TEDS scenario which applies to the attached microphone/preamplifier pair. If TEDS only contains information about the microphone preamplifier, it is possible to edit information about the microphone cartridge and/or delete the microphone.
-
Page 40: Measurement Control
Configure your instrument Measurement control Measurement control settings specify how your measurements will run. Go to: Measurement settings > Measurement control. Measurement time This setting controls how the measurement stops: automatically or manually. Preset: The instrument will measure for the time specified in Preset time, then stop and save automatically. Free: You control the measurement manually. -
Page 41: Broadband Parameters
HBK 2255 has frequency weightings A, B, C, and Z. The instrument can make measurements with up to three frequency weightings simultaneously. If the BZ-7452 licence is installed and enabled on HBK 2255, the instrument will also have fre- quency weighting G. - Page 42 Configure your instrument ✐ Note: Licence BZ-7304 (Exhaust Noise Partner) enables basic parameters (Lmax and Lmin) with one frequency weighting (A) and time weightings (F, S or I). Go to: Measurement settings > Broadband parameters. How to set up broadband parameters using the instrument 1.
- Page 43 Configure your instrument How to set up broadband parameters using the mobile app 1. Tap 1 to enable parameters for the first frequency weighting. The instrument can measure broadband parameters with multiple simultaneous frequency weightings, you will enable parameters for each frequency weighting separately. 2.
- Page 44 Configure your instrument Exponentially averaged levels Exponentially averaged sound levels provide easy-to-read values. A number of parameters are derived from exponential averaging: Lmax = maximum sound level This parameter gives you the highest time-weighted sound level that occurs during the measurement time. Lmax is often used in conjunction with another noise parameter (for example, Leq) to ensure a single noise event does not exceed a limit.
- Page 45 Configure your instrument A-weighting Represents the human ear’s response at low to medium sound levels Equal loudness curve: 40 dB The most commonly applied frequency weighting Can be used for all sound levels B-weighting Represents the human ear’s response at medium sound levels Equal loudness curve: 70 dB C-weighting Represents the human ear’s response at fairly high sound levels...
-
Page 46: Display Settings
Configure your instrument Table of parameters This table gives an overview of all the possible parameter/frequency weighting combinations. ✐ Note: The parameters are listed as they appear in the Broadband parameters menu. LAeq LBeq LCeq LZeq Lpeak LApeak LBpeak LCpeak LZpeak LFmax LAFmax... - Page 47 Configure your instrument Colour scheme This setting controls the colour of the screen and text. Light is a light background with dark text. Dark is a dark background with light text. Display views SLM view Set up the instantaneous display (bar graph) and the readout for one broadband parameter (single measurement). The SLM view displays the readout of a single broadband parameter level in a large font so it is easy to see.
-
Page 48: Regional Settings
Configure your instrument About data view About data view displays information about the instrument with which you are measuring. It can also include the loc- ation of the instrument (latitude and longitude) using GPS (global positioning system). To enable latitude and longitude coordinates in About data view: 1. -
Page 49: Power Management
Measurement units: Wind speed, temperature and dimensions HBK 2255 works with weather station kits MM-0316-A and MM-0256-A, which are based on Vaisala weather stations. The measurement unit settings allow you to choose your preferred measurement unit for wind speed, temperature and dimensions. - Page 50 Configure your instrument Backup settings You can set up your instrument to store backups of your data to a USB stick or network storage (either a network attached storage (NAS) device or a shared folder). Data transfers automatically when the storage device is available. An icon on the instrument indicates the status of the backup.
-
Page 51: Network Settings
Configure your instrument Network settings Network settings enable you to control your local (or remote) network connections. There are also settings to give the instrument a nickname, to protect it with a password and to view the instrument GUI in a web broswer. Local connections Remote connections for more information. - Page 52 Configure your instrument Add a password using the instrument 1. Go to: System settings > Network settings 2. Select Password. ✐ Note: If the instrument is already password protected, you will need to confirm that you want to enter a new password.
-
Page 53: External Devices
1. Select Reset network settings. 2. Select Yes. External devices For HBK 2255, the External devices setting includes settings that allow you to output the analog signal and to connect the instrument to a weather station. Voltage output for information about how to output the analog signal. -
Page 54: Voltage Output
The atmospheric conditions, such as humidity and wind speed, in which measurements are made are an essential part of environmental measurements. HBK 2255 works with weather station kits MM-0316-A and MM-0256-A, which are based on Vaisala weather stations. MM-0316-A measures wind speed and wind direction. - Page 55 Configure your instrument For HBK 2255, the Metadata setting allows you to create custom metadata. Custom metadata is stored with the meas- urement and supported in the Enviro Noise Partner and Building Acoustics Partner PC applications. If you export your measurement data from the PC application, the export file includes the custom metadata.
-
Page 56: Lock The Settings
Configure your instrument Lock the settings After you have finished setting up the instrument, you can lock the measurement, display and system settings to pre- vent changes. ✐ Note: This setting is only accessible on the instrument. 1. Go to: System settings > Advanced settings > Service mode. 2. -
Page 57: Calibration Check
CALIBRATION CHECK It is a best practice to check the accuracy of your instrument before and after a measurement by performing a cal- ibration check. A calibration check is not a calibration. Calibration includes an adjustment of the instrument's sensitivity. A calibration check compares the current sensitivity of the instrument with the sensitivity from its most recent and ini- tial calibrations, checking that it has not changed too much. - Page 58 Hint: You can respond to the calibration dialog using the mobile app if you are using B&K 2245 with firm- ware versions greater than 1.1.3.1653 or HBK 2255 with firmware versions greater than 1.2.1325. 5. The calibration check will have one of two results: Pass: The measured sound level is within tolerance.
-
Page 59: Calibration History
Calibration check Calibration history To view the history of calibrations and calibration checks, go to: Menu > Calibration history. Calibration settings Menu location: Menu > System settings > Advanced settings > Calibration. Automatic calibration check By default, the instrument is set to perform a calibration check automatically when it detects the constant sound level produced by the calibrator. -
Page 60: Measurements
MEASUREMENTS The exact steps of a measurement will vary depending on the settings you use in Measurement control. A basic overview is as follows: 1. Press to start a measurement. 2. If necessary, press to pause. 3. Press to resume. 4. -
Page 61: Data Explorer
Measurements Data explorer Menu location: Menu > Data explorer Folder structure There are two top-level folders in the data explorer: Data and Trash. Within the two folders are subfolders, named by date. Within each date folder are all measurements made that day. Data folder Trash folder Date folders... -
Page 62: Review Measurements
Measurements Delete data There are two stages to remove data from the instrument forever. The first stage is to send the data to the Trash folder and the second stage is to delete data from the Trash folder. By default, you will need to move data to the Trash folder manually. -
Page 63: Measurement Views (Mobile)
Measurements How to control measurements Use the controls at the bottom of the screen to start, stop and pause measurements. The exact steps of a measurement will vary depending on the settings you use in the Measurement control settings on the instrument. - Page 64 Measurements Swipe left or right to switch between views. Tap on a readout to change the parameter being displayed. Touch and hold to move items in the list...
-
Page 65: Review Measurements (Mobile App)
Measurements Review measurements (mobile app) After you stop a measurement, the measurement stays open to review. You can open past measurements to review in the mobile app. See Measurements (mobile) for information about how to open a past measurement. You can change the measurement views as during a measurement. See Measurement views (mobile) for more inform- ation. -
Page 66: Annotations
ANNOTATIONS Use the mobile app to annotate your measurement. Annotations are comments you can attach to a measurement. There are four types of annotations: photo, video, note, and commentary. Every measurement can have multiple annotations of different types. It is always a good idea to add annotations to your measurements. For example, they can help you and your colleagues identify measurements at a later date and provide valuable information about the context of a measurement. -
Page 67: How To Attach Unattached Annotations
Annotations How to attach unattached annotations To attach an annotation to a measurement, a measurement must be open or in progress. 1. Navigate to Annotations. 2. Tap Attach at the desired annotations (or tap if you want to create more annotations). -
Page 68: Post-Process Using The Pc App
POST-PROCESS USING THE PC APP PC application GUI The application tab opens / closes the application menu where you will find information about the application and its options. Options: Change the language of the GUI. About: Information about the application. Exit: Close the application. - Page 69 Post-process Using the PC App These are the tools that control the operation of the application. : Create a new project. : Open an existing project. : Save the current project. : Save the current project under a new name or in another location. : Import data from the instrument or network storage.
- Page 70 Post-process Using the PC App When you open a project or import data, you will see the individual measurements in the project browser window. Select measurements to view them. Project Name: Unnamed projects appear as Untitled in the toolbar. : Select all measurements in the project browser. Unattached annotations displays annotations that are not linked to a measurement.
- Page 71 Post-process Using the PC App Tasks, such as importing data or exporting a project, are displayed in this window. These tabs are for switching between the Measurement, Gallery, Map and Report period windows. Within the Measurement window, there are two areas. The upper section is an overview of the selected measurements in a project.
-
Page 72: Application Menu
Post-process Using the PC App In this panel, you will find collapsible windows for viewing annotations. Annotations: (Map): View locations of annotations and measurements on a map. (Gallery): View photos and videos attached to the measurement. (Commentaries): Listen to voice memos attached to the measurement. (Notes): Read the notes attached to the measurement. -
Page 73: Open A Project
Post-process Using the PC App Connecting to an instrument If it is not possible to connect to instruments remotely via HTTPS, enable the setting to connect via HTTP. HTTP does not have the certificate requirements of HTTPS, which can cause problems with security features like firewalls. See Remote connections for more information about connecting to an instrument remotely. -
Page 74: Import Data
Post-process Using the PC App Import data The Import dialog allows you to import data to the PC app. You can use the PC app to analyse data, generate reports or to export data into another format. Once data is imported, it is available in tabular and graphical formats. Basic import instructions 1. - Page 75 Post-process Using the PC App 3. Find your instrument in the dialog and select it. ✐ Note: To import from a backup, click on the storage location. 4. Select the data you want to transfer. You can import measurements and annotations. Hint: Use <Ctrl>...
- Page 76 Post-process Using the PC App Measurement icons Measurement icons indicate the type of measurement. : General sound level measurement Import from an IP address If you want to find an instrument that is not showing up in the list of discovered instruments, such as an instrument on another network, you can manually add the instrument to the list using its IP address.
-
Page 77: Project Browser
Post-process Using the PC App 7. After you connect to the storage location, select the data to import. You can import measurements and annotations. See Import measurements for more information. 8. Click Import. Project browser The project browser (in the panel on the left) gives an overview of your project (its name and the data it contains) and allows you to select the items to view. -
Page 78: Measurement Window
Post-process Using the PC App Review annotations in the PC application for more information about annotations. Measurement window The Measurement window displays single measurements. You can view the data in both graphical and tabular formats. Select one or more measurements in the Project browser to display measurement data. - Page 79 Post-process Using the PC App Adjust the window size Mouse over a vertical or horizontal boundary. When the cursor changes and the line is highlighted, click and drag to res- ize the area. Customise the display Click to show or hide the profile view. Click to show or hide the table view.
- Page 80 Post-process Using the PC App Hide or show parameters Right-click in the profile to select which parameters to view. ✐ Note: The right-click menu only shows measured parameters. Parameters are colour coded. The cursor Click on the overview or the profile to place the cursor.
- Page 81 Post-process Using the PC App The cursor has two readouts: one at the bottom which shows the time and duration (in parentheses), and one in the graph which shows the level at that point. Hint: You can use the left and right arrow keys on your keyboard to move the cursor or click on the time readout to enter a specific time.
- Page 82 Post-process Using the PC App Copy the data Right-click on the graph to copy it to your clipboard. Paste the image into Microsoft® applications such as Excel®, Word or Powerpoint®. If the application supports vector graphics, the graphs paste as SVGs. Otherwise the graphs paste as bit- maps (PNG).
-
Page 83: Review Annotations In The Pc Application
Post-process Using the PC App Copy the table Right-click on the table and select Copy table to copy its contents to your clipboard in CSV format. Paste the data into Microsoft® applications such as Excel®, Word or Powerpoint®. Review annotations in the PC application If you created annotations using the mobile app, you can review them in the PC application. - Page 84 Post-process Using the PC App See where annotations were made The Map windows show the location of measurements and annotations. Use the context-sensitive menu to toggle on or off the different annotation types. ✐ Note: The map only shows annotations that have location data. To enable location data, the mobile app needs access to the location services of the mobile device.
-
Page 85: View Locations
Post-process Using the PC App How to attach or detach annotations Sometimes you need to move an annotation. In the PC application, it is easy to, for example, attach an unattached annotation to a measurement, or move an attached annotation from one measurement to another, or detach an unwanted annotation from a measurement. -
Page 86: Export Data
Post-process Using the PC App How to enable GPS location on the instrument 1. Press briefly to open the menu. 2. Go to: System settings > Advanced settings > Service mode. 3. Select Enabled. 4. Go to: GPS location. 5. Select Enabled. ✐... - Page 87 Post-process Using the PC App 6. If you are exporting to a workbook, the export method sets how the data is written to the workbook. Auto: The application chooses the best option; this is the default setting. Open XML (DOM): A memory-based method for writing to a workbook, which can tie up processing resources.
-
Page 88: Report
Post-process Using the PC App e. Right-click and select Clear Contents. 4. Use the Save as... option to name and save your new master file. ✐ Note: To export to a master file, set the Master file field in the Export dialog to your master file. When you export to your master file, it will contain only the sheets and parameters included in that master file. - Page 89 Post-process Using the PC App ✐ Note: To use the sharing feature, the device from which you are sharing must be set up with your email account. How to share a project 1. Click to open the project sharing dialog, which immediately prompts you to enter a password to protect the project.
- Page 90 TERMINOLOGY Frequency weighting corresponding approximately to the 40 dB equal loudness curve, that A-weighting filter is to say, the human ear’s response at low to medium sound levels. It is by far the most com- monly applied frequency weighting and is used for all levels of sound. Frequency weighting corresponding approximately to the 70 dB equal loudness curve, that B-weighting filter is to say, the human ear’s response at medium sound levels.
- Page 91 Terminology A widely used noise parameter that calculates a constant level of noise with the same energy content as the varying acoustic noise signal being measured. The letter 'A' denotes LAeq that the A-weighting has been included and 'eq' indicates that an equivalent level has been calculated.
- Page 92 Terminology Maximum peak of the acceleration, velocity, displacement signal or voltage input with fre- Peak quency weighting Linear. Any pressure variation that the human ear can detect. Just like dominoes, a wave motion is set off when an element sets the nearest particle of air into motion. This motion gradually spreads to adjacent air particles further away from the source.
Need help?
Do you have a question about the B&K 2245 and is the answer not in the manual?
Questions and answers