Table of Contents
Advertisement
Quick Links
Advertisement
Table of Contents

Related Manuals for KBL K7 Series


Summary of Contents for KBL K7 Series
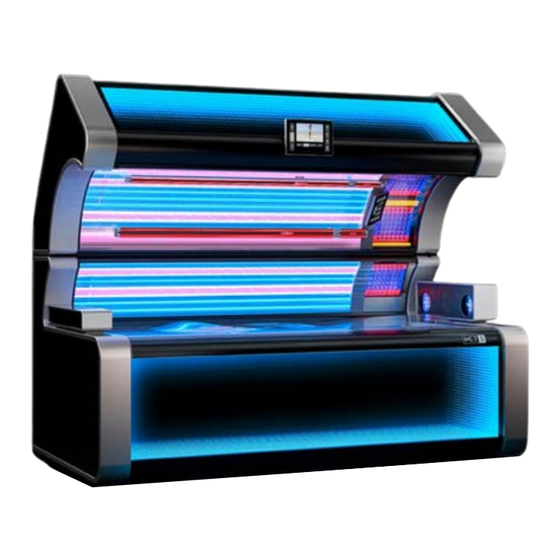
- Page 1 PRODUCT LINE P R O D U K - T R E I H E TANNING DEVICE ASSEMBLY INSTRUCTIONS...
- Page 3 Technical equipment and versions of the devices are in accordance with the legal prescriptions of the respective country of destination. Export to the European Union of the KBL products, listed in this guide, or operation of the systems in these countries, are not permitted. KBL does not accept any manufacturers liability in case this direction is not adhered to.
-
Page 4: Table Of Contents
4.12 Remove canopy ........32 4.13 Remove feet ..........37 4.14 Transport rear wall ........39 A s s e m b l y I n s t r u c t i o n s | KBL K5 K7 PRODUCT LINE... -
Page 5: General Information
• Moderate or minor injury is possible. before being opened, lamps and hous- ing parts may be hot. A s s e m b l y I n s t r u c t i o n s | KBL K5 K7 PRODUCT LINE... -
Page 6: Definitions
Depending on the weight of the components, lifting them might require several people. A s s e m b l y I n s t r u c t i o n s | KBL K5 K7 PRODUCT LINE... -
Page 7: Safety Notes
(due to electro-magnetic interference or other causes), then terminate installation / operation and consult the factory before continuing. A s s e m b l y I n s t r u c t i o n s | KBL K5 K7 PRODUCT LINE... -
Page 8: Installation Site & Dimensions
See also chapter technical data in the operating instructions. 3.1 Dimensions and Distances DIMENSIONS 51,19“ 90,56“ 54,06“ 1,142“ A s s e m b l y I n s t r u c t i o n s | KBL K5 K7 PRODUCT LINE... -
Page 9: Disassembly
Suction cup Tape rule or folding rule Spirit level A s s e m b l y I n s t r u c t i o n s | KBL K5 K7 PRODUCT LINE... -
Page 10: Unpack Tanning Device And Accessories
4.2.2 OPEN CANOPY A s s e m b l y I n s t r u c t i o n s | KBL K5 K7 PRODUCT LINE... - Page 11 4.2.3 VENT STACK AND CARTONS 4.2.4 OPEN BENCH A s s e m b l y I n s t r u c t i o n s | KBL K5 K7 PRODUCT LINE...
- Page 12 4.2.5 DISPLAY CARTON A s s e m b l y I n s t r u c t i o n s | KBL K5 K7 PRODUCT LINE...
-
Page 13: Disassemble Shoulder Tanner & Air Outlet Foot
4.3 Disassemble shoulder tanner & air outlet foot 4.3.1 DISCONNECT PLUGS A s s e m b l y I n s t r u c t i o n s | KBL K5 K7 PRODUCT LINE... - Page 14 ❷ ❷ ❷ ❷ upwards ❶ ❶ A s s e m b l y I n s t r u c t i o n s | KBL K5 K7 PRODUCT LINE...
-
Page 15: Remove The Acrylic Air Guide Pane And The Bed Pane
4.4 Remove the acrylic air guide pane and the bed pane 4.4.1 OPEN BED PANE 4.4.2 REMOVE ACRYLIC AIR GUIDE PANE A s s e m b l y I n s t r u c t i o n s | KBL K5 K7 PRODUCT LINE... - Page 16 4.4.3 REMOVE TELESCOPIC PROPS SW10 4.4.4 REMOVE BED PANE A s s e m b l y I n s t r u c t i o n s | KBL K5 K7 PRODUCT LINE...
-
Page 17: Remove Front Panel
4.5 Remove front panel 4.5.1 OPEN BED 4.5.2 REMOVE THE SCREWS A s s e m b l y I n s t r u c t i o n s | KBL K5 K7 PRODUCT LINE... - Page 18 4.5.3 REMOVE FILTER ELEMENT 4.5.4 PULL PLUG A s s e m b l y I n s t r u c t i o n s | KBL K5 K7 PRODUCT LINE...
- Page 19 4.5.5 REMOVE FRONT PANEL Disassembly First lift the front, then remove it. A s s e m b l y I n s t r u c t i o n s | KBL K5 K7 PRODUCT LINE...
-
Page 20: Remove Aqua/Aroma Unit
4.6 Remove Aqua/Aroma unit 4.6.1 PULL PLUG 4.6.2 PULL OFF BOTH HOSES A s s e m b l y I n s t r u c t i o n s | KBL K5 K7 PRODUCT LINE... - Page 21 4.6.3 REMOVE AQUA/AROMA UNIT A s s e m b l y I n s t r u c t i o n s | KBL K5 K7 PRODUCT LINE...
-
Page 22: Remove Air Conditioner
4.7.1 PULL PLUG �� �� �� �� �� �� �� �� 4.7.2 REMOVE AIR CONDITIONER A s s e m b l y I n s t r u c t i o n s | KBL K5 K7 PRODUCT LINE... -
Page 23: Remove Bed
4.8 Remove bed 4.8.1 PULL PLUGS 4.8.2 REMOVE BED DAMPERS 3 mm A s s e m b l y I n s t r u c t i o n s | KBL K5 K7 PRODUCT LINE... - Page 24 • After removing the dampers, carefully place the bed on the electronic box. A s s e m b l y I n s t r u c t i o n s | KBL K5 K7 PRODUCT LINE...
-
Page 25: Remove Electronic Box
4.9 Remove electronic box 4.9.1 PULL PLUGS A s s e m b l y I n s t r u c t i o n s | KBL K5 K7 PRODUCT LINE... - Page 26 4.9.2 DISCONNECT GROUND CABLE 4.9.3 REMOVE THE COVER PLATE OF THE ELECTRONICS TRAY A s s e m b l y I n s t r u c t i o n s | KBL K5 K7 PRODUCT LINE...
- Page 27 4.9.4 DISCONNECT PATCH AND CHANNEL SELECTION CABLE 3 mm Channel Selection 4.9.5 DISCONNECT MAIN FAN PLUG A s s e m b l y I n s t r u c t i o n s | KBL K5 K7 PRODUCT LINE...
- Page 28 4.9.6 OPEN ELECTRONICS TRAY 4.9.7 DISCONNECT MAINS CABLE 3 mm A s s e m b l y I n s t r u c t i o n s | KBL K5 K7 PRODUCT LINE...
- Page 29 4.9.8 REMOVE ELECTRONIC BOX A s s e m b l y I n s t r u c t i o n s | KBL K5 K7 PRODUCT LINE...
-
Page 30: Remove Rear Air Housing
4.10 Remove rear air housing 4.10.1 PULL PLUGS 4.10.2 REMOVE AIR HOUSING A s s e m b l y I n s t r u c t i o n s | KBL K5 K7 PRODUCT LINE... -
Page 31: Fold Down Canopy
4.11 Fold down canopy 4.11.1 FOLD DOWN CANOPY A s s e m b l y I n s t r u c t i o n s | KBL K5 K7 PRODUCT LINE... -
Page 32: Remove Canopy
4.12.1 LOOSEN THE LOCKING SCREW AND LOCK THE HINGE ISK5 SW17 4.12.2 MARK THE POSITION OF THE PANE (OPTIONAL) A s s e m b l y I n s t r u c t i o n s | KBL K5 K7 PRODUCT LINE... - Page 33 Plug connection Lift the Infinity Mirror slightly and release the plug connection through the gap. A s s e m b l y I n s t r u c t i o n s | KBL K5 K7 PRODUCT LINE...
- Page 34 (Dual Lock). 4.12.6 REMOVE FRONT PLASTIC PANELS (OPTIONAL) A s s e m b l y I n s t r u c t i o n s | KBL K5 K7 PRODUCT LINE...
- Page 35 4.12.7 REMOVE UPPER PANELING (OPTIONAL) 4.12.8 REMOVE SIDE PANELING (OPTIONAL) A s s e m b l y I n s t r u c t i o n s | KBL K5 K7 PRODUCT LINE...
- Page 36 4.12.9 UNSCREW INTAKE AIR BOOTS AND REMOVE CABLES AND HOSES 4.12.10 REMOVE CANOPY A s s e m b l y I n s t r u c t i o n s | KBL K5 K7 PRODUCT LINE...
-
Page 37: Remove Feet
4.13.2 DISCONNECT THE CONNECTOR ON THE LEFT SIDE AND REMOVE THE PANELING ���� ���� A s s e m b l y I n s t r u c t i o n s | KBL K5 K7 PRODUCT LINE... - Page 38 4.13.3 REMOVE FEET SW17 A s s e m b l y I n s t r u c t i o n s | KBL K5 K7 PRODUCT LINE...
-
Page 39: Transport Rear Wall
4.14 Transport rear wall 4.14.1 TRANSPORT REAR WALL A s s e m b l y I n s t r u c t i o n s | KBL K5 K7 PRODUCT LINE... -
Page 40: Assembly
Install the cover plate of the electronics tray • Connect ground cable • Connect plugs A s s e m b l y I n s t r u c t i o n s | KBL K5 K7 PRODUCT LINE... - Page 41 • Connect plugs Install display Adjust the feet and the lock of the bed A s s e m b l y I n s t r u c t i o n s | KBL K5 K7 PRODUCT LINE...
-
Page 42: Install Canopy
5.1.1 INSTALL CANOPY 5.1.2 LOOSEN THE HINGE AND TIGHTEN THE LOCKING SCREW ISK5 SW13 A s s e m b l y I n s t r u c t i o n s | KBL K5 K7 PRODUCT LINE... -
Page 43: Install Display
5.2 Install display 5.2.1 CONNECT PLUGS 5.2.2 FIXING DISPLAY A s s e m b l y I n s t r u c t i o n s | KBL K5 K7 PRODUCT LINE... -
Page 44: Adjust The Feet And The Lock Of The Bed
Adjust the end stop so that the bed can be opened and closed without any problems. A s s e m b l y I n s t r u c t i o n s | KBL K5 K7 PRODUCT LINE... -
Page 45: Install Acrylic Air Guide Pane
�� �� �� �� �� �� M4 knurled nuts included in the mounting material. (312.06-30109) A s s e m b l y I n s t r u c t i o n s | KBL K5 K7 PRODUCT LINE... -
Page 46: Connections & Initial Operation
“I” or additional indicator light), fitted externally on the site side. This means that for full separation each A s s e m b l y I n s t r u c t i o n s | KBL K5 K7 PRODUCT LINE... -
Page 47: Connecting An External Audio Source
BCD coding. PULS 5 6 2 1 3 4 A s s e m b l y I n s t r u c t i o n s | KBL K5 K7 PRODUCT LINE... -
Page 48: Level Adjustment Studio Music Signal
Remove filter cartridge. Installation instructions for filter cartridges: -> Retaining clips always faced outwards! A s s e m b l y I n s t r u c t i o n s | KBL K5 K7 PRODUCT LINE... -
Page 49: Connecting External Timer
• Remove the cover from the T-Max box. • Insert the T-Max board to the socket pins of the box. A s s e m b l y I n s t r u c t i o n s | KBL K5 K7 PRODUCT LINE... -
Page 50: Aqua Cool And Aroma Connections
Connector (liquid-level monitoring) Connection to Aqua Cool canister Compressor with compressed-air connection Aroma box A s s e m b l y I n s t r u c t i o n s | KBL K5 K7 PRODUCT LINE... - Page 52 Ringstraße 24-26 56307 Dernbach / Germany fon: +49 (0) 26 89.94 26-0 fax: +49 (0) 26 89.94 26-66...
Need help?
Do you have a question about the K7 Series and is the answer not in the manual?
Questions and answers