Advertisement
Quick Links
Troubleshooting and errors
•
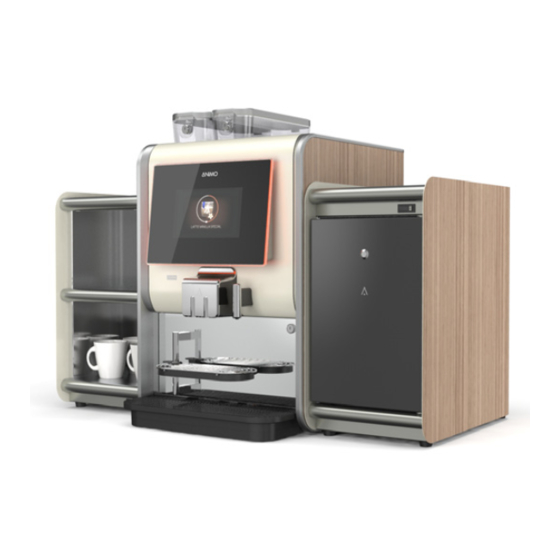
OptiMe with Fresh Milk option
•
Refrigerator
•
Cup heater
•
Water reservoir
Content
1.
Basics
2.
Errors codes
3.
Non error codes related problems
4.
Fresh milk system problems
5.
Refrigerator
6.
Cup heater
7.
Water reservoir
1. Basics
From Software version V 1.2 (release date April 2020)
the error screen contains extra information.
Error display information
- Reset button [A]
When the door is closed the reset button is NOT
active. This prevents users from pressing the reset
button. Only after opening the door by the operator the
reset button is active (red).
- Error number & description [B]
The error is also stored in the error log, which stores the
20 last errors complete with date and time.
- Instructions for the machine Operator [C]
If the error if caused by something the machine opera-
tor can try to solve, instructions are displayed here.
- QR code [D].
Scan the QR code (if available) with your smart phone
for additional online instructions.
- Dealer information [E].
This information will only appear if its entered during
the installation of the machine.
A
RESET SOFTWARE
B
1 / 38
OptiMe
OptiMe
C
Check the water supply (pressure), open the
water tap completely. Check the hoses for
kinks. Check the level of the (optional) water
tank. Open door and press reset
D
SCAN QR CODE FOR MORE
INFORMATION OR TIPS
E
DEALER INFO:
Name
Phone number
Email address
Advertisement

Subscribe to Our Youtube Channel
Related Manuals for Animo OptiMe


Summary of Contents for Animo OptiMe
- Page 1 OptiMe OptiMe Troubleshooting and errors • OptiMe with Fresh Milk option • Refrigerator • Cup heater • Water reservoir Content Basics Errors codes Non error codes related problems Fresh milk system problems Refrigerator Cup heater Water reservoir 1. Basics From Software version V 1.2 (release date April 2020) the error screen contains extra information.
- Page 2 OptiMe OptiMe Reset an error (operator) Follow the instructions [C] and [D] is displayed, for Check the water supply (pressure), open the water tap completely. Check the hoses for example: check water pressure and restore it. The kinks. Check the level of the (optional) water tank.
- Page 3 OptiMe OptiMe 4. To check components IN- and OUTPUT go to: SERVICE MENU / 2.07 HARDWARE TEST / 2.07.00 INPUTS or 2.07.01 OUTPUTS and search further what’s causing the problem. 2.09.03 RESET ERROR 5. To reset the software, go to: NEE? DRUK ANNULEREN / JA? DRUK OK SERVICE MENU / 2.09 REMOVE LOG FILES /...
-
Page 4: Error Codes
OptiMe OptiMe 2. Error codes WARNING • When there are defects and/or (cleaning) activities in the machine, the plug must be removed from the wall socket before the machine is opened. Introduction Check, before troubleshooting, whether all the components are still in the correct location. To do this, remove the back- and side covers from the machine and make sure that all circuit boards, connectors, wiring looms and hoses are still properly mounted. - Page 5 OptiMe OptiMe Display Possible cause Solution The brewer position switches detect Check whether the brewer [A] is that the brewer is NOT rotating. properly positioned in the motor unit [B]. The control has disabled the brewer motor output. Check if the brewer runs if when the brewer motor is activated in the service menu 2.07 Hardware test / outputs /...
- Page 6 OptiMe OptiMe Display Possible cause Solution The problem can be caused by bad contact sockets from the 2 and 4 pole Molex connectors. Check if all the socket (male/female) make contact with each other. The connectors are to be found behind the left panel.
- Page 7 OptiMe OptiMe Display Possible cause Solution Check whether mixer is contaminated or incorrectly mounted. MIXER ERROR Mixer motor stalled. Clean and/or check whether the rotor Mixer motor outputs overloaded turns freely. The motor current is over 3000mA. Check the motor current in the service menu 2.07 Hardware test / outputs /...
- Page 8 OptiMe OptiMe Display Possible cause Solution Ingredient motor and valve output Carry out the checks as specified for group overloaded (current too high). E10 and E11. OUTPUT ERROR The control has disabled the output. Air break minimum water level switch...
- Page 9 OptiMe OptiMe Display Possible cause Solution Wipe the upper brewer filter with a clean towel. Maximum coffee preparation time has been exceeded (120 sec ). Run the BREWER CLEANING program. Check if the coffee grind is not too fine. BREW...
- Page 10 OptiMe OptiMe Display Possible cause Solution Rotate the switch drum by hand and check of both switch positions are During the initialisation process runs passing by. the brewer 1 or 2 complete cycles. Check the brewer switches for correct During this cycle both brewer switch- operation in the service menu 2.07...
- Page 11 OptiMe OptiMe Display Possible cause Solution Remove the back wall of the machine. Locate the pump. Remove the bypass hose from the brass control valve (see red circle). The pump just makes a noise (vibrate). There is probably an air bubble in the pump supply that prevents the pump from taking water in.
- Page 12 OptiMe OptiMe Display Possible cause Solution continuation... Try to shock the pump by tapping it with Pump still does not work despite the back of a screwdriver. hearing the relay clicking and the pump gets power No result Replace the pump.
- Page 13 OptiMe OptiMe Display Possible cause Solution continuation... The espresso pump KW2 is Check if the flow meter FL1 connector is activated and takes water from the mounted correctly. air break, but the flow meter FL1 does not register water flow.
- Page 14 OptiMe OptiMe HEX17 O-ring 10,82 x 1,78mm Display Possible cause Solution ww-yy M12 x 1 AISI 316L / 1.4404 Check the temperature sensor operation in the service menu 2.07 Hardware test Temperature sensor measures a / inputs / temperature. temperature over 125 °C or has a short circuit.
- Page 15 OptiMe OptiMe Display Possible cause Solution Check if the brewer motor runs. Check if the brewer unit is blocked. The brewer has left the home Check if dispensed ground coffee does position but did not reach the brew not exceed the brewer cylinder volume position within 5,1 sec.
- Page 16 OptiMe OptiMe Display Possible cause Solution The brewer has left its brewing Check if the brewer motor runs. HEX17 O-ring 10,82 x 1,78mm BREWER REACH position but did not reach its home Check if the brewer unit is blocked. ww-yy M12 x 1 position within 6,6 sec.
- Page 17 OptiMe OptiMe Display Possible cause Solution Steam boiler and/or NTC sensor is TEMPERATURE Temperature sensor measures a below 0 °C. Let the machine warm up boiler temperature below 0 °C. STEAM BOILER to room temperature. TO LOW Temperature sensor measures a Check the temperature sensor operation temperature over 145°C or the NTC...
-
Page 18: Steam Boiler
OptiMe OptiMe Display Possible cause Solution E38: During use the steam boiler Check if espresso pump is functioning. does not REFILL or fills up to slowly. Service menu 2.07 Hardware test / The steam boiler dosing valve DV3 inputs / espresso pump... - Page 19 OptiMe OptiMe Display Possible cause Solution Check if espresso pump is functioning. Service menu 2.07 Hardware test / inputs / espresso pump. During commissioning the EMPTY If the pump does not function please coffee boiler does not fill or fills up HOT WATER follow the instructions in chapter 3.
- Page 20 OptiMe OptiMe 3. No error code related problems (under construction) Problem Possible cause Solution Valve DV6 is located just below the Valve DV6 which is located just before brewer motor and can be reached from the brewer inlet does not opens after No coffee is brewed.
- Page 21 OptiMe OptiMe Problem Possible cause Solution To clean the valve: Disassemble the coil from the body. Clean the silicon lever and the inside of the valve body. Pay attention to the notch position when assembling the valve. Moer (boven zijde)
- Page 22 OptiMe OptiMe Problem Possible cause Solution The coffee grinder is jammed by a foreign object. Disassemble the upper part where the Grinder motor(s) does grinder(s) are build-in. not run. Disassemble the top half of the coffee grinder. Vacuum / brush away all coffee residues and check the grinding discs for damage.
- Page 23 OptiMe OptiMe Problem Possible cause Solution Please check the following connections and signals. Power (top); The grinder board must be connected to the 230Vac brown and blue. Fuse: the fuse secures the Phase, 3,15A Grinder motor(s); both motors (230Vdc) must be connected on the two (2) pin connectors.
- Page 24 OptiMe OptiMe Problem Possible cause Solution LED; the LED lights up when one of the grinder motor signals are activated. Signals; from the I/0 board - Red; 24V from the I/0 Platine. - Brown; Signal to start grinder motor 1 (left grinder).
- Page 25 OptiMe OptiMe 4. Fresh milk system problems Use below drawing to identify the mentioned components mentioned in the trouble shooting table. 10mm 10mm [D2] [D1] entrée sortie Duckbill valve [D1] Lippenventil [D2] Valve bec de canard press presse open ouvert closed fermé...
- Page 26 OptiMe OptiMe Problem Possible cause Solution (continuation) Check the duckbill valve [D1] for: - Correct assembly - Correct function and Duckbill valve is missing, contamination. defect or dirty Clean or replace if Steam leaves necessary. from the milk Art. no. duckbill valve: 1007799 outlet.
- Page 27 OptiMe OptiMe Possible Problem Solution cause Milk pump speed to Check the milk temperature. low. Calibrate the milk temperature The milk is too hot Check the milk inlet tube [B] False air enters the for cracks. system Shorten or replace if necessary...
- Page 28 OptiMe OptiMe Possible Problem Solution cause (continuation) Check if the air valve [G] needs re-adjustment. Air valve [G] Milk spouts adjustment / fixation Check if the air valve [G] and from dispensing needs attention stainless steel coupling are outlet properly tightened.
- Page 29 OptiMe OptiMe Possible Problem Solution cause Check the steam boiler temperature setting. Factory setting = 127°C (approx. 1,46 Bar) Clean the steam venturi injector. The injector opening ø 1,4mm can be constipated or reduced by caked milk remains. Use a small cleaning brush set to clean out the opening.
- Page 30 OptiMe OptiMe Problem / Possible cause Modification Milk temperature to low. Reducing the milk pump speed does not have effect. Insufficient steam supply to the milk venturi. During 24/7 use of the machine, sealing of the steam supply valve can develop a deformation leading to a reduced flow resulting in the above mentioned problem.
- Page 31 OptiMe OptiMe Problem / Possible cause Dirty duckbill valves By placing the duckbill valves deeper in the milk circuit, they are cleaned even better during the rinsing process (water) and the cleaning process (milk cleaner). Milk Venturi and Rinse Adapter Blocks [A]...
- Page 32 OptiMe OptiMe Continuation... Modification Explanation of the images on the right: 1. Original duckbill position (air inlet) 2. New duckbill position (air inlet) 3. Original duckbill position (milk inlet) 4. New duckbill position (milk inlet) Select the link below or scan the QR code...
- Page 33 OptiMe OptiMe 5. Refrigerator Problem Possible cause Solution Make sure the power plug is correctly plugged into the power sockets. Make sure the main power switch is on ‘I’ position. The refrigerator will not − O − O start Power supply Make sure the power socket is working.
- Page 34 OptiMe OptiMe Problem Possible cause Solution ..continued from Make sure the thermostat is not OFF. previous page The thermostat can only be reached by removing the top cover of the refrigerator. The refrigerator will not Thermostat start The notch (in the red circle) shows the Position at which the thermostat is set to approx.
- Page 35 OptiMe OptiMe Problem Possible cause Solution Make sure the door is correctly closed Door closure and also the gasket is not damaged in any point. Make sure the refrigerator is not too Position close to a heating source. Make sure the refrigerator is positioned...
-
Page 36: Cup Heater
OptiMe OptiMe 6. Cup heater Problem Possible cause Solution Make sure the power plug is correctly plugged into the power sockets. Make sure the main power switch is on ‘I’ position. − O The cup hater does not Power supply... - Page 37 OptiMe OptiMe 7. Water reservoir (under construction) Problem Possible cause Solution 37 / 38 2021/01 Rev. 0.4...
- Page 38 OptiMe OptiMe 38 / 38 2021/01 Rev. 0.4...
Need help?
Do you have a question about the OptiMe and is the answer not in the manual?
Questions and answers