
Related Manuals for Axon Body 4


Summary of Contents for Axon Body 4
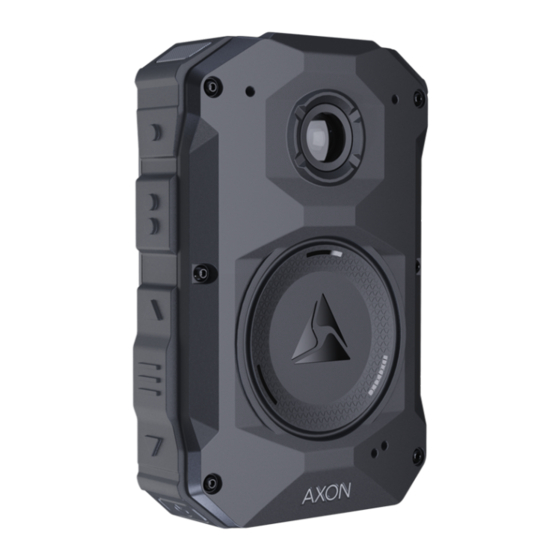
- Page 1 Body 4 Camera User Guide Camera models: AX1037, AX1038 Dock models: AX1039, AX1040 Rev: 23 Apr 2024...
- Page 2 Axon Enterprise, Inc. 17800 N 85th St Scottsdale, AZ 85255 , Axon Body, Axon Dock, Axon Evidence, and Axon Fleet are trademarks of Axon Enterprise, Inc., some of which are registered in the US and other countries. For more information, visit www.axon.com/legal.
-
Page 3: Table Of Contents
Body 4 Camera User Guide Contents Introduction and registration Introduction and registration - ABW Important safety and health information Additional reading Register camera Dock-based registration (recommended) Registration with Axon Device Manager Registration with View XL Standalone mode FAQs Get to know your camera... - Page 4 System requirements Configuration requirements Using BDC on Respond desktop or mobile Multiple viewers Multiple livestream windows Camera modes Use BDC on the Body 4 Flex POV Module Flex POV cable connection Connect Use the module Icons, LEDs, and sounds Icons, LEDs, and sounds - ABW...
- Page 5 Body 4 Camera User Guide Axon View XL Standalone mode (Windows) Care and maintenance Care and maintenance - ABW Clean the camera Charge the battery Charge without a dock Internal clock Moisture Camera storage Troubleshooting Troubleshooting - ABW General FAQs...
-
Page 6: Introduction And Registration
Body 4 Camera User Guide Introduction and registration Axon Body 4 is a body-worn camera system for use in tough environmental conditions encountered by law enforcement, corrections, military, and security personnel. The Body 4 Camera records events for secure storage, retrieval, and analysis on Axon Evidence or Axon Evidence Local. -
Page 7: Dock-Based Registration (Recommended)
You can register up to 100 cameras at once if you have an Axon Dock for each camera. You must keep your mobile device with ADM within 30 feet of all the cameras. 1. Ensure the Automatic Camera Registration setting is turned off in Axon Evidence. - Page 8 Body 4 Camera User Guide 4. Log in to ADM and tap Settings 5. Go to Registration, select Devices, then Body 4. Axon Enterprise, Inc.
-
Page 9: Registration With View Xl Standalone Mode
Body 4 Camera User Guide 6. Review the device registration setup and tap Next to move to the next screen. Tap Start Scan to start the registration process. 7. ADM detects and prepares unregistered cameras. The number of detected and prepared cameras appears at the top of the ADM screen. -
Page 10: Faqs
View XL Version v1.17 or later installed on a Windows computer A camera with USB-C cable 1. Launch View XL and enter your agency Axon Evidence URL. 2. Sign in using your Axon Evidence credentials. 3. Select Launch Standalone Mode. -
Page 11: Get To Know Your Camera
Body 4 Camera User Guide Get to know your camera Button actions There are several buttons that perform as described below. Front view 1. Programmable Button 1 2. Programmable Button 2 3. Volume up 4. Select ... - Page 12 POV Connector Port – Used to connect the POV and body camera together via the POV Cable. All Axon Body 4 Cameras ship with a plastic cover over the port. If a camera will not be using the POV, leave this cover on to protect the port.
-
Page 13: Accessories And Mounts
Camera Display – Shows information on camera status and activity. Different information is shown when the camera is in the field and in an Axon Dock. Some icons may not be active or displayed at your agency. The display is divided into a Status Bar and Activity Area. - Page 14 If your clothing is too thick for the magnets to connect securely, wear the lanyard over your clothing. In general, Axon mounting systems consist of the attachment piece (called the key) on the camera and the attachment receiver (called the lock) on the mount. To lock a...
-
Page 15: Configure Your Camera
Axon View product page or see the Axon View for Devices User Manual for Android for details about using Axon View. Your camera must be turned on and paired with your mobile device. Adjust volume During normal operation, the camera emits beeping sounds, called audio prompts, to notify you of the camera status. -
Page 16: Change Camera Vibration
Use Axon View to turn camera vibrations off and on. 1. Open the Axon View app on your mobile device and go to Settings. 2. Tap the switch to the right of Vibration to change the setting. -
Page 17: Programmable Buttons
Me and the default behavior of Programmable Button 2 will be No Function. Optimized battery capacity If this setting is enabled in the Admin section of Axon Evidence, the camera will only charge to about 90% capacity and display FULL when finished charging instead of 100%. -
Page 18: Other Settings (Admin)
Signal technology does not transmit a signal to end recording. The camera must be stopped manually. Axon Signal technology cannot turn an Axon system on. If the camera is turned off, it will not record, even if Axon Signal instructs it to. -
Page 19: Operate Your Camera
This feature is intended to capture the video of an incident just before a recording begins. Body 4 does not capture audio within the pre-event buffer by default (but can be set to do so by an admin). -
Page 20: Start Recording Mode (Event)
SAVING and then READY and the Operation LED blinks green Mute audio recording If your organization’s administrator has configured your Body 4 Camera to do so, you can use Select to enter mute mode (disable audio recording) while recording video. -
Page 21: Illuminate The Camera Display
While in this state, an automatic activation enabled at your agency will not initiate camera recording. Note The ability to use Sleep mode is enabled by your agency Axon Evidence administrator and may not be available at your agency. Sleep mode is useful for situations where camera users may need momentary privacy. -
Page 22: On-Camera Categorization
On-camera categorization On-camera categorization lets you add categories to videos directly from the camera. To do so, ensure your admin enables the On Camera Categorizaton feature in Axon Evidence at Admin > Axon Body 4 under Device management. Once enabled, after you end a recording, the BWC will prompt you with a list of categories. - Page 23 5. When finished, hold Select to save the selected categories to the recording. Any selected categories will save automatically if another recording starts while you're assigning them, for example, if triggered by Axon Signal. You can also tag videos using the...
-
Page 24: Watch Me
1. Programmable Button 1 If the Body 4 is buffering, a Watch Me request will start a recording. If the camera is already recording, it will continue recording after the Watch Me request. To cancel a Watch Me request, simply long-press Event to end the recording. -
Page 25: Bi-Directional Communications
Up to 25 Respond viewers can participate in a single conversation. All conversations are recorded and uploaded to Axon Evidence as part of the evidentiary video, just like any other Axon body camera recording. -
Page 26: Using Bdc On Respond Desktop Or Mobile
Body 4 Camera User Guide Using BDC on Respond desktop or mobile 1. Sign in. 2. Select the Respond tab... Axon Enterprise, Inc. - Page 27 Body 4 Camera User Guide 3..to view the Respond map and start a Livestream from a Body 4-equipped officer. The camera must be recording to be livestreamed. Grant microphone access if needed. 4. Select Stream Video on a user’s tile.
- Page 28 Body 4 Camera User Guide 5. Select Start Call to start bi-directional communication. 6. Wait to be connected to the Body 4 camera. 7. Your microphone is muted upon successfully connecting. Press and hold the push-to-talk (PTT) button with your mouse or by holding the space bar on your keyboard.
-
Page 29: Multiple Viewers
Body 4 Camera User Guide 8. You may now speak to the Body 4 camera user. Release the mouse (or space bar) when you are done. Multiple viewers Just like livestreaming, bi-directional communications supports up to 25 simultaneous Respond viewers per Body 4 camera. If a conversation is ongoing between a Respond viewer and camera user, any Respond viewer who opens the livestream to that camera will automatically be added to the conversation. -
Page 30: Camera Modes
Camera modes The Body 4 camera may enter modes or conditions that make it unavailable for bi- directional communications. When this happens, Axon Respond will update to prevent you from talking. Here are two camera modes that do not allow bi-directional... - Page 31 Body 4 Camera User Guide Speaker muted When the Body 4 camera’s speaker volume is muted, the Respond user is not allowed to talk. Microphone muted When the camera's microphone is muted, you will not hear any audio. If this happens, any Respond viewers in the conversation may continue to talk to each other and the camera user will still hear them, but they will not hear the camera user.
-
Page 32: Use Bdc On The Body 4
Body 4 Camera User Guide Use BDC on the Body 4 While the Body 4 camera is livestreaming, a LIVE icon appears on the display: If a Respond user starts a conversation, the camera will vibrate, play a tone, and the display will briefly show COMMS OPEN to inform you that someone has started a conversation and audio can start playing from the camera's speaker. - Page 33 COMMS CLOSED. Respond viewer joins or leaves When a Respond user joins or leaves the conversation, the Body 4 will vibrate, play a tone, and the display will indicate the total number of participants. If no Respond viewers remain, the conversation ends.
- Page 34 Body 4 Camera User Guide Microphone control Mute the camera's microphone while recording also prevents Respond users from hearing camera audio. Axon Enterprise, Inc.
-
Page 35: Flex Pov Module
Mount Magnet – Connects to the POV Mount Flex POV cable connection The Flex POV Module and the Axon Body 4 Camera work with a purpose-built cable with a smaller, straight connector at one end and a larger, right-angle connector at the other. -
Page 36: Connect
Use the module When the Axon Flex POV Module is attached to the body camera, Body 4 will use the POV video sensor instead of the body camera’s. If the POV module is attached while buffering, the view will automatically switch from the body camera to the POV module. - Page 37 Ask the user to “PRESS SELECT TO SWITCH TO POV” After the user presses the select button, Body 4 will end the recording on the body camera and start a recording on the POV Module. Note If the camera is recording from the body camera while the POV Module is attached and no action is taken, it will continue to record from the body camera.
-
Page 38: Icons, Leds, And Sounds
Visual notifications The display is divided into a Status Bar and Activity Area. Different information displays when the camera is in the field and in an Axon Dock. Some icons may not apply at your agency. Icons during use... -
Page 39: Icons And Triad Leds While Docked
Body 4 Camera User Guide Activity Area Icon Description Operation LED Axon Respond Livestreaming* Blinking purple Axon Respond Voice Comms* Blinking purple Axon Respond Voice Comms, Blinking red participants* L-READY or Buffering with POV (right/left Blinking green orientation)* R-READY Microphone off (mute mode) -
Page 40: Audible And Haptic Notifications
10 during installation seconds after undocking. Network error – Check network connection, see NETWORK device page in Axon Evidence and troubleshooting Blinking red and ERROR instructions at help.axon.com. green Number of videos on camera Updating firmware or settings –... - Page 41 Body 4 Camera User Guide Haptic Notification Operating Mode or Action Audio Notification (vibration) Event marker captured None One – short duration Exit Stealth mode None Two – short duration Lights off None One – long duration Low battery notifications at Four quick high-pitch tones Four –...
-
Page 42: Admin Settings
Body 4 Camera User Guide Admin settings This section discusses camera settings available in Axon Evidence under Admin > Devices and Applications > Body Camera > Body 4. Not all settings may be applicable at your agency. Video Action Definition Quality Determines the camera’s recording quality. -
Page 43: Audio
Enables audio to be recorded in the pre-event buffer. Audio Audio in Video Recall Enables audio recording while capturing Video Recall evidence. Lights If enabled, lights can still be configured at the user level through Axon View or on the device. Action Definition Front Light Illuminates the front-facing Triad camera lights to provide a visible indication of recording status. -
Page 44: Axon Respond
Sets the maximum upload speed in megabits per second for each Upload Speed individual camera. Signal Configure assigned officer activation in Axon Evidence under Admin > Signal. Action Definition Signal Activation Lets cameras be activated by Axon Signal products. When disabled, cameras can't be activated by Axon Signal products. -
Page 45: App Support
(Fleet), and Fleet Dashboard. When disabled, cameras can still be connected via wired connection to View XL (Standalone). Video playback in Lets users play video still on the camera from Axon View, View XL Axon Applications (Fleet and Standalone), and Fleet Dashboard. -
Page 46: Firmware Download
Body 4 Camera User Guide Firmware download Action Definition Firmware Download Adjusts the timeframe in which cameras download a firmware Timeframe update. A shorter timeframe means cameras download firmware sooner but may result in congestion on your network. User permissions and mute configuration... -
Page 47: Device Management
Body 4 Camera User Guide Device management Action Definition Settings return to User settings return to default settings when the camera is docked. default in dock On Camera When enabled, a user will be prompted to add one or more... -
Page 48: Axon View
Axon View XL Standalone mode (Windows) This camera can be connected to a Windows laptop or computer with Axon View XL to allow priority upload of videos from the camera to Axon Evidence and to charge the camera. Using Axon View XL in standalone mode is separate from using it with Axon Fleet products. - Page 49 Body 4 Camera User Guide Connect the camera to the laptop or computer with a USB C cable and use Axon View XL standalone mode. If your agency uses this feature, the administrator must set the appropriate Axon Evidence permissions to allow users to sign into View XL.
-
Page 50: Care And Maintenance
Ensure the Body 4 microphone openings are clean and clear of debris. Charge the battery Charge the camera battery by placing the camera in the Body 4 Dock or connecting a USB-C cable. Note Ensure the USB port is dry and free of dirt and debris before placing the camera in a dock or connecting a USB-C cable. -
Page 51: Charge Without A Dock
90% or higher. Internal clock Place your camera in an Axon dock or connect it to View XL Standalone mode to update the camera’s internal clock. Moisture Don’t charge your camera while the USB-C connector on the camera or dock is wet. -
Page 52: Camera Storage
Camera storage -04–95 °F Do not store Axon body-worn cameras in environments where the -20–35 °C temperature is likely to be outside the maximum (such as under direct sunlight, near heaters, or in a vehicle in extremely hot weather) or minimum values. -
Page 53: Troubleshooting
Error Code 1004 – There is an issue with the digital video recorder. Restart the camera and check if the issue resolves. Error Code 1006 – There is an issue connecting with Axon Evidence for video uploads. It can be resolved by un-docking and re-docking the camera. -
Page 54: Axon Dock Faqs
How do I ensure my dock is connected to the network? If your dock is connected to the network, LEDs in the ethernet port blink green or amber. The camera will also be able to upload videos to Axon Evidence immediately upon docking. -
Page 55: Camera Registration
Body 4 Camera User Guide Why can't I access my dock’s Device Profile page on Axon Evidence? Your dock must be registered to use the Device Profile page on Axon Evidence. See the Axon Dock PDF on your camera's product page... -
Page 56: Adm Error Codes
Body 4 Camera User Guide To assign through Axon Evidence: 1. Ensure you have the correct permissions to assign users on Axon Evidence. 2. Select Inventory, then Body Worn Cameras. 3. Search for your device in the Body Camera search bar by the serial number. - Page 57 Sign out and back into ADM. If you can sign in, retry reach your agency’s registration. Otherwise, contact Axon Technical Axon Evidence Support to see if there are any issues with Axon account Evidence. 34, 48, or 50 Camera provisioning...
-
Page 58: Viewing Camera Information On The Display
Body 4 Camera User Guide Viewing camera information on the display View camera information such as serial number on the display using these steps: 1. Double-press Select to enter the device menu. The camera display shows five options: Upload, About, Cellular, Legal, and (if appicable) POV Orientation. -
Page 59: Technical Information
Axon Enterprise warranty provisions are applicable on all Body 4 system products. See Axon Enterprise’s website, www.axon.com, for detailed warranty information. This warranty does not apply, and Axon shall not be liable for any loss, loss of data, damage, or other liability arising out of: ... -
Page 60: Radio Waves
FCC that it does not exceed the limit established by the government-adopted requirement for safe exposure. Axon equipment (models (AX1037, AX1038, AX1039, and AX1040) has been tested and found to comply with the limits for Class B digital devices, pursuant to part 15 of the FCC Rules. -
Page 61: Ised Canada Compliance Statement
Consult Axon Technical Support for help. Axon systems comply with part 15 of the FCC Rules. Operation is subject to the following two conditions: (1) This device may not cause harmful interference, and (2) this device must accept any interference received, including interference that may cause undesired operation. -
Page 62: Declaration Of Conformity And Eu Compliance Statement
Body 4 Camera User Guide Declaration of conformity and EU compliance statement Axon declares that this Axon system is compliant with the requirements of the Radio Equipment Directive (RED) 2014/53/EU and the Electromagnetic Compatibility (EMC) Directive 2014/30/EU of the European Parliament and of the Council. A copy of the original Declaration of Conformity can be found at www.axon.com.
Need help?
Do you have a question about the Body 4 and is the answer not in the manual?
Questions and answers