
Related Manuals for Axon Body 3


Summary of Contents for Axon Body 3
- Page 1 Axon Body 3 Camera User Manual Models AX1021 and AX1023 Document Revision: DRAFT B June 2019...
- Page 2 Javascript is a trademark of Oracle America, Inc. registered in the US and other countries. Axon, Axon Body 3, Axon Commander, Axon Evidence, Axon Signal, and Axon View are trademarks of Axon Enterprise, Inc., some of which are registered in the US and other countries. For more information, visit www.axon.com/legal.
-
Page 3: Table Of Contents
Turning On or Off Camera Vibrations............15 Stealth Mode ................... 15 Using Axon View .................... 16 Pairing Your Axon Body 2 Camera with a Smart Device ........17 Other Settings and Functionality ............... 17 Axon Signal ....................17 Button, Notification, and Display Reference Tables ....................18 Button Actions .................... - Page 4 Axon Body 3 Camera User Manual Camera Storage ..................... 23 Replacing the Battery ..................23 Troubleshooting and Other Information ........................30 Technical Support ................... 30 Warranty Policy ....................30 Warnings ...................... 30 Radio Waves ....................30 Compliance Marks ..................32 Axon Enterprise, Inc.
-
Page 5: Introduction
Axon Body 3 Camera User Manual Introduction The Axon Body 3 is a camera system incorporating an audio and video recording device. This camera is designed for use in tough environmental conditions encountered in law enforcement, corrections, military, and security activities. The Axon Body 3 camera is designed to record events for secure storage, retrieval, and analysis to the Axon Evidence (Evidence.com) or Axon Commander services. - Page 6 Axon Body 3 Camera User Manual personnel to cameras, recharge your camera, and transfer video from an Axon device to a computer. Visit academy.axon. com. Axon Enterprise, Inc. Page 6 of 33...
-
Page 7: Getting To Know Your Axon Body 3 Camera
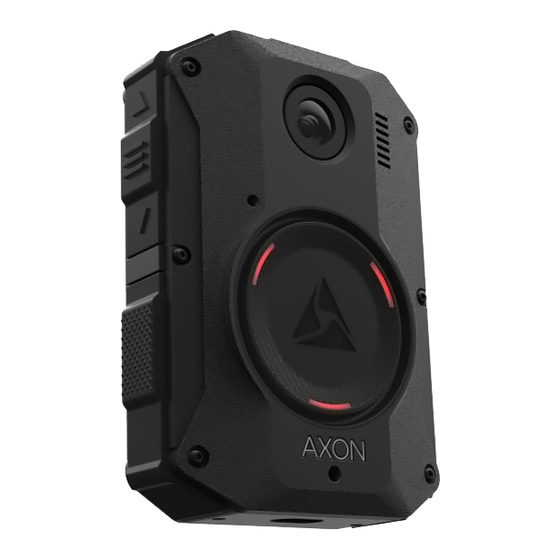
User Manual Getting to Know Your Axon Body 3 Camera The Axon Body 3 camera includes physical controls to enable video and audio capture while providing visual, audible, and vibration notifications of the Axon Body 3 camera’s state of operation. - Page 8 Camera Display – Shows information on camera status and activity. Different information is shown when the Axon Body 3 camera is in the field and in an Axon Dock. Note that some icons may not be active or displayed at your agency.
- Page 9 Axon Body 3 Camera User Manual Activity Area In the Field In an Axon Dock Status Bar Icon Description Status Bar Icon Description Battery capacity Battery capacity Camera paired Charging Connected to Axon Lights off Evidence for upload and update...
-
Page 10: Accessories
USB C connector – Used for data transfer and charging when placed in an Axon Dock. Accessories The Axon Body 3 camera is designed to work with a variety of Axon mounting systems. The various mounts that use this system can be used with a wide variety uniforms, and holds the camera to your shirt, patrol vest, jacket, or belt. -
Page 11: Operating The Axon Body 3 Camera
With default settings, the system does not capture audio during camera buffering, so anything recorded in that mode will be video-only. Ready mode starts only after the Axon Body 3 camera is turned on. The system does not record when the camera is turned off. -
Page 12: Starting Recording (Event) Mode
Depending on your agency configuration, other events or actions can cause your camera to transition from Ready (buffering) to Recording mode. An example of this is if a device with Axon Signal technology broadcasts a signal. When your camera starts recording, you will hear 2 beeps and 2 vibrations. The Camera Display shows the recording icon. -
Page 13: Adding Markers While Recording
Double-press the Select button. The Camera Display is backlit for 2 seconds. Battery Status The battery capacity for your Axon Body 3 camera is shown in the Camera Display. Configuring Your Camera During normal operation an Axon Body 3 camera uses lights, sounds (audio prompts), and vibrations (haptic feedback) to notify you of the camera status. -
Page 14: Turning On Or Off Camera Lights
Your Axon Body 3 camera must be turned on and paired with your mobile device. Open Axon View app on your mobile device and go to Settings. Tap the switch to the right of the Indicator Lights to change the setting. -
Page 15: Turning On Or Off Camera Vibrations
Your Axon Body 3 camera must be turned on and paired with your mobile device. Open Axon View app on your mobile device and go to Settings. Tap the switch to the right of the Vibration to change the setting. -
Page 16: Using Axon View
Your Axon Body 3 camera must be turned on and paired with your mobile device. Open Axon View app on your mobile device and go to Settings. Tap the switch to the right of the Stealth Mode to change the setting. -
Page 17: Pairing Your Axon Body 2 Camera With A Smart Device
Signal technology does not transmit a signal to end recording. The camera must be stopped manually. Axon Signal technology cannot turn an Axon system on. If the Axon Body 3 camera is turned off, the camera will not record, even if a device equipped with Axon Signal technology transmits a signal. -
Page 18: Button, Notification, And Display Reference Tables
This section has consolidated lists of the Axon Body 3 camera button actions, notifications, camera display icons, and LED indications. Button Actions The Axon Body 3 camera has six buttons. The actions associated with each button are described below. Button Actions •... -
Page 19: Camera Display
Axon Body 3 Camera User Manual Camera Display The display is divided into a Status Bar and Activity Area. Status Bar Activity Area In the Field In an Axon Dock Status Bar Icon Description Status Bar Icon Description Battery capacity... -
Page 20: Notifications
User Manual Notifications The Axon Body 3 camera emits sounds called audio prompts to notify you of the device status. The audio prompts are accompanied by a vibration that matches the audio. These prompts usually occur after you perform an action with the body camera. -
Page 21: Led Status
Recording Blinking red Triad LED (in an Axon Dock) In the Axon Dock, the Triad LED on the front of the camera shows the device status and battery capacity. See the camera display for additional information. Device Status Triad LED Battery is fully charged (>... -
Page 22: Care And Maintenance
Body 3 camera. Cleaning the Camera Use a soft, damp cloth to clean the surface of the Axon Body 3 camera. Do not use harsh cleaners or solvents. You may moisten the cloth with isopropyl alcohol. -
Page 23: Camera Storage
User Manual Camera Storage Axon on-officer cameras should not be stored in environments where the temperature is likely to exceed 95 °F (35 °C) (such as under direct sunlight, near heaters, or in a vehicle in extremely hot weather) or exposed to temperatures below −4 °F (−20 °C). - Page 24 Axon Body 3 Camera User Manual 1. Remove all 6 screws from the back panel of the Axon Body 3 Camera. 2. Remove the back cover. Be careful to not smear the thermal paste (shown by the white arrows). Axon Enterprise, Inc.
- Page 25 Axon Body 3 Camera User Manual 3. Gently peel the black PGS layer off the battery. PGS layer is attached to the battery with a small adhesive patch near the top. Adhesive patch location (underside). 4. Disconnect the battery connector from the main board by lifting it up.
- Page 26 Axon Body 3 Camera User Manual 5. Lift battery from top edge to remove from camera. 6. Insert top edge of replacement battery into camera and press down bottom edge to secure. Axon Enterprise, Inc. Page 26 of 33...
- Page 27 Axon Body 3 Camera User Manual 7. Carefully align and press down on battery connector to connect to main board. Caution: Make sure connector is properly seated before pushing down to avoid damaging internal pins. 8. Re-attach black PGS layer to top of battery by pressing down on adhesive patch.
- Page 28 Axon Body 3 Camera User Manual 9. Inspect yellow gasket to ensure it is properly seated in the groove around the perimeter of the camera. ✓ 10. Gently replace back cover and tighten all 6 screws starting with the 2 center screws.
- Page 29 Axon Body 3 Camera User Manual 11. Dispose of the old battery in accordance with your local regulations regarding battery disposal. Axon Enterprise, Inc. Page 29 of 33...
-
Page 30: Troubleshooting And Other Information
Axon Body 3 troubleshooting information. If you are having trouble with your Axon Body 3 camera, turn the camera off and turn it on again to see if the issue clears. In situations where the camera is in a frozen state and does not respond to button presses, you can initiate a hard reset of the camera as follows: •... - Page 31 Connect the equipment into an outlet on a circuit different from that to which the receiver is connected. • Consult Axon Technical Support for help. This device complies with part 15 of the FCC Rules. Operation is subject to the following two conditions: (1) This device may not cause harmful interference, and (2) this device must accept any interference received, including interference that may cause undesired operation.
-
Page 32: Compliance Marks
THIS MODEL DEVICE MEETS THE GOVERNMENT’S REQUIREMENTS FOR EXPOSURE TO RADIO WAVES Compliance Marks You can view the e-labeling information for the Axon Body 3 camera on the camera display using the following steps: 1. Turn on you Axon Body 3 by pressing the Power button. - Page 33 Axon Body 3 Camera User Manual READY is shown on the camera display when the camera is on. 2. Press Power button + Program button at the same time. 3. The camera display shows three options: About, Cellular, and Legal.
Need help?
Do you have a question about the Body 3 and is the answer not in the manual?
Questions and answers