Table of Contents
Advertisement
Advertisement
Table of Contents

Related Manuals for Axon Body 4


Summary of Contents for Axon Body 4
- Page 1 Body 4 Camera User Guide Models: AX1037, AX1038 Rev: 15 September 2023...
- Page 2 17800 N 85th St Scottsdale, AZ 85255 , Axon Dock, Axon Evidence, and Axon Fleet are trademarks of Axon Enterprise, Inc., some of which are registered in the US and other countries. For more information, visit www.axon.com/legal. All rights reserved. ©2023 Axon Enterprise, Inc..
-
Page 3: Table Of Contents
Body 4 Camera User Guide Contents Introduction and registration Important safety and health information Additional reading Register camera Dock-based registration (recommended) Registration with Axon Device Manager Registration with View XL Standalone mode Registration FAQs Get to know your camera Button actions... - Page 4 User permissions and mute configuration Programmable buttons Device management Button confirmation Notification tables Visual notifications Icons and Triad LEDs in an Axon dock Audible and haptic notifications Care and maintenance Clean the camera Charge the battery Charge without a dock...
- Page 5 Body 4 Camera User Guide Warranty Warnings Radio waves Compliance marks Axon Enterprise, Inc.
-
Page 6: Introduction And Registration
Axon device to a computer. Register camera Axon Body 4 Cameras must be registered by your agency before they can be assigned to users. Additionally, you should adjust the agency-wide Axon Body 4 Camera Settings in Axon Evidence before assigning cameras to users. -
Page 7: Dock-Based Registration (Recommended)
You must have device management permissions to use ADM. If you aren’t sure if you have permissions to use ADM, contact an Axon Evidence administrator. An Axon Body 4 Dock connected to power and the internet (green LED visible on the WAN port). See the Axon Body 4 Dock Installation Manual for information on installing a dock. -
Page 8: Registration With View Xl Standalone Mode
Why is my camera is not fully charged when I power it on the first time? Your Axon Body 4 Camera comes with a partial charge out of the box. Connect your dock(s) to the network and dock your camera to charge it. Always recharge a depleted battery as soon as reasonably possible using an Axon Dock. - Page 9 (ADM) or through Axon Evidence. To assign through Axon Evidence: 1. Ensure you have the correct permissions to assign users on Axon Evidence. 2. Select Inventory, then Body Worn Cameras. 3. Search for your device in the Body Camera search bar by the serial number.
-
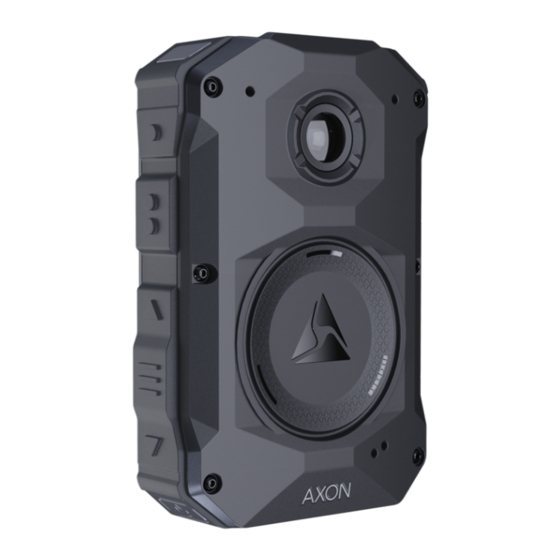
Page 10: Get To Know Your Camera
Body 4 Camera User Guide Get to know your camera Button actions There are seven buttons that perform as described below. Action Button Presses Add marker Press Select while recording Enter or exit audio Press Select for three seconds while recording (or double-press Event... - Page 11 POV Connector Port – Used to connect the POV and body camera together via the POV Cable. All Axon Body 4 Cameras ship with a plastic cover over the port. If a camera will not be using the POV, leave this cover on to protect the port.
- Page 12 Camera Display – Shows information on camera status and activity. Different information is shown when the Axon Body 4 Camera is in the field and in an Axon Dock. Some icons may not be active or displayed at your agency. The display is divided into a Status Bar and Activity Area.
-
Page 13: Accessories And Mounts
Body 4 Camera User Guide USB-C connector – Used for data transfer and charging when placed in an Axon Dock. Power Button – Used to turn the camera on/off. Magnetic Charger Port – Used to connect Axon Body 4’s magnetic charging cable. -
Page 14: Dock Installation
Body 4 Camera User Guide Dock installation Axon Docks and cameras should be in a cool, well-ventilated space. The ideal ambient temperature when all equipment is powered on and cameras are docked or charging is 41– 80 ⁰F (5–27 ⁰C). Temperatures outside this recommended range may lead to battery performance degradation over time while charging. -
Page 15: Register Dock
Body 4 Camera User Guide 5. Plug the power cord to a standard power outlet. Place an Axon Body 4 Camera in the dock and look for the charging icon on the camera display. Once a dock is installed, it can be used to register and charge Axon Body 4 Cameras. -
Page 16: Adjust Volume
Axon View product page or see the Axon View for Devices User Manual for Android for details about using Axon View. Your Axon Body 4 Camera must be turned on and paired with your mobile device. Adjust volume During normal operation, Axon Body 4 Cameras emit beeping sounds, called audio prompts, to notify you of the camera status. -
Page 17: Change Camera Vibration
Use Axon View to turn camera vibrations off and on. 1. Open the Axon View app on your mobile device and go to Settings. 2. Tap the switch to the right of Vibration to change the setting. -
Page 18: Optimized Battery Capacity
Programmable Button 2 will be No Function. Optimized battery capacity If this setting is enabled in the Admin section of Evidence.com, Axon Body 4 Cameras will only charge to about 90% capacity and display FULL when finished charging instead of 100%. -
Page 19: Other Settings (Admin)
Body 4 Camera User Guide Devices equipped with Axon Signal technology, such as an Axon Body 4 Camera or Signal Sidearm for a TASER device, have a signal range of approximately 30 feet (9.1 meters) from the signal device. Other devices are available separately. -
Page 20: Start Recording Mode (Event)
When Recording (Event) mode is activated, the buffered video captured directly before the event is saved and attached to the event in permanent memory. This feature is intended to capture the video of an incident just before a recording begins. Axon Body 4 does not capture audio within the pre-event buffer. -
Page 21: Add Markers While Recording
Add markers while recording Markers are useful for indicating an important event that you want to easily find when replaying the video. The marker is shown when the video is replayed in Axon Evidence and documented in the audit trail. - Page 22 Body 4 Camera User Guide Enter and exit sleep mode To enter Sleep mode with Power Off Confirmation disabled: 1. Press the power button. 2. Press Select to enter sleep mode. To enter Sleep mode with Power Off Confirmation enabled: ...
-
Page 23: Flex Pov Module
Body 4 Camera User Guide FLEX POV Module Axon Body 4 includes a new POV camera that connects to the side USB-C connector. It offers high-quality video and low-light capture from an officer’s point of view. Lens – Avoid touching the lens ... -
Page 24: Connect
POV connector into place by pushing up on the locking mechanism until it’s flush with the rest of the connector. These cables are specifically calibrated to work with the Axon Body 4 system. Use of unapproved cables will degrade system performance and may cause the system to malfunction. -
Page 25: Use The Module
Body 4 Camera User Guide Use the module When the Axon Flex POV Module is attached to the body camera, Axon Body 4 will use the POV video sensor instead of the body camera’s. If the POV module is attached while buffering, the view will automatically switch from the body camera to the POV module. -
Page 26: Pair Your Camera With A Smart Device
Using Axon View XL in standalone mode is separate from using it with Axon Fleet products. Connect the Axon Body 4 Camera to the laptop or computer with a USB C cable and use Axon View XL standalone mode. -
Page 27: Video
Body 4 Camera User Guide Video Action Definition Quality Determines the camera’s recording quality. Body Worn Camera Determines the field of view of the camera. Setting this to 160 degrees will Field of View provide a wider field of view, while the 120-degree setting will provide longer battery life. -
Page 28: Audio
Enables audio to be recorded in the pre-event buffer. Audio in Video Recall Enables audio recording while capturing Video Recall evidence. Lights If enabled, lights can still be configured at the user level through Axon View or on the device. Action Definition Front Light Illuminates the front-facing Triad camera lights to provide a visible indication of recording status. -
Page 29: Evidence Upload
Lets cameras be activated by Axon Signal products. When disabled, Applications cameras cant be activated by Axon Signal products. Video playback in Axon Lets users play video still on the camera from Axon View, View XL (Fleet Applications and Standalone), and Fleet Dashboard. Axon Application... -
Page 30: Battery
Body 4 Camera User Guide Battery Evaluate your battery needs in the initial weeks of deployment. If officers typically finish their shift with >25% battery life, enable Optimized Battery Capacity to increase the overall life of your batteries. Action Definition Optimized Battery Limits the camera charge to approximately 90% of full capacity. -
Page 31: User Permissions And Mute Configuration
Body 4 Camera User Guide User permissions and mute configuration Action Definition Users Can Mute During Lets users mute audio when recording an event. Push and hold mode Recording requires a user to hold the mute button to remain muted. Static mode requires a user to manually enter and exit mute mode. -
Page 32: Button Confirmation
Visual notifications The display is divided into a Status Bar and Activity Area. Different information displays when the Axon Body 4 Camera is in the field and in an Axon Dock. Some icons may not apply at your agency. Axon Enterprise, Inc. - Page 33 Body 4 Camera User Guide Icons the field Status Bar Icon Description Battery capacity Battery charging Battery low warning (to the right of the battery capacity icon; Operation LED blinks yellow Low battery (battery level is 10% or less) Battery not charging due to high temperature. The camera will continue to operate normally and resume charging when the camera cools down.
-
Page 34: Icons And Triad Leds In An Axon Dock
Battery charging – Triad LED colors reflect the Green: > 90% charge level. Yellow: 11-89% Red: <10% Device error. Refer to device page in Axon Evidence. Blinking red DEVICE ERROR Firmware update complete – Displayed for 10 Spinning white seconds after the update is complete and for 10 during installation seconds after undocking. -
Page 35: Audible And Haptic Notifications
Body 4 Camera User Guide Audible and haptic notifications The Axon Body 4 Camera emits audio prompts to notify you of device status. These prompts are accompanied by a vibration (haptic feedback). These prompts usually occur after you perform an action with the camera. -
Page 36: Care And Maintenance
Clean the camera Use a soft, damp cloth to clean the surface of the Axon Body 4 Camera. Do not use harsh cleaners or solvents. Ideally, moisten the cloth with isopropyl alcohol. Do not immerse the camera in water or cleaning solutions. -
Page 37: Charge Without A Dock
Recharge a depleted battery as soon as reasonably possible. Charge without a dock To charge the Axon Body 4 Camera when no dock is available, use a USB-C cable. You should still regularly place your camera in its dock to ensure it has the correct time synchronization and receives the latest firmware updates. -
Page 38: Internal Clock
Body 4 Camera User Guide Internal clock Axon Body 4 Cameras should be regularly placed in an Axon dock or connected to View XL Standalone mode to update the camera’s internal clock. Moisture Don’t charge your camera while the USB-C connector on the camera or dock is wet. The camera will display a moisture icon if it detects moisture in the USB-C port. -
Page 39: General Faqs
Error Code 1004 – There is an issue with the digital video recorder. Restart the camera and check if the issue resolves. Error Code 1006 – There is an issue connecting with Axon Evidence for video uploads. It can be resolved by un-docking and re-docking the camera. -
Page 40: Axon Dock Faqs
Also, remember that different information is displayed when the Axon Body 4 Camera is in the field and in its dock. If you believe there is an error with your camera, try restarting it. If this doesn't resolve the issue, contact technical support. - Page 41 If you are unable to register any cameras, this may be due to a connectivity issue. Reference the Axon Network Whitelisting Guide to ensure the appropriate network ports are open. If some cameras are registering but others are not, this may be a transient error. A suggested general troubleshooting approach is to: ...
-
Page 42: Viewing Camera Information On The Display
Axon Enterprise warranty provisions are applicable on all Axon Body 4 system products. See Axon Enterprise’s website, www.axon.com, for detailed warranty information. This warranty does not apply, and Axon shall not be liable for any loss, loss of data, damage, or other liability arising out of:... - Page 43 For a full list of the warning associated with this product, see www.axon.com. Radio waves An Axon Body 4 system transmission is in the frequency ranges of 2402 – 2480 MHz, 2412 – 2462 MHz, 5150 – 5350 MHz, 5470 – 5725 MHz, 5725 – 5850 MHz. Additionally, depending on the model number, it transmits in the frequencies listed below: ...
- Page 44 Body 4 Camera User Guide scientific organizations through periodic and thorough evaluation of scientific studies. The standards include a substantial safety margin designed to assure the safety of all persons, regardless of age and health. Before a device model is available for sale to the public, it must be tested and certified to the FCC that it does not exceed the limit established by the government-adopted requirement for safe exposure.
- Page 45 When applicable, you can view the e-labeling information for the Axon Body 4 Camera on the camera display using the following steps: 1. Turn on your Axon Body 4 by pressing Power. READY appears on the camera display when the camera is on.
- Page 46 Body 4 Camera User Guide For Model AX1037: Model: AX1037 FCC ID: X4GS01506 IC: 8803A-S01506 Contains FCC ID: X4GAB065 Contains IC: 8803A-AB065 ICES-3(B)/NMB-3(B) 6. Press Event to return to the normal camera display.
Need help?
Do you have a question about the Body 4 and is the answer not in the manual?
Questions and answers