Table of Contents
Advertisement
Quick Links
INTELLI-IQ CONTROLLER
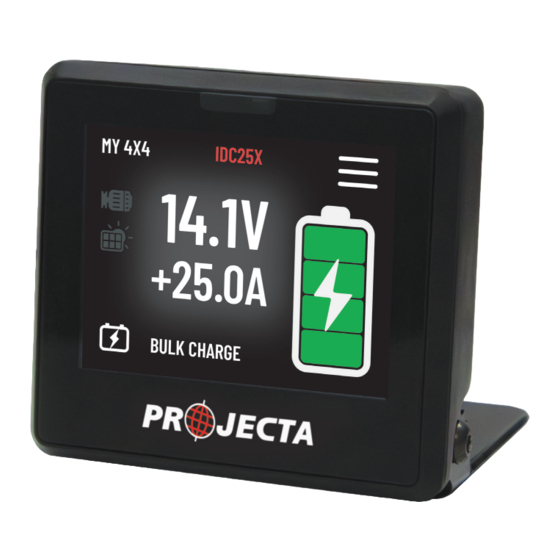
2-INCH SMART DISPLAY
BLUETOOTH, LINBUS
P/No. IQD2
Warning:
Prior to initial installation and usage of the IQD2, it is
imperative to follow the manual's instructions for conducting
a firmware update for the IQD2 and any other PROJECTA
INTELLI-IQ series products within your DCDC system via the
PROJECTA IQ APP. This ensures all product software is
upgraded to the most current version.
Advertisement
Table of Contents

Related Manuals for Projecta IQD2


Summary of Contents for Projecta IQD2
- Page 1 2-INCH SMART DISPLAY BLUETOOTH, LINBUS Warning: Prior to initial installation and usage of the IQD2, it is imperative to follow the manual’s instructions for conducting a firmware update for the IQD2 and any other PROJECTA INTELLI-IQ series products within your DCDC system via the PROJECTA IQ APP.
- Page 2 INTRODUCTION The PROJECTA IQD2, 2” Intelli-IQ Display, introduces an innovative way to control IDCX and various accessories with its advanced LIN bus design. This design allows real-time control and monitoring of multiple devices from a single 2-inch high-definition capacitive touchscreen.
-
Page 3: Product Overview
PRODUCT OVERVIEW 2A Blade Fuse IQD2 2-inch Smart Display 6.3mm Ring Terminal- Black/Ground 3.5m Connection 3 in 1 Square Connector Loom 6.3mm Ring Terminal- Red/Positive M3 Hex Screws Mounting 6.3 Quick Connector Bracket for LIN Hex Allen Key M3 Self Tapping... -
Page 4: Specifications
SPECIFICATIONS PART NO. IQD2 INPUT VOLTAGE RANGE 9-32V INPUT CONSUMPTION CURRENT <150mA DC INPUT CURRENT AT POWER SAVING MODE <10mA DC POWER SAVING INPUT THRESHOLD <13.4V DISPLAY PHYSICAL CHARACTERISTICS SCREEN SIZE 2 inches SCREEN RESOLUTION 320 x 240 pixel SCREEN TYPE... -
Page 5: Application Diagram
EXTERNAL LED - PINK (1.5mm ) IGNITION OVERRIDE - BLUE (1.5mm ) 12V SOLAR PANEL GROUND EXTERNAL LED - PINK (1.5mm ) 12V SOLAR PANEL GROUND IGNITION CONNECTION LINBUS CONNECTION FOR IQD2 LED INDICATOR TION CONNECTION BUS CONNECTION IQD2 INDICATOR... - Page 6 DISPLAY SCREEN INSTALLATION Choose a flat location which is easily accessible and easy to view on the display screen. The location should be in the vehicle, away from the weather. Drill a 15mm diameter hole using the provided drilling template to allow the connector to pass through.
- Page 7 B. Using the supplied 3M double-sided adhesive: i. Without the bracket 3. Stick the product on the clean, even 1. Clean the back of the IQD2 with 2. Thread the loom through the pre- surface and let it set 12+ hours for an alcohol swab, attach the provided drilled hole.
-
Page 8: Display Instructions
If the IQD2 fails to detect any device within the network, it will prompt the user to perform the network searching procedure once more. Ensure the LIN connections of the network are securely... -
Page 9: Main Display
DISPLAY Upon system start, the device shows the charging system’s status on two main pages: The IQD2 system’s Main Screen displays the DC/DC chargers’ status. Users can swipe for additional details about the charging system. Features of the screen include: IQD2 System Name: Editable in the app settings. - Page 10 ERROR AND ALERT MESSAGES ALERT INSTRUCTION DISPLAY TYPE Manual • Click the red error icon to view system issue details. Inquiry • Popup messages indicate the specific problem. • To close the error detail popup, click the ‘X’. Automatic • Low Voltage: Alert for reduced auxiliary battery voltage (<11V).
- Page 11 Please let the device cool down before using it again. DEVICE ERROR A connection problem has occurred on the LIN network. Please check the hardware connections and wait for IQD2 to detect the network automatically. This process takes about one minute. AUXILIARY SHORT CIRCUIT The auxiliary battery has a short circuit problem.
-
Page 12: Troubleshooting
2. ‘NO DEVICE FOUND’ when start up. Ensure that every device in the network has a LIN wire connected to IQD2. You can connect the LIN wires in parallel or in a daisy chain. To scan the devices, press the reset button on the screen. - Page 13 Go to your smart device’s App Store (iPhone/iPad) or Play Store (Android) and search for “Intelli-IQ” or scan the following QR codes to download this app for free to your smart devices. PROJECTA IQ APP Connect your smart devices via Bluetooth®...
- Page 14 Prepare the Device: INSTRUCTION DISPLAY Wire up the IQD2 and Intelli-IQ devices to the power supply. N o I n t e l l i - I Q a v a i l a b l e . Ensure the smart device’s Bluetooth function is...
- Page 15 Open Device Settings: INSTRUCTION DISPLAY When a device is selected. The name of the device will be shown on the top left, and a dashboard will be presented to you. MY 4X4 14.4V To enter the general screen settings screen, tap +25.0 A the top left “DEVICE NAME”.
- Page 16 Update User Settings: INSTRUCTION DISPLAY In the App Settings screen, you will see a “MORE” section. To enter the User Settings screen, select “Settings” then in the general settings screen, select “Preferences”. Se ngs More My Account My Account Guide Peter Connect Device Preferences...
- Page 17 Change Password: OLD PASSWORD NEW PASSWORD INSTRUCTION DISPLAY Password needs at least 8 characters with 1 or more numbers and 1 or more uppercase characters. Inside the User settings screen to change the CONFIRM NEW PASSWORD name, tap “CHANGE PASSWORD” to open the Change Password screen screen.
-
Page 18: Delete Account
Delete Account Delete Account: WARNING: Dele ng your account will remove all of your IntelliIQ App INSTRUCTION Informa on. DISPLAY If you are sure you would In the user account settings screen, on the like to proceed, please confirm your password and bottom right of the screen, tap the press delete. - Page 19 Check Charging Status: INSTRUCTION DISPLAY When connected to an Intelli-IQ device. On the IQ dashboard screen. In the left top the battery charging icon is presented. When a battery is correctly connected and detected, the battery indicator will indicate the current battery level with three different indicators.
- Page 20 Rename Intelli-IQ: INSTRUCTION DISPLAY You can rename your Intelli-IQ in either the Main device settings screen or the IQ Display settings screen. Se ngs Se ngs MY 4x4 NoName To change your device name, in either screen, IQ Settings IQ Settings select the text of the existing device name.
- Page 21 Change IDC Battery Profile: INSTRUCTION DISPLAY In the IDC settings screen you can select a predefined battery profile from a collection of different profile settings. IDC251 Charge Profile LiFePO4 CHANGE So change the battery profile, select one from the dropdown and tap “CONFIRM”. Low Voltage Alarm LiFePO4...
- Page 22 Update the IDC Firmware: INSTRUCTION DISPLAY In the IDC device settings screen, at the bottom of the screen, there will be an Update Firmware button. If you cannot see it, swipe up the view. When tapping this button, we will check if the device you have requires a firmware update.
- Page 23 Update IQD2 Firmware: INSTRUCTION DISPLAY In the IQD2 device settings screen, at the bottom of the screen, there will be an Update Firmware button. If you cannot see it, swipe up the view. When tapping this button, we will check if the device you have requires a firmware update.
-
Page 24: Warranty Statement
WARRANTY STATEMENT Brown & Watson International Pty Ltd (“BWI”) of 1500 Ferntree Gully Road, Knoxfield, Vic., telephone (03) 9730 6000, fax (03) 9730 6050, warrants that all products described in its current catalogue will under normal use and service be free of failures in material and workmanship for a period of five (5) years from the date of the original purchase by the customer as marked on the invoice.
Need help?
Do you have a question about the IQD2 and is the answer not in the manual?
Questions and answers