
Subscribe to Our Youtube Channel
Related Manuals for Bull 18248CE


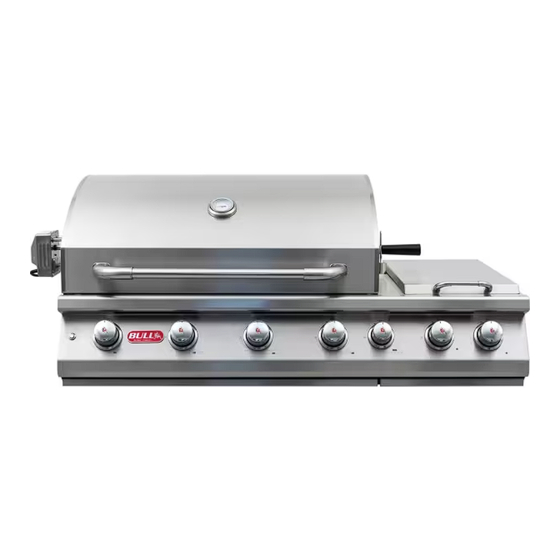
Summary of Contents for Bull 18248CE
- Page 1 ASSEMBLY & OPERATING INSTRUCTIONS Model #18248CE 7 BURNER STAINLESS STEEL,ROTISSERIE, BUILT-IN LPG (PROPANE) Model #18249CE 7 BURNER STAINLESS STEEL,ROTISSERIE, BUILT-IN NG (NATURAL GAS)
-
Page 2: Table Of Contents
Page # Contents Safety Instructions The location for your Grill Checking for Gas Leaks Natural Gas Safety LP Gas Safety 7-12 Installation Instructions Specifications for Barbecue Structure Connecting to Gas Source Natural Gas Connections Outdoor Natural Gas BBQ Installation Specifications Outdoor Propane Gas BBQ Installation Specifications Transformer Inspecting / Cleaning Burners &... -
Page 3: Safety Instructions
Safety Instructions Important - Please read the instructions before assembly and operation of your grill WARNING: This product expose chemicals including, Carbon Monoxide, which is known to the State of California to cause birth defects or other reproductive harm. more information visit www.P65Warnings.ca.gov This gas grill must be installed in accordance with local codes or, if in an area without local codes, installation must conform with the latest edition of CE Norms EN498. -
Page 4: Checking For Gas Leaks
Safety Instructions Important - Please read the instructions before assembly and operation of your grill CHECKING FOR GAS LEAKS NEVER TEST FOR GAS LEAKS WHILE THE GRILL IS STILL LIT! Prior to the first use and at the beginning each new season (or, if using LP, whenever gas cylinder is changed), it is a must that you check for gas leaks. -
Page 5: Lp Gas Safety
Safety Instructions Important - Please read the instructions before assembly and operation of your grill Do not use Teflon ® tape or pipe sealant on any flare ends because you will not obtain a leak-free seal. Pipe sealing compound or pipe thread tape of the type resistant to the action of natural gas must be used on all male pipe thread. - Page 6 Safety Instructions Important - Please read the instructions before assembly and operation of your grill Caution: Never store an LPG cylinder inside a building or in the vicinity of any gas-burning appliance. WARNING: Gas valves are pre-set at the factory to operate on LPG or natural gas. If you wish to convert to a different gas type, be sure to contact your grill dealer, licensed plumber or authorized service centre for further details.
-
Page 7: Installation Instructions
Please remove the cotter pins from the burners before installing unit into an island. See page 13 for cotter pin removal. • Adapter from 1/2” NPT to BSP 21 mm & regulator are available from Bull dealers and distributors. • LPG TANK STORAGE AREA MUST BE ISOLATED FROM GRILL AND VENTED. -
Page 8: Specifications For Barbecue Structure
12.5 cm from the bottom of the island enclosure to the top of the vent. 6. If not using Bull vents, the vents you use must meet local codes. 7. The upper vents must have openings that have a total free area of not less than 6.45 sq cm per kg of stored fuel capacity per vent. -
Page 9: Connecting To Gas Source
LPG CONNECTIONS CAUTION: Changing the gas tanks must be done away from any source of ignition. • The LP gas pressure regulator is not supplied with the grill but can be purchased from Bull dealers or hardware stores. • Make sure the tank is firmly secured in an upright position. -
Page 10: Outdoor Natural Gas Bbq Installation Specifications
There must be a minimum of 15cm counter space behind the grill in order to allow the grill hood to clear properly. Detail E NON-COMBUSTIBLE CONSTRUCTION NATURAL GAS REGULATOR (SUPPLIED BY BULL) OPTIONAL VENT LOCATION NATURAL GAS (NOT SUPPLIED) VENT... -
Page 11: Outdoor Propane Gas Bbq Installation Specifications
MUST BE SECURED TO THE ISLAND WALL DURING INSTALLATION THE BTACKET LPG HOSE WITH SHOWN IS REGULATOR OPTIONAL REFERENCE VENT ONLY. ( NOT SUPPLIED BY MOUNTING LOCATION BULL) HARDWARE VENT (NOT SUPPLIED BY BULL) LPG TANK (NOT SUPPLIED) VENT VENT... -
Page 12: Transformer
INSTALLATION INSTRUCTIONS TRANSFORMER To ensure transformer and interior light system longevity, the transformer must be installed at least 15 cm above the ground. The transformer may be attached to your island material using metal screws. To install your transformer, secure two screws (not provided) through the designed mounting tabs (see illustration below). -
Page 13: Inspecting / Cleaning Burners & Gas Valve Orifices
INSPECTION / CLEANING BURNERS & GAS ORIFICES CAUTION: ALWAYS TURN OFF THE GAS SUPPLY PRIOR TO CLEARING YOUR GRILL By following these cleaning procedures on a timely basis, your grill will be kept clean and working properly with minimum effort. Burner Cleaning 1. -
Page 14: Burner Replacement Into Insert
INSPECTION / CLEANING BURNERS & GAS ORIFICES BURNER REPLACEMENT INTO INSERT CAUTION - ALWAYS TURN OFF GAS SUPPLY PRIOR TO CLEANING YOUR GRILL 1. Replace burner back into the grill insert. There is no need to replace the cotter pin back into the cast peg, it is for shipping purposes only. -
Page 15: Burner Operation Check
INSPECTION / CLEANING BURNERS & GAS ORIFICES BURNER OPERATION CHECK NOTE: Upon first assembly the gas lines and burners will be full of air. In order for the burners to light properly the lines must fill with gas. It may require several attempts at lighting the burners before you are successful. -
Page 16: Cooking Component Installation
COOKING COMPONENT INSTALLATION IMPORTANT: Before first use: wash flame tamers, cooking grids, and warming rack with warm, soapy water. Rinse and dry thoroughly. Season metal surfaces with cooking oil occasionally. (After cooking is completed, turn grill to high setting for NO MORE THAN five minutes to burn off excess grease or food residue) CAUTION: DO NOT LEAVE GRILL UNATTENDED WHILE GRILL IS IN USE 1. -
Page 17: Lighting & Operating Instructions
LIGHTING & OPERATING INSTRUCTIONS LIGHTING PROCEDURES Lighting Main Burner(s): 1. Become familiar with the safety guidelines at the front of the manual. DO NOT SMOKE WHILE LIGHTING GRILL OR CHECKING GAS SUPPLY CONNECTIONS! 2. If your grill fuel source is a LP gas cylinder, check to see that cylinder is filled. 3. -
Page 18: Operating Procedure
LIGHTING & OPERATING INSTRUCTIONS WARNING: • Never operate Rotisserie Burner with main burner(s) “ON” • Warming Rack must be removed when operating the Rotisserie Burner Do not attempt to regulate the rotisserie burner by using the control knob. This control has a fixed setting and is not adjustable. -
Page 19: Cooking Temperature
LIGHTING & OPERATING INSTRUCTIONS COOKING TEMPERATURES • HIGH setting - Use this setting only for fast warm-up, for searing steaks and chops, and for burning food residue from the cooking grids after the cookout is over. • MEDIUM setting - Use this setting for most grilling, roasting or baking, and for cooking hamburgers and vegetables. -
Page 20: Rotisserie Cooking
ROTISSERIE COOKING Rotisserie is mostly used to cook large pieces of meat and poultry to assure slow, even cooking. The constant turning provides a self-basting action, making food cooked on a rotisserie exceptionally moist and juicy. Rotisserie cooking generally requires 1 ½ to 4½ hrs to cook depending on the size and type of meat being cooked. -
Page 21: Lighting & Operations Instructions
ROTISSERIE COOKING LIGHTING & OPERATING INSTRUCTIONS To install the motor bracket, remove the two (2) end screws on the grill closest to the front. Place bracket on top of grill lip and replace screws (see drawing to the right). Bracket can be installed on either side of the unit. -
Page 22: Light System
LIGHT SYSTEM LIGHT BULB REPLACEMENT If light bulb(s) need to be replaced, make sure power is disconnected and grill and light bulbs are completely cool to the touch. 1. Remove screw with a small Phillips screwdriver. Caution: Glass cover may be loose, ensure the cover is properly supported before completely removing the screw. -
Page 23: Wiring Diagram
LIGHT SYSTEM 4. Using a soft cloth or paper towel, replace new light bulb into the housing (finger prints left on the bulb may reduce its life). Make sure the metal prongs on the light bulb slip into the openings in the light housing. - Page 24 LIGHT SYSTEM Wiring diagram: 1A - Black wire; 1B - Red wire; 1C - Blue Wire; 1D - Yellow wire...
-
Page 25: Cleaning & Maintenance
Grease will not be able to drip down into grease collector and a grease fire could occur. It is recommended that you use Bull Grease Tray Liners for easy clean up & maintenance. STAINLESS STEEL CLEANING AND MAINTENANCE Stainless steel is a corrosion resistant chromium/nickel alloy steel that is both durable as well as strong with an outstanding lustre. -
Page 26: Troubleshooting
TROUBLESHOOTING NO SMOKING IF GAS FAILS TO OPERATE PROPERLY 1. Turn 2. Check 3. Repeat lighting procedure If grill still fails to operate properly, TURN “OFF” GAS AT SOURCE, TURN CONTROL KNOBS TO “OFF”, wait for grill to cool, and check the following: •... -
Page 27: Yellow Flame & Flash Back
TROUBLESHOOTING • Misalignment of igniter on burner Correction: Check for proper position of electrode tip. The tip of the electrode should be pointing forward toward the front and free from grease for spark discharging. The ignition wire should be firmly connected to the valve ignition and electrode. -
Page 28: Serial Number Locations
LOCATION OF SERIAL NUMBERS Essential information about your product is encoded in the serial number of your grill. This information will be required for all warranty claims, ordering replacement parts and will identify any variations of your unit. It is extremely important that you record your serial number and register your grill from the Proof of Purchase. -
Page 29: Parts List
PARTS LIST MODEL #18248CE 7 BURNER STAINLESS STEEL, ROTISSERIE, BUILT-IN, L.P.G. (PROPANE) MODEL #18249CE 7 BURNER STAINLESS STEEL, ROTISSERIE, BUILT-IN, N.G. (NATURAL GAS) REF # PARTS # DESCRIPTION WARRANTY PERIOD 18001 LID - FRONT 20 yrs 18014 LID - REAR... - Page 30 PARTS LIST MODEL #18248CE 7 BURNER STAINLESS STEEL, ROTISSERIE, BUILT-IN, L.P.G. (PROPANE) MODEL #18249CE 7 BURNER STAINLESS STEEL, ROTISSERIE, BUILT-IN, N.G. (NATURAL GAS) REF # PARTS # DESCRIPTION WARRANTY PERIOD 18359 SIDE BURNER S/STEEL BURNER 3 yrs 64010 SIDE BURNER COOKING GRATE...
-
Page 31: Exploded Illustrations
EXPLODED ILLUSTRATIONS Detail A Detail C Detail J Detail B Detail K Detail G Detail D Detail H Detail E... -
Page 32: How To Order Replacement Parts
HOW TO ORDER REPLACEMENT PARTS Please refer to the Parts List on pages 29 and 30, and Exploded Illustration on page 31. To make sure you obtain the correct replacement parts for your gas grill, the following information is required to assure getting the correct part. 1. -
Page 33: Warranty
WHO MAY USE THIS WARRANTY? BULL OUTDOOR PRODUCTS, INC. located at address 1011 East Pine St. Lodi, CA. 95240 (“we”) extend this limited warranty only to the consumer who originally purchased the product (“you”) at the original site of delivery or installation. - Page 34 All of the parts and construction materials are covered for two years. Grill Accessories and Grill Covers do not include a warranty period. Registering your Grill Thank you for purchasing your Bull Outdoor For Warranty Claims or Replacement Parts ordering, please fill out the area provided below: Product.
Need help?
Do you have a question about the 18248CE and is the answer not in the manual?
Questions and answers