
Related Manuals for Bull 45550


Summary of Contents for Bull 45550
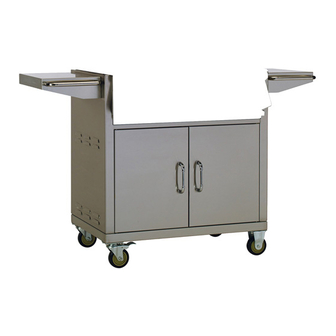
- Page 1 ASSEMBLY & OPERATING INSTRUCTIONS MODEL #45550 30” CART BOTTOM FOR USE WITH ANGUS (PICTURED), LONESTAR SELECT & OUTLAW GRILL HEADS...
-
Page 2: Table Of Contents
TABLE OF CONTENTS PAGE # HARDWARE LIST……....………………...…………………………………………………….………………………..………………………...2 ASSEMBLY INSTRUCTIONS………………………..….…….………………...……..….………………………………..…...…………..….…..3 CLEANING & MAINTENANCE………………………………………………………………….……………………..….……….…..……….………7 CLEANING THE GRILL CART…………………...….…...………….….……...…......……..…..….….….….…….…...……7 PARTS LIST………………………………………………….…….….……….……….….….…………..……….……………………......8 EXPLODED ILLUSTRATION………………………………….…………………….…………………..……….…….…………….…..….….………9 LIMITED WARRANTY…………………………………….………….…….……….….……………..….………….……….….…..….……..……..10 - READ THE FOLLOWING INSTRUCTIONS CAREFULLY AND BE SURE YOUR GRILL CART IS PROPERLY INSTALLED, ASSEMBLED AND CARED FOR. FAILURE TO FOLLOW THESE INSTRUCTIONS MAY RESULT IN SERIOUS BODILY INJURY AND/OR PROPERTY DAMAGE. IF YOU HAVE QUESTIONS CONCERNING ASSEMBLY OR OPERATION, CONSULT YOUR DEALER OR APPLIANCE SERVICE REPRESENTATIVE. -
Page 3: Hardware List
HARDWARE LIST 1A – 1/2” Allen wrench head screw (8x) 1B – 9/16” Phillips head screw (2x) 1C – 1” Phillips head screw (2x) 1D – 1” Phillips head screw (16x) 1E – 7/16” Small flat washer (8x) 1F – 9/16” medium flat washer (2x) 1G –... -
Page 4: Assembly Instructions
Do not assemble or operate a grill cart that appears to be damaged. For your safety, Bull recommends the assistance of another person when assembling larger and/or heavier items. - Page 5 ASSEMBLY INSTRUCTIONS (Cont.) Step #3. Ensure the swivel casters are in the locked position in order to prevent the cart from moving and causing injury. Place the grill head onto the cart (this step will require at least 2 people). Attach the grill head to the cart body using two 1” phillips head screws (1C) and two 9/16” medium flat washers (1F).
- Page 6 ASSEMBLY INSTRUCTIONS (Cont.) There is a secondary grill head attachment spot located in the front which is not necessary as long as you have the back attached. However, If you wish to secure the front, simply remove the grease tray from the grill head and attach using two 9/16” Phillips head screw (1B).
- Page 7 ASSEMBLY INSTRUCTIONS (Cont.) Step #4. Attach the left and right side shelves to the cart body with four 1/2” allen wrench head screws (1A) and four 7/16” small flat washers (1E) per shelf. Note: To prevent damage to the cart, do not lift unit by the side shelves. Step #5.
-
Page 8: Cleaning & Maintenance
These chemicals combined with heat and humidity greatly increase the corrosiveness of these chemicals. Regular cleaning is the best way to prevent corrosion and add years of enjoyment to your Bull stainless steel products. -
Page 9: Parts List
PARTS LIST MODEL #45550 30” CART BOTTOM REF # PARTS # DESCRIPTION WARRANTY PERIOD 45500 LEFT DOOR PANEL 1 Yr 45501 RIGHT DOOR PANEL 1 Yr 16572 DOOR HANDLE 1 Yr 45509 SIDE SHELF - RIGHT 1 Yr 45510 SIDE SHELF - LEFT... -
Page 10: Exploded Illustration
EXPLODED ILLUSTRATION... -
Page 11: Limited Warranty
LIMITED WARRANTY Bull Outdoor Products, Inc. warrants to the original purchaser at the original site of delivery with proof of purchase of each Outdoor Gas Grill that when subject to normal residential use, it is free from defects in workmanship and materials for the periods specified below. This warranty excludes grills used in rental or commercial applications.
Need help?
Do you have a question about the 45550 and is the answer not in the manual?
Questions and answers