EarthWay Polar Tech 90399 Assembly Instructions Manual
Ice melt spreader
Hide thumbs
Also See for Polar Tech 90399:
- Assembly instructions manual (9 pages) ,
- Assembly instructions manual (9 pages)
Advertisement
MODEL # 90399
Visit our EarthWay
website to see the
assembly video
Prior to assembly, you will need:
Needle nose pliers
#2 Phillips screwdriver
Two 7/16" adjustable or
box wrenches
2170_M52164_RevOct2021
100LB Stainless Steel
ASSEMBLY INSTRUCTIONS
THANK YOU
Thank you for selecting EarthWay for your
spreader needs. Our production team in
Northern Indiana takes pride in building this
spreader. Our customer support team is
standing ready to ensure your success.
Please contact us at www.EarthWay.com to
see our full line of commercial, lawn & garden tools.
NOTE: The large opening is designed to allow ice melt to flow
through spreader without the need for an agitator. This unit is
.
not designed for fertilizer
ASSEMBLY HARDWARE
1/4-20 X 1"
M6 X 1 X25MM
1/4-20 X 1 1/2"
(QTY 2)
M6 X 1 X 40MM
(QTY 4)
SPREADER COMPONENTS
HANDLES
AXLE
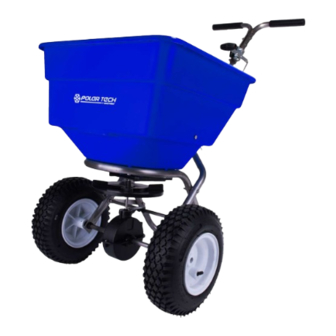
Ice Melt Spreader
1/4-20 X 1 1/2"
M6 X 1 X 40MM
1/4-20 X 2"
(QTY 4)
M6 X 1 X 50MM
1/4-20 X 2 1/4"
(QTY 5)
M6 X 1 X 55MM
(QTY 2)
HOPPER
FRAME
GUAGE
METER
FRAME
ROD
FOOT
X-BRACE
PIVOT
GEAR
BOX
IMPELLER
PAGE 1
Advertisement
Table of Contents

Subscribe to Our Youtube Channel
Related Manuals for EarthWay Polar Tech 90399


Summary of Contents for EarthWay Polar Tech 90399
- Page 1 Ice Melt Spreader MODEL # 90399 ASSEMBLY INSTRUCTIONS THANK YOU Visit our EarthWay Thank you for selecting EarthWay for your website to see the spreader needs. Our production team in assembly video Northern Indiana takes pride in building this spreader. Our customer support team is standing ready to ensure your success.
-
Page 2: Helpful Hints
Assembly and Operation Instructions HELPFUL HINTS Read the directions before assembly. If your spreader does not spread evenly, be sure “FRONT” on the GEARBOX points to the front of the spreader. The impeller must turn clockwise when pushing forward. Reversing the GEARBOX during assembly will cause issues. ... - Page 3 Assembly and Operation Instructions Install GEARBOX by inserting the PINION Step 4: SHAFT into hole in center of HOPPER bottom. The word “FRONT” on the GEARBOX must point to Front of the HOPPER. NOTE: Place PolarTech brand towards the front of the hopper.
- Page 4 Hog Ring. Insert Hog Ring through AXLE (not thru the wheel). New for 2021 EarthWay listened to customers who desired an adjustable handle for taller operators. Step 9: Select three (3) ¼-20 x 2” (M6 X 1 X 50MM) bolts and three (3) ¼-20 (M6 X 1) nylon lock nuts to complete this step.
- Page 5 Assembly and Operation Instructions TIGHTEN ALL HARDWARE. TALL OPERATOR CONFIGUATION – with the four handle holes, use the bottom two holes for the guage and use the top hole for the spacer 1/4-20 X 2” M6 X 1 X 50MM Hex Head Bolts (QTY 3) 1/4-20 X 2”...
- Page 6 Assembly and Operation Instructions (This step is only required if you want Step 10: Step 11: to change the position of the handles). NOTE: Thread hex nut onto the end of the pivot rod. BEFORE INSTALLING GAUGE AND UPPER Insert threaded end of the pivot rod into the shut off HANDLES TO HANDLE SHAFT, UPPER HANDLES plate.
- Page 7 Assembly and Operation Instructions Step 13: Install flattened end of CONTROL ROD Step 14: in to LEVER on GAUGE as shown. Turn to lock in place. Next push LEVER forward to the “0” position. Align CONTROL ROD with hole in PIVOT BRACKET, pull LEVER backward “30”...
-
Page 8: How To Order Parts
Assembly and Operation Instructions HOW TO ORDER PARTS Call or Email: TURF DEPOT 800-305-9255 or earthway@turfdepot.com 100LB (90399) High Output Broadcast Spreader Parts List SERIES PART # DESCRIPTION SERIES PART # DESCRIPTION 40003 SQUARE SCREEN 60333 GEABOX ASSEMBLY 99342 HOPPER & SHUTOFF ASSEMBLY 12110 9”... -
Page 9: Customer Service
EarthWay. Due to the corrosive nature of most fertilizers and ice melt products, EarthWay Products, Inc. makes no warranty against and specifically excludes part(s) or product degradation or failure due to corrosion or its effects.
Need help?
Do you have a question about the Polar Tech 90399 and is the answer not in the manual?
Questions and answers