Advertisement
Quick Links
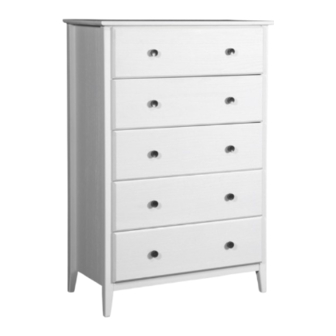
51 ¼"
Thank you for choosing Grain Wood Furniture, it is an honor to be in your home! If you
have any questions, feedback, or need replacement parts please contact us at:
grainwoodfurniture.com/help or
Greenport Collection
5-Drawer Chest
REV - 11/2023
Assembly Instructions
support@grainwoodfurniture.com
Made in Brazil
2-person assembly
Model #
Finish
GPS0703
Brushed White
Brushed Walnut
GPS0705
GPS0716 Brushed Driftwood
Brushed Grey
GPS0740
PH #2
page 1/18
Advertisement

Related Manuals for GrainWood Greenport GPS0703


Summary of Contents for GrainWood Greenport GPS0703
- Page 1 Assembly Instructions 2-person assembly PH #2 51 ¼" Model # Finish GPS0703 Brushed White Brushed Walnut GPS0705 GPS0716 Brushed Driftwood Brushed Grey GPS0740 Thank you for choosing Grain Wood Furniture, it is an honor to be in your home! If you have any questions, feedback, or need replacement parts please contact us at: grainwoodfurniture.com/help or support@grainwoodfurniture.com...
- Page 2 PLEASE READ BELOW BEFORE BEGINNING ASSEMBLY Enlist help from a friend or family member as most items require two Ÿ people for proper assembly. Choose a spacious, open area near where the piece will be located once Ÿ assembled. It is easier to move parts than to relocate the furniture after it is fully assembled.
-
Page 3: Hardware List
HARDWARE LIST 65 + 4 ANTI-TIPPING RESTRAINT KIT 4,0x30 2 + 1 20 + 1 3,0x20 3,0x20 3,5x14 15 + 1 3,5x16 10 + 1 250mm - 9 ³⁄ " M4x25 40 + 2 6,0x10 62 + 4 8,0x25 330mm - 13" ATTENTION 232,7mm - 9 ¹⁄... - Page 4 Box A - 1 of 1 Qty. Description Part # Right side Left side Upper crosspiece Lower crosspiece Back panel Drawer front Drawer right side Drawer left side Drawer bottom Drawer back Drawer bottom support Profile “H” Rear panel Stabilizing panel Hardware page 4/18...
- Page 5 Tip: Use a hammer in case dowels are hard to install by hand. 8,0x25 page 5/18...
- Page 6 3,5x14 page 6/18...
- Page 7 Glide wheels should be positioned towards the front and bottom of the side panel. Need help? Scan the QR code. 6,0x10 RIGHT Side page 7/18...
- Page 8 Glide wheels should be positioned towards the front and bottom of the side panel. Need help? Scan the QR code. 6,0x10 LEFT Side page 8/18...
- Page 9 Attention: There are no predrilled holes for the A4 screws on parts 02 and 03. 3,5x14 page 9/18...
- Page 10 ü ü Attention: There are no predrilled holes for the A1 screws on part 02. 4,0x30 Attention: There are no predrilled holes for the A1 screws on part 02. 4,0x30 page 10/18...
- Page 11 Attention: There are no predrilled holes for the A1 screws on part 03. 4,0x30 Attention: There are no predrilled holes for the A1 screws on part 01. 4,0x30 page 11/18...
- Page 12 Make sure back panels are perfectly aligned with side panels and top and there are no gaps. Gap present û No gap ü ü 10x10 Gap present û No gap ü 10x10 page 12/18...
- Page 13 10x10 Attention: There are no predrilled holes for the A4 screws on parts 07 and 16. 1" 3,5x14 page 13/18...
- Page 14 Attention: There are no predrilled holes for the A1 screws on part 08. 4,0x30 page 14/18...
- Page 15 Flip the assembled drawer upside down to install glides. Need help? Scan the QR code. Drawer RIGHT Drawer LEFT 6,0x10 page 15/18...
- Page 16 Observe the correct orientation as shown below. ü û 3,5x16 3,5x16 M4 x 25 page 16/18...
- Page 17 18) Place the labeled drawer in the top position page 17/18...
- Page 18 ANTI-TIPPING RESTRAINT KIT Install against the furniture on the wall Anchors and screws are not included, choose best type based on your wall Install both parts F8 3,0x20 Tighten them together using the safety strap page 18/18...
Need help?
Do you have a question about the Greenport GPS0703 and is the answer not in the manual?
Questions and answers