Advertisement
Quick Links
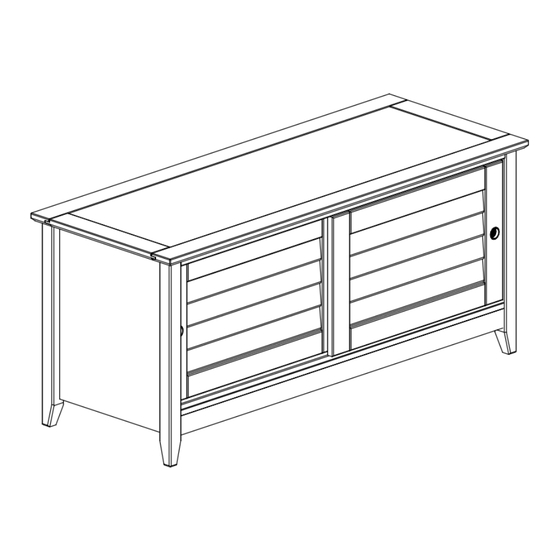
21 ¼"
Thank you for choosing Grain Wood Furniture, it is an honor to be in your home!
If you have any questions, feedback, or need replacement parts please contact us at:
grainwoodfurniture.com/help or
Greenport Collection
Storage Bench
REV - 06/2024
Assembly Instructions
48"
support@grainwoodfurniture.com
18 ¾"
Made in Brazil
1-person assembly
Model #
Finish
GP2503
Brushed White
Brushed Walnut
GP2505
Brushed Driftwood
GP2516
PH #2
page 1/13
Advertisement

Related Manuals for GrainWood Greenport GP2503


Summary of Contents for GrainWood Greenport GP2503
- Page 1 Assembly Instructions 1-person assembly 18 ¾" 48" 21 ¼" PH #2 Model # Finish GP2503 Brushed White Brushed Walnut GP2505 Brushed Driftwood GP2516 Thank you for choosing Grain Wood Furniture, it is an honor to be in your home! If you have any questions, feedback, or need replacement parts please contact us at: grainwoodfurniture.com/help or support@grainwoodfurniture.com Greenport Collection...
- Page 2 PLEASE READ BELOW BEFORE BEGINNING ASSEMBLY Enlist help from a friend or family member as most items require two Ÿ people for proper assembly. Choose a spacious, open area near where the piece will be located once Ÿ assembled. It is easier to move parts than to relocate the furniture after it is fully assembled.
-
Page 3: Hardware List
HARDWARE LIST 20 + 1 3,5x16 4,0x40 25 + 2 4,0x30 30 + 2 8,0x25 8 + 1 Ø6x8 metal 25x25 20x20 ATTENTION Before starting assembly please verify the hardware set is complete. For missing hardware please contact us at grainwoodfurniture.com/help WARNING: CHOKING HAZARD... - Page 4 Qty. Description Part # Right side Left side Upper crosspiece Lower crosspiece Rear Mount Back panel Front Mount Base Left door Right door Adjustable shelf Hardware page 4/13...
- Page 5 Tip: Use a hammer in case dowels are hard to install by hand. 8,0x25 page 5/13...
- Page 6 3,5x16 Attention: There are no predrilled holes for the A41 screws on part 02. 4,0x30 page 6/13...
- Page 7 Attention: There are no predrilled holes for the A16 screws on part 06. 4,0x40 Attention: There are no predrilled holes for the A41 screws on part 02. 4,0x30 page 7/13...
- Page 8 Attention: There are no predrilled holes for the A41 screws on part 03. 4,0x30 Attention: There are no predrilled holes for the A9 screws on part 05. 3,5x16 page 8/13...
- Page 9 The part number label (07) marks the inner side. Attention: There are no predrilled holes for the A41 screws on part 09. 4,0x30 Attention: There are no predrilled holes for the A41 screws on part 01. 4,0x30 page 9/13...
- Page 10 Choose the desired shelf height and insert metal supports. 4,0x30 page 10/13...
- Page 11 Flip the door upside down. 3,5x16 page 11/13...
- Page 12 Flip the door upside down. 3,5x16 page 12/13...
- Page 13 page 13/13...
Need help?
Do you have a question about the Greenport GP2503 and is the answer not in the manual?
Questions and answers