Table of Contents
Advertisement
Available languages
Available languages
Quick Links
MANUALE D'USO
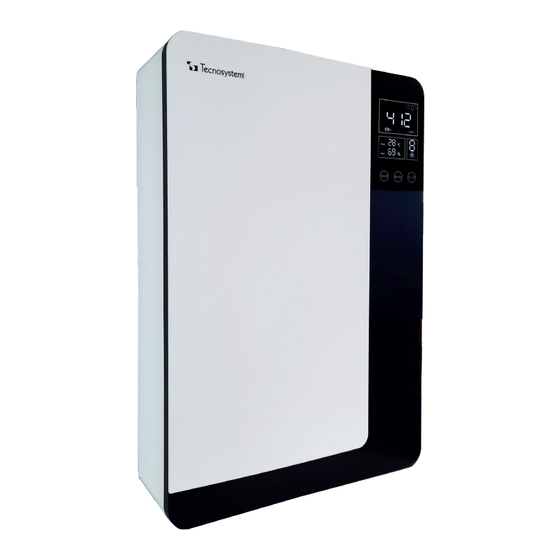
SILENCE AIR PLUS
RECUPERATORE DI CALORE RESIDENZIALE DA PARETE
INTEGRABILE IN SISTEMI BMS
• cod. ACC300009
Tecnosystemi S.p.A. - Società Benefit
www.tecnosystemi.com
via dell'Industria, 2/4 - Z.I. San Giacomo di Veglia
31029 Vittorio Veneto (Treviso) - Italy
Phone +39 0438.500044 Fax +39 0438.501516
Numero Verde 800 904474
email: info@tecnosystemi.com
C.F. - P. IVA - R.I.TV IT02535780247 | Cap. Soc. € 5.000.000,00 i.v.
COD. CLI00135
REV. 01 / 16-02-2024
(only for Italy)
Advertisement
Chapters
Table of Contents

Related Manuals for Tecnosystemi SILENCE AIR PLUS

Summary of Contents for Tecnosystemi SILENCE AIR PLUS
- Page 1 REV. 01 / 16-02-2024 SILENCE AIR PLUS RECUPERATORE DI CALORE RESIDENZIALE DA PARETE INTEGRABILE IN SISTEMI BMS • cod. ACC300009 Tecnosystemi S.p.A. - Società Benefit www.tecnosystemi.com via dell’Industria, 2/4 - Z.I. San Giacomo di Veglia Numero Verde 800 904474 (only for Italy) 31029 Vittorio Veneto (Treviso) - Italy email: info@tecnosystemi.com...
-
Page 2: Table Of Contents
Indice 1. Introduzione 1.1 Informazioni generali 1.2 Scopo e contenuto delle istruzioni 1.3 Conservazione del manuale delle istruzioni 1.4 Aggiornamento delle ist ruzioni 1.5 Identificazione dell’unità 2. Sicurezza 2.1 Avvertenze generali 3. Descrizione del prodotto 3.1 Descrizione del prodotto e uso previsto 3.2 Dati tecnici 3.3 Contenuto della confezione / Accessori 4. -
Page 3: Introduzione
1.4 Aggiornamento delle istruzioni Verificare che le istruzioni siano aggiornate all’ultima revisione disponibile. Tecnosystemi si impegna a migliorare e sviluppare continuamente i propri prodotti e si riserva il diritto di apportare modifiche alle specifiche, agli allestimenti e alla documentazione in qualsiasi momento, senza preavviso e senza obbligo di aggiornare le versioni già consegnate. -
Page 4: Identificazione Dell'unità
1,00 • Sylver Polyester Label; identificazione. • Font Arial; Un FACSIMILE della targhetta è visualizzato qui sotto con la relativa legenda dei dati in essa riportati: SILENCE AIR PLUS Minimum symbol requirement L’etichetta identificativa non deve essere mai rimossa dall’unità Legenda: (1) Modello (2) Caratteristiche alimentazione elettrica (3) Portata aria nominale Label Ink must not be erased by solvent test according to clause. 7.14 of CEI EN 60335-1 : (4) Potenza elettrica assorbita The markings required by the standard shall be clearly legible and durable. -
Page 5: Sicurezza
2. Sicurezza 2.1 Avvertenze generali Questo manuale di istruzioni fornisce le informazioni essenziali per installare, utilizzare e mantenere il prodotto. È stato redatto in conformità alle normative dell’Unione Europea e alle norme tecniche in vigore al momento della pubblicazione. Questo manuale include le indicazioni per prevenire l’uso improprio del prodotto in modo ragionevolmente prevedibile. ATTENZIONE Per evitare danni alle persone e necessario prendere le seguenti precauzioni: •... -
Page 6: Descrizione Del Prodotto
• Non lasciare l’apparecchio esposto ad agenti atmosferici. • Non coprire e non ostruire l’aspirazione e la mandata dell’apparecchio, in modo da assicurare l’ottimale passaggio dell’aria. TECNOSYSTEMI S.p.A. SOCIETÀ BENEFIT declina ogni responsabilità per eventuali danni causati da una non corretta installazione, uso improprio o manomissione del prodotto. 3. Descrizione del prodotto 3.1 Descrizione del prodotto e uso previsto Silence Air Plus è una unità di ventilazione con recuperatore di calore con integrata la funzione di... - Page 7 • Dati targa Alimentazione elettrica 230V, 50Hz, monofase Assorbimento elettrico massimo 44 W Classe di isolamento Classe I Grado IP IP X2 Motori Brushless EC Azionamento 8 velocità Portata massima 150 m Tipologia scambiatore Entalpico a flussi incrociati Efficienza termica del pacco di scambio 82 % Efficienza entalpica (riscaldamento) 58 % Efficienza entalpica (raffrescamento) 52 % Temperatura dell’aria...
- Page 8 • Prestazioni alle diverse velocità Portata d’aria Pressione sonora Potenza elettrica Corrente Velocità in immissione a 1.5 m [dB(A)] 12.6 0.16 22.6 16.9 0.18 25.1 18.1 0.19 27.7 22.9 0.21 29.7 25.2 0.24 31.7 29.2 0.27 33.1 34.2 0.31 35.1 43.8 0.37 37.9...
- Page 9 • Dati Ecodesign In accordo a Regolamento (UE) 1253/2014 e Regolamento (UE) 1254/2014 Marchio Tecnosystemi Modello ACC300009 -76,8 Clima freddo -39,2 Consumo specifico di energia Clima temperato (SEC, kWh/m /a) e Classe SEC -15,0 Clima caldo UVB, UVR Tipologia Unità di Ventilazione Bidirezionale, Residenziale Tipo di azionamento A velocità variabile Tipo di sistema di recupero del calore Recuperativo Efficienza termica del recupero di calore (%)
- Page 10 • Etichettatura energetica Silence Air Plus 37.9 ENERGIA 2016 1254/2014...
-
Page 11: Contenuto Della Confezione / Accessori
3.3 Contenuto della confezione / Accessori Il pacchetto include i seguenti elementi. Si prega di controllare all’apertura della confezione la presenza di: • n°1 unità di ventilazione • n°1 manuale d’istruzione • I seguenti particolari elencati: n°1 pannello n°1 cavo n°1 telecomando n°2 condotti in PVC di installazione di alimentazione n°1 griglia n°1 griglia n°2 tappi n°2 flange di aspirazione di scarico n°2 protezione n°2 guarnizioni n°2 guarnizioni... -
Page 12: Trasporto, Movimentazione E Stoccaggio
4. Trasporto, movimentazione e stoccaggio 4.1 Ricevimento e ispezione Il prodotto ha lasciato la fabbrica imballato e in prefetto stato. All’atto del ricevimento del prodotto, verificarne l’integrità: eventuali danni dovranno essere immediatamente contestati al trasportatore annotandoli sul documento di trasporto e informando tempestivamente il fornitore. 4.2 Stoccaggio Conservare il prodotto imballato nel proprio imballaggio, in un luogo chiuso e asciutto, al riparo dagli agenti atmosferici. 4.3 Movimentazione e disimballaggio Si consiglia di lasciare le unità imballate durante la movimentazione e di togliere l’imballo solo all’atto dell’installazione. L’imballo dell’unità deve essere rimosso con cura evitando di arrecare possibili... -
Page 13: Installazione Meccanica
5.1 Installazione meccanica A seconda della modalità di installazione a parete, utilizzare i condotti d’aria posteriori oppure laterali. • Installazione con condotti posteriori Scegliere la posizione adatta sul muro, segnare la posizione del foro d’ingresso aria e dell’uscita aria, contrassegnare anche i 5 fori per il fissaggio del dispositivo a parete. Attenzione: garantire uno spazio minimo di 1,5 m da terra e di 0,3m dai due fianchi laterali. I fori da praticare sulla parete per i condotti dell’aria devono essere Ø 100 mm e leggermente inclinati lungo l’asse verso il basso di modo da impedire il passaggio di acqua piovana all’interno dei condotti aria. La dimensione consigliata per i 5 fori di fissaggio è Ø 6 x 70 mm Attenzione: le dimensioni dei fori di ingresso aria e uscita aria devono essere compatibili con i particolari in dotazione nella confezione. -
Page 14: Collegamenti Elettrici
• Installazione con condotti laterali Rimuovere i tappi di ingresso dal fianco laterale e installarli sul pannello posteriore. Incollare gli anelli di tenuta sulle flange, fissare le flange sul fianco laterale a mezzo bulloni M3 x 12. Scegliere la posizione adatta sul muro, segnare la posizione del foro d’ingresso e uscita aria laterali, contrassegnare anche i 5 fori per il fissaggio del dispositivo a parete. Attenzione: garantire uno spazio minimo di 1,5 m da terra e di 0,3 m dai due fianchi laterali I fori da praticare sulla parete per i condotti dell’aria devono essere Ø 100 mm e leggermente inclinati lungo l’asse verso il basso di modo da impedire il passaggio di acqua piovana all’interno dei condotti aria. La dimensione consigliata per i 5 fori di fissaggio è Ø 6 x 70 mm. Attenzione: si raccomanda di utilizzare condotti flessibili per l’installazione con condotti laterali. Condotti flessibili a cura dell’installatore. Agganciare il recuperatore di calore sul pannello d’installazione precedentemente fissato a muro. Ad installazione completata è possibile accendere il recuperatore. In base allo spessore della parete, tagliare la lunghezza adeguata dei tubi flessibili di condotto, collegare i tubi di condotto alle flange da un lato e le griglie di ingresso aria e uscita aria dall’altra estremità; assicurarsi che le tettoie delle griglie siano ruotate sul lato superiore. -
Page 15: Installazione Elettrica - Collegamenti Elettrici
5.3 Installazione elettrica – collegamenti elettrici • Utilizzare esclusivamente il cavo di alimentazione in dotazione. • La connessione elettrica deve essere realizzata secondo le normative locali ed internazionali. • Schema elettrico 5.4 Collegamento porta seriale (BMS) Per i collegamenti seriali (BMS) è indispensabile utilizzare cavi idonei al recuperatore. Baud rate 9600bps, Even/Odd No, Date bit 8,... - Page 16 7(0x0007) √ reserved Viene scritto il dato 8(0x0008) √ √ 0-99 Temperatura ricevuto dalla rete Viene scritto il dato 9(0x0009) √ √ 0-99 Humidity ricevuto dalla rete 10(0x000a) √ reserved Viene scritto il dato 11(0x000b) √ √ 0-1000 Pm2.5 data ug/m3 ricevuto dalla rete Viene scritto il dato 12(0x000c)
-
Page 17: Messa In Servizio
5.5 Messa in servizio ATTENZIONE • Le operazioni di messa in servizio devono essere eseguite in conformità a tutte le prescrizioni dei paragrafi precedenti. • Verificare che il prodotto sia installato a regola d’arte ed in conformità alle indicazioni di questo manuale. • Verificare l’allacciamento elettrico ed il corretto fissaggio di tutti i morsetti. • Verificare che la tensione sia quella riportata sulla targhetta dell’unità. • Verificare che il prodotto sia connesso all’impianto di terra. • Prima di procedere all’accensione controllare che tutti i pannelli di chiusura siano nella loro posizione e fissati. 6. Istruzioni per l’uso • Prima dell’uso, controllare che l’apparecchio sia correttamente fissato al muro. -
Page 18: Display E Pulsanti
6.2 Display e pulsanti • Descrizione interfaccia display Ora impostata e timer Valore di CO2 rilevata nel locale Temperatura e umidità rilevata nel locale Velocità di funzionamento Modalità funzionamento SPEED: impostazione velocità MODE: modalità di funzionamento ON/OFF: accensione/spegnimento Premere a lungo il pulsante “ON/OFF” per accendere o spegnere la macchina. Dopo l’avvio, premere il pulsante MODE per cambiare modalità di funzionamento: • Auto, • Manual, • Timer, • Sleep, • Pure L, •... -
Page 19: Funzioni
6.3 Funzioni • Modalità Auto Con modalità automatica AUTO, il dispositivo regolerà autonomamente la portata d’aria di mandata in base al valore di CO rilevato all’interno del locale, come da seguente tabella: Valore CO Salubrità dell’aria Velocità Operativa 0 ≤ CO ≤ 450 Eccellente 450 < CO ≤ 1000 Buona 1000 < CO ≤ 1500 Media 1500 < CO ≤ 2000 Scarsa >2000 Molto scarsa Nota: per garantire sempre un sufficiente apporto di aria fresca, in modalità auto, periodicamente i ventilatori si portano in modo automatico e per un breve periodo a velocità maggiori rispetto a quelle in tabella. In tale periodo la velocità diversa è mostrata a display. -
Page 20: Telecomando
• Modalità purificazione “PURE L”, “PURE M”, “PURE H” Silence Air Plus ha un design speciale per la purificazione dell’aria interna. Sul lato dell’aria di immissione è presente un filtro HEPA, utile a pulire l’aria interna e ridurre il livello di PM2,5. Oppure Sono presenti 3 funzioni di purificazione per migliorare rapidamente la qualità dell’aria interna (ventilazione a pressione positiva); il grado di purificazione dell’aria migliora progressivamente seguendo l’ordine delle 3 modalità: • Pure L : la ventola di alimentazione funziona alla velocità massima (8), mentre la ventola di scarico funziona al 70% della ventola di alimentazione. • Pure M : la ventola di alimentazione funziona alla velocità massima (8), mentre la ventola di scarico funziona al 50% della ventola di alimentazione. -
Page 21: Controllo Wifi
n Instructions WIFI Function Nota: se non si esegue alcuna operazione entro 15 secondi, il dispositivo terminerà l’operazione, salvando automaticamente l’impostazione. Installation of “Smart Life” of remote controller Al termine dell’impostazione del timer, se si preme nuovamente il pulsante “Timer”, nell’angolo in alto a destra del display mostra il tempo rimanente per l’impostazione del timer, in questo momento è possibile on introduction: 1. If your phone is Android system, please search and download impostare nuovamente il timer. -
Page 22: Modifica Delle Informazioni Utente
su “device removing”. B. Continuare l’operazione cliccando su “Removing Binding”, seguito da “confirm”, il dispositivo verrà rimosso. 6.11 Modifica delle informazioni utente A. Fai clic su “I” nell’angolo in basso a destra della home page. B. Fare clic sull’immagine in alto per accedere alla pagina delle informazioni utente. C. Da qui è possibile modificare le informazioni utente, inclusi avatar, nome utente (nickname, numero account, sicurezza, ecc.) 6.12 Disconnessione dall’account A. Clicca su “Me” nell’angolo in basso a destra della home page, poi fare clic su “impostazioni”. B. Selezionare “Esci” in basso per disconnettersi. 7. Manutenzione ATTENZIONE • Qualsiasi operazione di manutenzione del prodotto deve essere eseguita esclusivamente da personale professionalmente qualificato ed abilitato. -
Page 23: Filtro Hepa
- Take 8. Input the pipes to the wall, seal the gap between wall and the pipes by sealant. - Take off t ventila ventilator, t 9. Connect the another sides of the pipes to the flanges on side of the ventilator. - Clean 9. -
Page 24: Diagnosi E Risoluzione Dei Problemi
8. Diagnosi e risoluzione dei problemi Fenomeno Possibile motivo Soluzione 1. Collegare il cavo d’alimenta- 1. Cavo d’alimentazione scolle- zione gato Lo schermo non si accende 2. Sostituire il cavo con uno 2. Cavo d’alimentazione rotto equivalente 3. Display guasto 3. Contattare il costruttore Nessuna indicazione oppure Corto circuito oppure contatto indicazione errata dei valori di scollegato del sensore corrispet- Contattare il costruttore... -
Page 25: Smaltimento
9. Smaltimento Tutte le operazioni di messa fuori servizio devono essere eseguite da personale abilitato in ottemperanza alla legislazione nazionale. Lo smaltimento deve avvenire in accordo alla Direttiva 2012/19/UE sui Rifiuti da Apparecchiature Elettrici ed Elettronici (RAEE). Il simbolo del cassonetto barrato riportato sull’apparecchio indica che il prodotto, alla fine della propria vita utile, deve essere trattato separatamente dai rifiuti domestici. Il prodotto deve essere conferito in un centro di raccolta differenziata per apparecchiature elettriche ed elettroniche oppure riconsegnato al rivenditore al momento dell’acquisto di una nuova apparecchiatura equivalente. -
Page 26: Garanzia
10. Garanzia 1. La presente garanzia opera esclusivamente nei confronti del Cliente (persona giuridica) e non nei confronti del consumatore finale (persona fisica) al quale il Cliente abbia fornito il Prodotto. 2. La garanzia ha durata di anni 2 (due) a decorrere dalla data di consegna indicata sul d.d.t (bolla). 3. La garanzia copre i difetti di fabbricazione e del materiale dei Prodotti. Non opererà dunque con riferimento ai difetti causati da: •... - Page 27 SILENCE AIR PLUS RESIDENTIAL WALL-MOUNTED HEAT RECOVERY SYSTEM THAT CAN BE INTEGRATED INTO BMS SYSTEMS • cod. ACC300009 Tecnosystemi S.p.A. - Società Benefit www.tecnosystemi.com via dell’Industria, 2/4 - Z.I. San Giacomo di Veglia Numero Verde 800 904474 (only for Italy) 31029 Vittorio Veneto (Treviso) - Italy email: info@tecnosystemi.com...
- Page 28 Index 1. Introduction 1.1 General information 1.2 Purpose and content of the instructions 1.3 Storage of the instruction manual 1.4 Updates of the manual 1.5 Identification of the unit 2. Safety 2.1 General safety instructions 3. Product description 3.1 Product description and intended use 3.2 Technical data 3.3 Contents of the package / Accessories 4.
- Page 29 Tecnosystemi undertakes to continuously improve and develop its products and reserves the right to make changes to specifications, fittings and documentation at any time, without notice and without the obligation to update the versions already delivered. This manual can be downloaded from and is available on the website www.tecnosystemi.com or can be requested at the e-mail address assistenza@tecnosystemi.com, indicating the model and serial number of the product.
- Page 30 1,00 • Sylver Polyester Label; plate. • Font Arial; A FACSIMILE of the plate is displayed below with the relative legend of the data reported on it: SILENCE AIR PLUS Minimum symbol requirement The identification label must never be removed from the unit. Key: (1) Model (2) Electrical power supply characteristics (3) Nominal air flow Label Ink must not be erased by solvent test according to clause. 7.14 of CEI EN 60335-1 : (4) Electrical power absorbed The markings required by the standard shall be clearly legible and durable.
- Page 31 2. Safety 2.1 General safety instructions This instruction manual provides the essential information to install, use and maintain the product. It was drawn up in accordance with European Union regulations and technical standards in force at the time of publication. This manual includes instructions to prevent misuse of the product in a reasonably foreseeable manner.
- Page 32 • Do not cover or obstruct the intake and delivery of the appliance, in order to ensure optimal air passage. TECNOSYSTEMI S.p.A. SOCIETÀ BENEFIT declines all responsibility for any damage caused by incorrect installation and improper use or tampering with the control.
- Page 33 • Electric Data Power supply 230V, 50Hz, single-phase Maximum power consumption 44 W Insulation class Class I IP Grade IP X2 Motors Brushless EC Drive 8-speed Maximum flow rate 150 m Exchanger type Cross-flow enthalpy Thermal efficiency of heat exchanger Enthalpy efficiency (heating) Enthalpy efficiency (cooling) Air temperature -15 ÷ +40 °C Sound power 36 dB(A) Body material Manual...
- Page 34 • Performance at different speeds Air flow capacity Electric Current Sound Pressure Speed in ventilation Power [W] at 1.5 m [dB(A)] 12.6 0.16 22.6 16.9 0.18 25.1 18.1 0.19 27.7 22.9 0.21 29.7 25.2 0.24 31.7 29.2 0.27 33.1 34.2 0.31 35.1 43.8...
- Page 35 • Ecodesign data According to Regulation (EU) 1253/2014 and Regulation (EU) 1254/2014 Brand Tecnosystemi Model ACC300009 -76.8 Cold climate Specific energy consumption -39.2 Average climate (SEC, kWh/m /a) and SEC Class -15.0 Warm climate UVB, UVR – Residential, Type Bidirectional Ventilation Unit Drive type Variable speed Type of heat recovery unit Recuperative Thermal efficiency of heat recovery (%) Maximum flow rate (m3/h) Electrical power input at maximum flow rate (W) 43.8...
- Page 36 • Energy labelling Silence Air Plus 37.9 ENERGIA 2016 1254/2014...
- Page 37 3.3 Contents of the package / Accessories The package includes the following items. Please check when opening the package that the following are included: • n°1 ventilation unit • n°1 instruction manual • The following listed parts: n°1 installation n°1 power n°2 PVC ducts n°1 remote control panel supply cable L = 50 cm n°1 grille n°1 grille n°2 caps...
- Page 38 4. Transportation, handling and storage 4.1 Receipt and inspection The product left the factory packaged and in perfect condition. Upon receipt of the product, check its integrity: any damage must be immediately reported to the carrier by noting it on the transport document and promptly informing the supplier. 4.2 Storage Store the product packaged in its packaging, in a closed and dry place, protected from atmospheric agents. 4.3 Handling and unpacking It is advisable to leave the units packaged during handling and to remove the packaging only upon installation.
- Page 39 5.1 Mechanical installation Use either the rear or side air ducts depending on the type of wall installation. • Installation with rear ducting Choose a suitable position on the wall, mark the position of the air intake hole and the air outlet, also mark the 5 holes for mounting the device on the wall. Caution: ensure a minimum clearance of 1.5m from the ground and 0.3m from the two sides The holes to be drilled in the wall for the air ducts must be Ø100mm and slightly...
- Page 40 • Installation with side ducting Remove the intake caps from the sidewall and install them on the rear panel. Glue the sealing rings onto the flanges, secure the flanges to the sidewall using M3x12 bolts. Choose a suitable position on the wall, mark the position of the side air intake and outlet hole, also mark the 5 holes for mounting the device on the wall.
- Page 41 5.3 Electric information – Electrical connectioni • Only use the supplied power cord. • The electrical connection must be made according to local and international regulations. 5.4 Serial port connection (BMS) For serial connections (BMS) it is essential to use cables suitable for the recuperator. Baud rate 9600bps, Even/Odd No, Date bit 8,...
- Page 42 7(0x0007) √ eserved Data is written when it 8(0x0008) √ √ 0-99 Temperature comes from the network Data is written when it 9(0x0009) √ √ 0-99 Humidity comes from the network 10(0x000a) √ reserved Data is written when it 11(0x000b) √...
- Page 43 5.5 Commissioning WARNING • Commissioning operations must be performed in compliance with all the provisions of the preceding paragraphs. • Check that the product is installed to a professional standard and in compliance with the indications of this manual. • Check the electrical connection and the correct fastening of all the terminals.
- Page 44 6.2 Display and buttons • Description of display interface Set time and timer Measured CO in room Measured temperature and humidity in room Operating speed Operating modes SPEED: speed setting MODE: operating mode ON/OFF: on/off switch Long press the “on/off” button to switch the machine on or off. After start-up, press the MODE button to change the operating mode: •...
- Page 45 6.3 Functions • Auto Mode In automatic AUTO mode, the device will autonomously adjust the delivery air flow rate depending on the value of CO detected inside the room, as shown in the following table: value Status Operational Speed 0 ≤ CO ≤ 450 Excellent 450 < CO ≤ 1000 Good 1000 < CO ≤ 1500 Light Pollution 1500 < CO ≤ 2000 Medium Pollution >2000 Serious Pollution Note: to ensure sufficient indoor fresh air supply, in auto mode, periodically the fans automatically go to higher speeds than those in the table for a short period. During this period the different speed is shown on the display.
- Page 46 • Air purification modes “PURE L”, “PURE M”, “PURE H” modes Silence Air Plushas a special design for indoor air purification. There is a HEPA filter at the supply air side, helpful to clean the indoor air and reduce the PM 2.5 level. Oppure There are 3 purification modes to quickly improve indoor air quality (positive pressure ventilation); the degree of air purification improves progressively following the order of the 3 modes. • Pure : the supply fan runs at maximum speed (8), while the exhaust fan runs at 70% of the supply fan. • Pure M : the supply fan runs at maximum speed (8), while the exhaust fan runs at 50% of the supply fan. • Pure H : the supply fan runs at maximum speed (8), while the exhaust fan runs at 30% of the supply fan. Positive pressure ventilation is beneficial in urban areas where outside air is more polluted. Triple filters clean the supply air, while the positive pressure makes it difficult for polluted air to flow through doors or windows.
- Page 47 “+” to increase o decrease time, repress “Minute” button to To use Silence Air Plus via WiFi, download the “Smart Life” app and follow the inkling, if no operation in 15s, twinkling ends and save setting instructions on the app itself.
- Page 48 B. Click on the picture above to enter the user information page C. After entering into the user information page, you can modify the user information, including avatar, user name (nickname, account number, and security, etc.) 6.12 Sign out A. Click “Me” on the bottom right corner of the homepage, then click “setting” button. B.
- Page 49 - Take 8. Input the pipes to the wall, seal the gap between wall and the pipes by sealant. - Take off t ventila ventilator, t 9. Connect the another sides of the pipes to the flanges on side of the ventilator. - Clean 9.
- Page 50 8. Diagnosis and troubleshooting Problem Potential cause Solution 1. Connect power cable 1. Power cable disconnected 2. Replace cable with Screen does not switch ON 2. Power cable broken equivalent 3. Faulty display 3. Contact manufacturer No indication or incorrect indication of values of Short circuit or disconnected con- Contact manufacturer temperature, humidity or...
- Page 51 9. Disposal All decommissioning operations must be carried out by authorized personnel in compliance with national legislation. Disposal must take place in accordance with Directive 2012/19/EU on Waste from Electrical and Electronic Equipment (WEEE). The crossed-out wheeled bin symbol on the appliance indicates that the product, at the end of its useful life, must be treated separately from household waste. The product must be taken to a separate collection center for electrical and electronic equipment or returned to the retailer when purchasing new equivalent equipment.
- Page 52 10. Warranty 1. This warranty applies exclusively to the Customer (legal person) and not to the end consumer (natural person) to whom the Customer has supplied the Product. 2. The warranty is valid for 2 (two) years starting from the delivery date indicated on the Transport Document (delivery note). 3. The warranty covers manufacturing and material defects of the Products. The warranty will not, therefore, cover any defects attributable to, for example: •...
- Page 53 REV. 01 / 16-02-2024 SILENCE AIR PLUS Wandmontiertes WÄRMERÜCKGEWINNUNGSGERÄT FÜR WOHNGEBÄUDE, ZUR INTEGRATION IN BMS-SYSTEME • Cod. ACC300009 Tecnosystemi S.p.A. - Società Benefit www.tecnosystemi.com Kostenlose Nummer 800 904474 (nur in Italien gültig) E-Mail: info@tecnosystemi.com Via dell’Industria, 2/4 - Z.I. San Giacomo di Veglia Steuernummer - USt-IdNr.
- Page 54 Inhaltsverzeichnis 1. Einleitung 1.1 Allgemeine Informationen 1.2 Zweck und Inhalt der Anleitung 1.3 Aufbewahrung der Bedienungsanleitung 1.4 Aktualisierung der Anleitung 1.5 Maschinenidentifikation 2. Sicherheit 2.1 Allgemeine Warnhinweise 3. Beschreibung des Produkts 3.1 Beschreibung des Produkts und Verwendungszweck 3.2 Technische Daten 3.3 Lieferumfang / Zubehör 4.
-
Page 55: Einleitung
Recht vor, jederzeit und ohne Vorankündigung Änderungen an den Spezifikationen, Ausstattungen und Dokumentationen vorzunehmen und ohne Verpflichtung, die bereits gelieferten Versionen zu aktualisieren. Dieses Handbuch kann heruntergeladen werden und ist auf der Website www.tecnosystemi.com verfügbar oder kann unter der E-Mail-Adresse amministrazione@tecnosystemi.com unter Angabe des Modells und der Seriennummer des Produkts angefordert werden. -
Page 56: Maschinenidentifikation
Daten übereinstimmen. • Font Arial; Nachfolgend wird ein Faksimile der Platte mit der entsprechenden Legende der darauf angegebenen Daten angezeigt: SILENCE AIR PLUS Minimum symbol requirement Das Idenifikationsetikett darf niemals vom Gerät entfernt werden Legende: (1) Modell Label Ink must not be erased by solvent test according to clause. 7.14 of CEI EN 60335-1 : (2) Merkmale Stromversorgung The markings required by the standard shall be clearly legible and durable. -
Page 57: Sicherheit
2. Sicherheit 2.1 Allgemeine Warnhinweise Diese Bedienungsanleitung enthält wichtige Informationen für die Installation, Verwendung und Wartung des Produkts. Es wurde in Übereinstimmung mit den Vorschriften der Europäischen Union und den zum Zeitpunkt der Veröffentlichung geltenden technischen Standards erstellt. Dieses H andbuch enthält A nleitungen, um e inen Missbrauch des P rodukts a uf v ernünftigerweise vorhersehbare Weise zu verhindern. ACHTUNG Um Personenschäden zu vermeiden, müssen folgende Vorsichtsmaßnahmen getroffen werden: • Jegliche Installations- und/oder Wartungsarbeiten am Produkt dürfen ausschließlich von professionell qualifiziertem und autorisiertem Personal durchgeführt werden. -
Page 58: Beschreibung Des Produkts
• Lassen Sie die Inspektionsklappen nicht teilweise geschlossen; Stellen Sie sicher, dass alle Griffe oder Knöpfe perfekt geschlossen sind. ACHTUNG Um Schäden am Produkt zu vermeiden, treffen Sie die folgenden Vorsichtsmaßnahmen: • Nehmen Sie keinerlei Veränderungen am Gerät vor. • Setzen Sie das Gerät keinen Witterungseinflüssen aus. • Decken Sie den Ansaug- und Auslassbereich des Geräts nicht ab und behindern Sie ihn nicht, um eine optimale Luftzirkulation zu gewährleisten. TECNOSYSTEMI S.p.A. SOCIETÀ BENEFIT lehnt jegliche Verantwortung für Schäden ab, die durch falsche Installation, unsachgemäßen Gebrauch oder Manipulationen am Produkt verursacht werden. 3. Beschreibung des Produkts 3.1 Beschreibung des Produkts und Verwendungszweck Silence Air Plus ist eine Lüftereinheit mit Wärmerückgewinner und integrierter Funktion zur Luftreinigung. Geeignet für Wandmontage ermöglicht er den Luftaustausch mit Wärme- und Luftfeuchtigkeitsrückgewinnung dank des enthalpischen Querstrom-Wärmetauschers. 3.2 Technische Daten •... - Page 59 • Kennzeichendaten Stromversorgung 230V, 50Hz, einphasig Maximale Stromaufnahme 44 W Isolierstoffklasse Klasse I Schutzart IP IP X2 Motoren Bürstenlos EC Antrieb 8 Geschwindigkeiten Maximale Tragfähigkeit 150 m Typ von Wärmetauscher Enthalpisch mit Querstrom Enthalpische Effizienz der Austauscheinheit Enthalpische Effizienz (Heizung) Enthalpische Effizienz (Kühlung) Lufttemperatur -15 ÷ +40 °C Schallleistung 36 dB(A) Körpermaterial Handbetrieb Automatikbetrieb Betriebsmodus Timer Sleep (leiser Modus) Reinigung Filter Funktion Reiniger HEPA 99% Raumluft...
- Page 60 • Leistung bei unterschiedlichen Geschwindigkeiten Luftdurchsatz Elektrische Schallleistung Strom Geschwindigkeit am Eingang Leistung bei 1,5m [dB(A)] 12,6 0,16 22,6 16,9 0,18 25,1 18,1 0,19 27,7 22,9 0,21 29,7 25,2 0,24 31,7 29,2 0,27 33,1 34,2 0,31 35,1 43,8 0,37 37,9...
- Page 61 • Daten Ecodesign Gemäß Verordnung (EU) 1253/2014 und Verordnung (EU) 1254/2014 Marke Tecnosystemi Modell ACC300009 -76,8 Kaltes Klima -39,2 Spezifischer Energieverbrauch Mäßiges Klima (SEC, kWh/m /a) und Klasse SEC -15,0 Warmes Klima BVU, WLA Bidirektionales Lüftungsgerät, Wohngebäude Typ von Antrieb Mit variabler Geschwindigkeit Art der Wärmerückgewinnungseinheit Rückgewinnend Thermische Effizienz der Wärmerückgewinnung (%) Maximaler Durchsatz (m Elektrische Leistungsaufnahme bei maximalem 43,8 Durchsatz (W) Schallleistungspegel (LWA) 37,9 Referenzdurchsatz (m 0,0417 Unterschied des Referenzdrucks (Pa)
- Page 62 • Energieverbrauchskennzeichnung Silence Air Plus 37,9 ENERGIA 2016 1254/2014...
-
Page 63: Lieferumfang / Zubehör
3.3 Lieferumfang / Zubehör Im Lieferumfang enthalten sind die folgenden Artikel. Bitte überprüfen Sie beim Öffnen der Verpackung Folgendes: • Nr.1 Lüftungsgerät • Nr.1 Bedienungsanleitung • Die folgenden Zubehörteile: Nr.1 Platte Nr.1 Kabel Nr.1 Fernbedienung Nr.2 PVC-Kanäle Für die Installation Für die Stromversorgung Nr.1 Ansaug- Nr.1 Ablauf- Nr.2 Kappen Nr.2 Flansche gitter gitter Nr.2 Dichtungen Nr.2 Dichtungen Nr.2 Dichtungen Nr.2 Regenschutze Zur rückseitigen Zur seitlichen In Gummi Abdichtung Abdichtung Nr.5 Dübelsätze Nr.4 selbstschneidende... -
Page 64: Transport, Handhabung Und Lagerung
4. Transport, Handhabung und Lagerung 4.1 Empfang und Inspektion Das Produkt verließ das Werk verpackt und in einwandfreiem Zustand. Überprüfen Sie bei Erhalt des Produkts dessen Unversehrtheit: Etwaige Schäden müssen sofort dem Spediteur gemeldet werden, indem sie auf dem Transportdokument vermerkt und der Lieferant umgehend informiert werden. 4.2 Lagerung Lagern Sie das verpackte Produkt in seiner Verpackung an einem geschlossenen, trockenen und vor Witterungseinflüssen geschützten Ort. 4.3 Handhabung und Auspacken Es wird empfohlen, die Geräte während der Handhabung verpackt zu belassen und die Verpackung erst nach der Installation zu entfernen. Die Verpackung des Geräts muss vorsichtig entfernt werden, um mögliche Schäden an der Maschine zu vermeiden. Die Materialien, aus denen die Verpackung besteht, können unterschiedlicher Natur sein (Holz, Pappe, Nylon... -
Page 65: Mechanische Installation
5.1 Mechanische Installation Verwenden Sie je nach Wandmontageart die hinteren oder seitlichen Luftkanäle. • Installation mit hinteren Kanälen Wählen Sie die geeignete Position an der Wand, markieren Sie die Position der Lufteinlass- und Luftauslasslöcher und markieren Sie außerdem die 5 Löcher für die Befestigung des Geräts an der Wand. Achtung: Stellen Sie einen Mindestabstand von 1,5 m zum Boden und 0,3 m zu den beiden Seitenwänden sicher. Die für die Luftkanäle an der Wand anzubringenden Löcher müssen einen Durchmesser von 100 mm haben und entlang der Achse leicht nach unten geneigt sein, um das Eindringen von Regenwasser in die Luftkanäle zu verhindern. Die empfohlene Größe für die 5 Befestigungslöcher beträgt Ø 6 x 70 mm... -
Page 66: Elektrische Anschlüsse
• Installation mit seitlichen Kanälen Entfernen Sie die Einlasskappen von der Seitenwand und installieren Sie sie an der Rückwand. Dichtringe auf die Flansche kleben, Flansche seitlich mit Schrauben M3 x 12 befestigen. Wählen Sie die geeignete Position an der Wand, markieren Sie die Position der seitlichen Lufteinlass- und -auslasslöcher und markieren Sie außerdem die 5 Löcher zur Befestigung des Geräts an der Wand. Achtung: Stellen Sie einen Mindestabstand von 1,5 m zum Boden und 0,3 m zu den beiden Seitenwänden sicher Die für die Luftkanäle an der Wand anzubringenden Löcher müssen einen Durchmesser von 100 mm haben und entlang der Achse leicht nach unten geneigt sein, um das Eindringen von Regenwasser in die Luftkanäle zu verhindern. Die empfohlene Größe für die 5 Befestigungslöcher beträgt Ø 6 x 70 mm... -
Page 67: Elektroinstallation - Elektrische Anschlüsse
5.3 Elektroinstallation – elektrische Anschlüsse • Verwenden Sie ausschließlich das mitgelieferte Netzkabel. • Der elektrische Anschluss muss gemäß den örtlichen und internationalen Vorschriften erfolgen. • Elektrischer Schaltplan 5.4 Serielle Port-Verbindung (BMS) Bei seriellen Verbindungen (BMS) müssen unbedingt für das Wärmerückgewinnungsgerät ge- eignete Kabel verwendet werden. Baudrate 9600bps, Even/Odd No, Date bit 8, Stop bit 1, Kommunikationsintervall > 200ms. Unterstützungsfunktionscode: 0x03, 0x06 Intervall Register Lesen Schreiben Beschreibung Hinweise Werte ON/OFF Status 0(0x0000) √ √ 0-OFF 1--ON Modus Betriebsart: 0 - Manual 1 - Automatisch 1(0x0001) √... - Page 68 7(0x0007) √ Reserviert Die vom Netzwerk 8(0x0008) √ √ 0-99 Temperatur empfangenen Daten werden geschrieben Die vom Netzwerk empfangenen 9(0x0009) √ √ 0-99 Feuchtigkeit Daten werden geschrieben 10(0x000a) √ Reserviert Die vom Netzwerk 11(0x000b) √ √ 0-1000 Pm2.5 data ug/m3 empfangenen Daten werden geschrieben Die vom Netzwerk 12(0x000c) √...
-
Page 69: Inbetriebnahme
5.5 Inbetriebnahme ACHTUNG • Die Inbetriebnahmearbeiten müssen unter Einhaltung aller Bestimmungen der vorstehenden Absätze durchgeführt werden. • Überprüfen Sie, ob das Produkt fachgerecht und in Übereinstimmung mit den Anweisungen in diesem Handbuch installiert wurde. • Überprüfen Sie den elektrischen Anschluss und die korrekte Befestigung aller Klemmen. • Überprüfen Sie, ob die Spannung mit der auf dem Typenschild des Geräts angegebenen Spannung übereinstimmt. • Überprüfen Sie, ob das Produkt an das Erdungssystem angeschlossen ist. • Überprüfen Sie vor dem Einschalten, ob alle Verschlussklappen in ihrer Position und gesichert sind. 6. Gebrauchsanweisung • Überprüfen Sie vor dem Gebrauch, ob das Gerät korrekt an der Wand befestigt ist. • Stellen Sie keine Gegenstände auf oder unter das Gerät, da diese den Luftstrom behindern können. 6.1 Eigenschaften des Produkts Die wandmontierte... -
Page 70: Display Und Tasten
6.2 Display und Tasten • Beschreibung der Displayanzeige Uhrzeit und Timer einstellen Erhobener CO2-Wert im Raum Erhobene Temperatur und Luftfeuchtigkeit im Raum Funktionsgeschwindigkeit Funktionsweise SPEED: Einstellung der Geschwindigkeit MODUS: Betriebsmodus ON/OFF: einschalten/ausschalten 1. Drücken Sie lange auf die „ON/OFF“-Taste, um die Maschine ein- oder auszuschalten. 2. Drücken Sie nach der Inbetriebnahme die Taste MODUS, um den Betriebsmodus zu wechseln: • Auto, • Manual, • Timer, • Sleep, • Pure L, • Pure M, •... -
Page 71: Funktionen
6.3 Funktionen • Modus Auto Im AUTO-Automatikmodus passt das Gerät den Zuluftvolumenstrom selbstständig an den im Raum ermittelten CO -Wert an, wie in der folgenden Tabelle dargestellt: Wert CO Reinheit der Luft Betriebsgeschwindigkeit 0 ≤ CO ≤ 450 Ausgezeichnet 450 < CO ≤ 1000 1000 < CO ≤ 1500 Mittel 1500 < CO ≤ 2000 Schlecht >2000 Sehr schlecht Hinweis: Um stets eine ausreichende Frischluftzufuhr zu gewährleisten, schalten die Ventilatoren im Auto-Modus periodisch automatisch und für kurze Zeit auf höherer Geschwindigkeit als in der Tabelle angegeben. Während dieser Zeit wird die unterschiedliche Geschwindigkeit auf dem Display angezeigt. -
Page 72: Fernbedienung
• Reinigungsmodus „PURE L“, „PURE M“, „PURE H“. Silence Air Plus verfügt über ein spezielles Design zur Luftreinigung in Innenräumen. Auf der Ansaugluftseite befindet sich ein HEPA-Filter, der zur Reinigung der Innenluft und zur Reduzierung des PM2,5-Gehalts beiträgt. Oder Es g ibt 3 R einigungsfunktionen z ur s chnellen V erbesserung d er R aumluftqualität ( Überdrucklüftung); Der Grad der Luftreinigung verbessert sich schrittweise in der Reihenfolge der 3 Modi: •... -
Page 73: Wlan-Steuerung
maximal 8 Stunden einzustellen. Der Standardtimer ist auf 00:00 eingestellt. Drücken Sie die Timer- Taste erneut, um die gewünschte Einstellung zu speichern und den Modus zu verlassen; Das Display zeigt wieder die aktuelle Uhrzeit an. n Instructions WIFI Function Hinweis: Wenn Sie innerhalb von 15 Sekunden keinen Vorgang ausführen, beendet das Gerät den Vorgang und speichert die Einstellung automatisch. Installation of “Smart Life” of remote controller Nachdem die Timer-Einstellung abgeschlossen ist und Sie die „Timer“-Taste erneut drücken, wird in der oberen rechten Ecke des Displays die verbleibende Zeit für die Timer-Einstellung on introduction: 1. -
Page 74: Gerät Entfernen (Gerät Entkoppeln)
6.10 Gerät entfernen (Gerät entkoppeln) A. Rufen Sie das Gerätemenü auf (wie in Punkt 6.8 „Ändern des Gerätenamens“ beschrieben) und klicken Sie dann auf „Gerät entfernen“. B. Setzen Sie den Vorgang fort, indem Sie auf „Bindung entfernen“ und anschließend auf „Bestätigen“ klicken. Das Gerät wird entfernt. 6.11 Benutzerinformationen ändern A. Klicken Sie unten rechts auf der Startseite auf „I“. B. Klicken Sie auf das Bild oben, um auf die Benutzerinformationsseite zuzugreifen. C. Von hier aus können Sie Ihre Benutzerinformationen bearbeiten, einschließlich Avatar, Benutzername (Spitzname, Kontonummer, Sicherheit usw.). 6.12 Trennung von Ihrem Konto A. Klicken Sie unten rechts auf der Startseite auf „Me“ und dann auf „Einstellungen“. B. Wählen Sie unten „Beenden“, um sich abzumelden. 7. Wartung ACHTUNG • Jegliche Wartungsarbeiten am Produkt dürfen ausschließlich von professionell qualifiziertem und autorisiertem Personal durchgeführt werden. •... -
Page 75: Hepa-Filter
- Take 8. Input the pipes to the wall, seal the gap between wall and the pipes by sealant. - Take off t ventila ventilator, t 9. Connect the another sides of the pipes to the flanges on side of the ventilator. - Clean 9. -
Page 76: Diagnose Und Fehlerbehebung
8. Diagnose und Fehlerbehebung Störung Mögliche Ursache Behebung 1. Versorgungskabel anschließen 1. Versorgungskabel getrennt Der Bildschirm lässt sich 2. Ersetzen Sie das Kabel 2. Versorgungskabel defekt nicht einschalten durch ein gleichwertiges 3. Display defekt 3. Kontaktieren Sie den Hersteller Keine oder falsche Kurzschluss oder Angabe von Temperatur, unterbrochener Kontakt des Kontaktieren Sie den Hersteller Luftfeuchtigkeit oder entsprechenden Sensors -Grad-Werten 1. Die Kanäle sind nicht 1. Festigen Sie die Kanäle ordnungsgemäß gesichert 2. Kontaktieren Sie den Ungewöhnliches Geräusch 2. Äußere Einwirkungen Hersteller verstopfen den Kanal 3. Kontaktieren Sie den... -
Page 77: Garantie
Eine ordnungsgemäße getrennte Sammlung für die anschließende Weiterleitung des ausgemusterten Geräts zur Wiederverwertung, Aufbereitung und umweltgerechten Entsorgung trägt dazu bei, mögliche negative Auswirkungen auf Umwelt und Gesundheit zu vermeiden und fördert die Wiederverwertung der Materialien, aus denen das Produkt besteht. Für detailliertere Informationen zu den verfügbaren Sammelsystemen wenden Sie sich bitte an Ihren örtlichen Entsorgungsdienstleister oder an das Geschäft, in dem Sie das Produkt gekauft haben. 10. Garantie 1. Diese Garantie gilt ausschließlich für den Kunden (juristische Person) und nicht für den Endverbraucher (physische Person), an den der Kunde das Produkt geliefert hat. 2. Die Garantie beträgt 2 (zwei) Jahre ab dem auf dem Lieferschein angegebenen Lieferdatum. 3. Die Garantie deckt Herstellungs- und Materialfehler an den Produkten ab. Es erfolgt daher keine Haftung für Mängel, die verursacht wurden durch: • ungeeigneten Transport; • fahrlässige oder unsachgemäße Verwendung des einzelnen Produkts und in jedem Fall Nichtbeachtung der Angaben in den Installations-, Nutzungs- und Wartungsanweisungen und/ oder Handbüchern, sofern zutreffend;... - Page 78 NOTE NOTES...
- Page 79 NOTE NOTES...
- Page 80 Tecnosystemi S.p.A. Società Benefit www.tecnosystemi.com via dell’Industria, 2/4 - Z.I. San Giacomo di Veglia 31029 Vittorio Veneto (Treviso) - Italia Tel +39 0438.500044 - Fax +39 0438.501516 email: info@tecnosystemi.com 800 904474 ONLY FOR ITALY C.F. - P. IVA - R.I.TV IT02535780247 Cap.
Need help?
Do you have a question about the SILENCE AIR PLUS and is the answer not in the manual?
Questions and answers