
Related Manuals for Swiss Madison Bastille SM-BV290


Summary of Contents for Swiss Madison Bastille SM-BV290
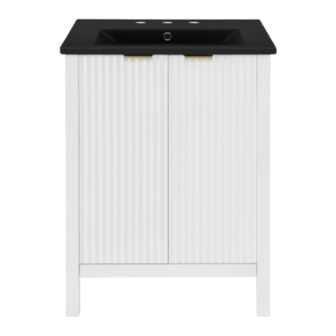
- Page 1 Freestanding Vanity INSTALLATION INSTRUCTIONS w e l l m a d e f o r e v e r @SwissMadison #WellMadeForever www.swissmadison.com | 1-434-623-4766 | info@swissmadison.com...
-
Page 2: Prior To Installation
· · The step-by-step guidelines in the installation instructions are a general reference. Should there be any discrepancies, Swiss Madison cannot be held liable. It is recommended to install all Swiss Madison products by hiring a licensed professional. · Read installation and maintenance instructions thoroughly before installing. Be sure to use proper tools and always wear proper personal safety accessories for your protection. -
Page 3: Installation Instructions
FREESTANDING VANITY INSTALLATION INSTRUCTIONS Parts for Reference: 1. Left side panel 2. Right side panel 3. Rear top bar 4. Rear bottom bar 5. Base panel 6. Front top bar 7. Front bottom outer bar 8. Left door 9. Right door 10. - Page 4 FREESTANDING VANITY INSTALLATION INSTRUCTIONS 1. Prepare Frame · Screw 6 cam bolts (B) into top and sides of left panel front bar (10) using the predrilled holes as shown. Repeat with an additional 6 cam bolts (B) to the right panel front bar (11), right panel back bar (12), and left panel back bar (13).
- Page 5 FREESTANDING VANITY INSTALLATION INSTRUCTIONS 2. Assemble Base & Frame · Insert 2 wooden dowels (C) into each side of right side panel (2) as shown. Attach right panel front bar (11) and right panel back bar (12). Secure using 6 cam locks (A). ·...
- Page 6 FREESTANDING VANITY INSTALLATION INSTRUCTIONS 3. Assemble Doors & Handles · Install 2 hinges (D) to both the left door (8) and the right door (9) using 2 screws (E) per hinge. · Use an additional 2 screws (E) per hinge (D) to attach the left door (8) and right door (9) to the cabinet NOTE: If the doors do not align properly, adjust the hinges according to the diagram below.
- Page 7 FREESTANDING VANITY INSTALLATION INSTRUCTIONS 4. Install Support Brackets and Feet · Attach 2 metal brackets (I) to the rear top bar (3) using 16 screws (E). · Using a hammer, secure the 4 support feet (J) to the bottom of each vanity leg. NOTE: rubber mallet is the preferred tool to avoid damaging support feet.
- Page 8 FREESTANDING VANITY INSTALLATION INSTRUCTIONS 5. Secure Vanity to Wall Option 1: Securing to Drywall · Position cabinet against wall in desired location. · Mark desired mounting location on wall and ensure · Using a pencil, make a mark on the wall through placement is level.
- Page 9 Should there be any defects in materials or crafts- manship under regular use that are discovered within the first year of installation, Swiss Madison will provide replacement parts at no charge, or at its discretion, replace any product or part of the product that is deemed defective, under normal installation, use, service or maintenance.
Need help?
Do you have a question about the Bastille SM-BV290 and is the answer not in the manual?
Questions and answers