
Subscribe to Our Youtube Channel
Related Manuals for Electrolux Professional Clarus Vibe WB6-70


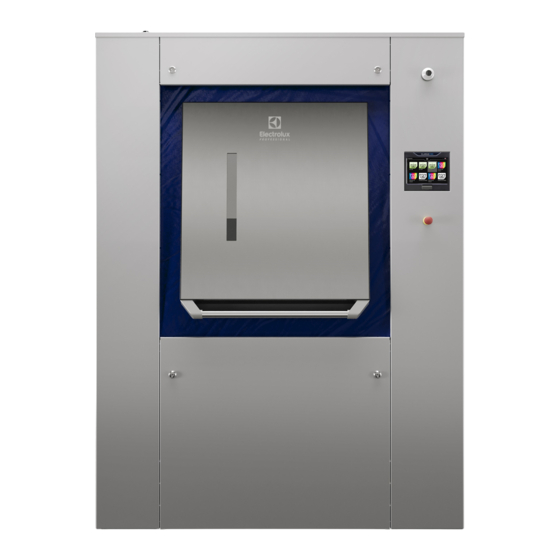
Summary of Contents for Electrolux Professional Clarus Vibe WB6-70
- Page 1 User manual Washer-extractors WB6–70 WB6–90 WB6–110 Clarus Vibe 01201218/EN original instructions...
-
Page 3: Table Of Contents
Contents Contents 1 Safety precautions..........................5 Symbols..........................11 Personal protection equipment....................12 Preliminary instructions ......................12 Data plate explanation......................14 Warranty terms and exclusions ....................17 2 Ergonomics certification........................19 3 Distributor Letter..........................20 4 Note about the A.C. power .........................21 5 Preparation ............................22 Nonstandard items : .........................23 Open &... -
Page 5: Safety Precautions
User manual 1 Safety precautions CAUTION READ THIS ENTIRE MANUAL BEFORE USAGE This machine should be installed in conformance to the health and safety regulations, and only used in a sufficiently aerated area. Check the instructions before installing or using the machine. - Page 6 User manual CAUTION Before any use, to retire all the parts needed to install the machine put in the drum , please follow these actions 1. connect compressed air. 2. Remove the side housing cabinet. 3. Push on the orange button of the D9/D10 distribution unit in the electric cabinet. (see drawing below) 4.
- Page 7 User manual CAUTION Users must have learnt how the machine operates. This device must not be installed in places accessible to the public. The machine is only intended for water-wash use. Do not allow minors to use the machine. Do not hose down the machine with water. Only use detergent intended for water-wash of textiles Never use dry cleaning agents.
- Page 8 User manual IMPORTANT The identification plate is located on the right side near the main switch. Never use the main switch as an emergency stop. Use it only when the machine does not work in progress. Instead of that, use the emergency stop buttons in both sides of the machine.
- Page 9 User manual The machines comply with the European Directive EMC (Electromagnetic Compatibil- ity). They have been tested in laboratory and approved as such. It is so prohibited to add wires or nonshielded electric cables in the cabinets, strands or cables' troughs. Considering that the volume of the outer drum is superior to 150 litres, the standard kept for the electric part is the IN 60204.
- Page 10 User manual THINK OF THE ENVIRONMENT! The use and handling of chemical products such as detergent, chlorine, acids, desca- ling agents, etc may create hazards for health and environment ; the following precau- tions should be taken: • Do not breathe the dusts or steam; •...
-
Page 11: Symbols
User manual 1.1 Symbols Caution. Caution, presence of dangerous current. Read the instructions before using the machine. -
Page 12: Personal Protection Equipment
User manual 1.2 Personal protection equipment Given below is a summary table of the Personal Protection Equipment (PPE) to be used during the various phases of the machine’s service life. Phase Protection Safety Gloves Glasses Ear protectors Mask Safety helmet garments footwear Transport... - Page 13 User manual WARNING Risk of the upper door being raised quickly on loading WARNING After the installation, Send back the commissionning form ,signed document, to Elec- troluxProfessional to validate the warrantly of the product.
-
Page 14: Data Plate Explanation
User manual 1.4 Data plate explanation In this chapter, you will find the explanation of the different data input on the data plate of your product. • Commercial name : Usual name of your product ( i.e. WPB4700H). • Type : Type of your product (you have the same on the Declaration of Conformity CE if delivered with CE certification). - Page 15 User manual Electrical heating : • P.Max : maximum power installed of your product • Power of the motorization in kW and its isolation class (F) . • Heating power in W .
- Page 16 User manual Steam heating : Left side • P.Max : maximum power installed of your product • Power of the motorization in kW and its isolation class (F) . • Heating power in W . Right side • P.Maxi. (kPa) maximum pressure For additional information, do not hesitate to consult with our quality department.
-
Page 17: Warranty Terms And Exclusions
(1) week of delivery unless otherwise agreed; • product with original serial numbers that have been removed, altered or cannot be readily determined; • replacement of light bulbs, filters or any consumable parts; • any accessories and software not approved or specified by Electrolux Professional. - Page 18 Warranty does not include scheduled maintenance activities (including the parts required for it) or the supply of cleaning agents unless specifically covered within any local agree- ment, subject to local terms and conditions. Check on Electrolux Professional website the list of authorized customer care.
-
Page 19: Ergonomics Certification
User manual 2 Ergonomics certification The human body is designed for movement and activity but physical stress injuries as a result of static and repetitive movements or unfavorable working postures may occur. The ergonomic features of our product, the ones which may influence your physical and cognitive interaction with it, have been assessed and certified. -
Page 20: Distributor Letter
User manual 3 Distributor Letter Chemical System Responsibility Disclaimer The following policy should be considered and understood as a warranty/disclaimer to customers operating textile care installations where liquid supply (chemical) systems use or may use peristaltic pumps to inject supplies into equipment. -
Page 21: Note About The A.c. Power
User manual 4 Note about the A.C. power According to the EN 60204-1:1997 standard, the machine is provided for A.C. supplies corresponding to the ex- tracted characteristics below : 4.3.2 A.C. supplies Voltage: Steady state voltage: from 0.9 to 1.1 of nominal voltage. Frequency: from 0.99 to 1.01 of nominal frequency continuously. -
Page 22: Preparation
User manual 5 Preparation Important Sort the linen according to the instructions mentioned on the care labels. Empty the pockets and close any zippers. Caution Make sure not to overload the machine as mentioned in front of the machine by this sticker : Note! The maximum load in this machine varies depending on model, from 70 kg to 110 kg dry linen. -
Page 23: Nonstandard Items
In case you want to wash nonstandard items, like backpacks, shoes, water proof textiles, heavy work wear, mat- tresses, shoes and the like, or in case of doubts, always consult Electrolux Professional technical department prior to doing so. They will be able to give you advice on the feasibility and if specific precautions will apply. -
Page 24: Open & Close Inner Drum Doors - Loading Side
User manual 5.2 Open & Close inner drum doors — Loading side 5.2.1 Open inner drum doors : 1. lower door (with hooks) : Put your hand in so that you can push the door and the safety spring at the same time. 2. - Page 25 User manual...
-
Page 26: Close Inner Drum Doors
User manual 5.2.2 Close inner drum doors : 1. Upper door: Release the door from the locking system. Press down on the lever plate for this action. 2. Gently help the door down. 3. The doors are ready to be closed now. 4. - Page 27 User manual 6. When the hooks are fully engaged in their slotted holes, you can gently release the pressure on the doors. 7. Check that the doors are properly closed: - Push only on the bottom door. - Keep the other hand safe. Check that no piece of linen is wedged between the doors and the inner drum.
- Page 28 User manual...
- Page 29 User manual...
-
Page 30: Detergents
User manual 5.3 Detergents Add the correct amount of detergent and softener according to recommendations. Warning Take care when adding laundry products. Powder or liquids left in the compartments (scoops) may be corrosive. Caution Do not open the cover when the water valves are flushing water through the detergent dispenser. Take care when adding laundry products. -
Page 31: General
User manual 6 General There are a large number of wash programs for different business segments available in the machine but only the wash programs suitable for the business segment selected are visible on the program selection screen. It is possible to create new wash programs directly on the user interface. A wash program created in one model/size of machine can be transferred to another model/size without changing any parameters. -
Page 32: Menus And Functions
User manual 7 Menus and functions 7.1 Main menu Push the menu button to enter the main menu. The menu button will not be visible if any of the self service segments is selected. To enter main menu in self service, push and hold at the menu button position for 10 seconds. -
Page 33: Edit Programs
User manual 7.1.1 Edit programs In this menu it is possible to change settings for any program other than the factory-made ones. Change program picture Rename program Duplicate program Copy module/parameter Paste module/parameter To duplicate and edit a program Activate the program you wish to duplicate with a long press. An extra menu with options will appear on the screen. Press the duplicate symbol to duplicate the program. - Page 34 User manual Header module: General The parameters that are valid for the whole wash program are set in the header module. • Start pumps at – Set the temperature at which dosing pumps should start in case “start at temperature” is selected in the wash module. •...
- Page 35 User manual Parameters in main wash, pre wash, rinse, pre rinse and soaking modules: Temperature settings • Filling with pre heating – Set if the water shall be heated to max; “Filling max. temperature”, during the filling phase. Can be used to shorten the total program time.
- Page 36 User manual Flushing in detergent box compartments Select which compartment(s) in the detergent box that shall be flushed in the module. The front mounted box has 6 compart- ments but 1a and 1b are flushed in parallel and this also applies to 2a and 2b. The top mounted box has 4 compartments. In factory made programs the compartments are used like below: •...
- Page 37 User manual Water level Water level in mm WB6–70 WB6–90 WB6–110 0.Low 1.Low Medium 2.Medium 3.Medium High 4.High 5.Extra High 6. Very High 6. Very high 5. Extra high 4. High 3. Medium high 2. Medium 1. Low medium 0. Low Level before dosing fig.X01712A Drum action...
-
Page 38: Statistics
User manual 7.1.2 Statistics This function is used to check the statistics of the machine. For example total program run hours, used chemicals, power fails etc. -
Page 39: Pumps
User manual 7.1.3 Pumps In this menu you can manage dosing systems/pumps such as Dosave, Jetsave or other pumps connected to the machine. Pumps Select pump type connected • Select “Peristaltic” for Dosave (or any other dosing system or pumps connected to the digital (relay) outputs). •... -
Page 40: Settings
User manual 7.1.4 Settings In this menu, different settings to the machine can be made. The table show some of the settings that can be changed/set. Language • Default language – Choose from the drop down list which language that shall be used as default language on the machine. •... - Page 41 User manual • Programs Select if buttons for selection of chemicals shall be visible or not on the start screen. There can be a maximum of three buttons for chemical selection. One for detergent, one for bleach and one for softener. For each button it is possible to select the following: –...
- Page 42 User manual Happy hour Here you can set discounts (in % or fixed amount) for weekdays and times of days. Barrier In this menu all parameters related to barrier machine are set, • Activate or not AIDO.
-
Page 43: Service
User manual 7.1.5 Service This menu is mainly used for trouble shooting and functional tests. • It is possible to turn on/off outputs and also to check the status of inputs. • The drum motor can be ordered to run at a desired speed and direction. •... -
Page 44: Transfer
User manual 7.1.6 Transfer This menu is used to transfer/copy programs and settings to/from the machine by using a USB memory. Follow the instructions on the screen. Download statistics report for the selected period. Transfer wash programs to/from the USB memory by drag and drop. Upload wash program images from the USB memory. -
Page 45: Unloading
User manual 8 Unloading 8.1 Unloading side (barrier washer) At the end of the wash When a program has finished, the indicating lamp on the clean side will show when the clean side unloading door can be opened. Caution With AIDO(Automatic Inner Door Opening) option, Take care of the disc of the opening system above your head. Risk of cutting with the edge of the disc!! The green key indicator blinks to indicate you can open the outer door. -
Page 46: At The End Of The Day
User manual The clean side unloading door is now locked and the dirty side loading door can be opened. The clean side unloading door will only unlock when a program has been successfully completed. If the program has been fast forwarded or an error has occurred (no heating, water missing, other errors, etc.) the machine control sys- tem will unlock the dirty side loading door. -
Page 47: Open & Close Inner Drum Doors - Unloading Side
User manual 8.3 Open & Close inner drum doors — Unloading side 8.3.1 Open inner drum doors : 1. When the "key" button flashes, press to start the automatic opening cycle. 2. Open the outer door : 3. Tilt the upper door to lock it in the locking system. 4. - Page 48 User manual 6. Gently help the lower door to rest on the lower part of the outer door frame.
-
Page 49: Close Inner Drum Doors
User manual 8.3.2 Close inner drum doors : 1. Upper door: Release the door from the locking system. Press down on the lever plate for this action. 2. Gently help the door to descend until it contacts the "butterfly" system. 3. - Page 50 User manual 7. When the hooks are fully engaged in their slotted holes, you can gently release the pressure on the doors.
-
Page 51: Preventive Maintenance
User manual 9 Preventive maintenance It is the responsibility of the owner of the machine/the laundry manager to make sure that the following maintenance is performed at stated intervals. Note! Lack of maintenance will deteriorate the performance and may cause damage to the machine, as well as cre- ate risk of personal injury. -
Page 52: Every 8 H
Drum doors hooks: Visually check the hooks of the drum doors. If deformation or premature wear (cracks similar as the one on the picture) are visible, STOP THE MACHINE and contact Electrolux Professional Service Partner. Do not start a wash program. - Page 53 User manual...
-
Page 54: Every 1000 H
User manual Drum doors deformation: Overloading could also create material deformation. The distance (B) between the closed drum doors and the drum radius must be lower than 10mm (see picture 1). The distance (X) between the closed drum doors and the outer drum radius must be high- er than 5mm (see picture 2). -
Page 55: Detergent Container
User manual 9.5 Detergent container Important Rinse the inside, every days with water, the detergents container. Clean the detergent container at regular basis to avoid that it is being clogged by detergent residue. Clean the detergent container and siphons with hot water and for example a small brush. 9.6 Descaling When descaling is needed: Use the special machine cleaning program. -
Page 56: Lubricant Table
User manual 10 Lubricant table MACHINE LUBRICATION Rolling Rolling Assembly Bare gears Flange joints Reducers Reducers Circuits and bearings bearings paste (fretting with wheels with gears pneumatic Chains shafts Union pipes corrosion) and screws devices USES Bearings Bearings Thread Steam high circuits Slides... -
Page 57: Conversion Of Measurement Units
User manual 11 Conversion of measurement units This following is a list of correspondences of the main frequency used units, to avoid the need to use measurement unit conversion table. 1 bar = 100 000 Pa British thermal unit 1 Btu = 1 055.06 J 1 bar = 1.019 7 kg/cm²... -
Page 58: Explanation Of Washing Symbols
User manual 12 Explanation of washing symbols (ISO 3758:2005 standard) To overcome language barriers, the following are symbols used internationally to give you guidance and recommen- dations when washing different textiles. 12.1 Washing The tub symbolizes washing. Max. washing tem- Symbols Mechanical action perature in °C... -
Page 59: Drying
User manual Symbols Explanation Bleaching allowed (chlorine or oxygen). Bleaching allowed (only oxygen). Do not bleach. 12.3 Drying The circle in a square symbolizes tumble drying. Symbols Explanation Can be put in a tumble dryer. Normal temperature. Can be put in a tumble dryer. Lower temperature. - Page 60 User manual Mild dry cleaning with solvent of hydrocarbon. Do not dry clean. Normal water cleaning. Mild water cleaning. Very mild water cleaning.
- Page 62 Electrolux Professional AB 341 80 Ljungby, Sweden www.electroluxprofessional.com...
Need help?
Do you have a question about the Clarus Vibe WB6-70 and is the answer not in the manual?
Questions and answers