Table of Contents
Advertisement
Quick Links
Advertisement
Table of Contents

Related Manuals for Electrolux Professional WE 170 P


Summary of Contents for Electrolux Professional WE 170 P
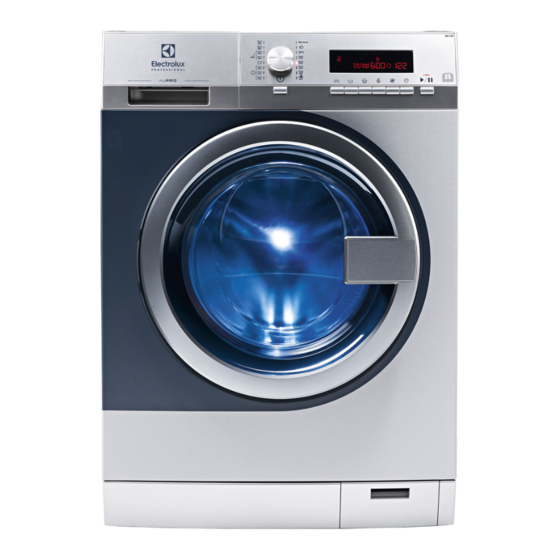
- Page 1 User Manual Washing Machine WE 170 P 132897227-A-432021 Original Instructions.
-
Page 2: Table Of Contents
CONTENTS 1. SAFETY INFORMATION..................3 2. PRODUCT DESCRIPTION................... 8 3. TECHNICAL DATA..................... 10 4. CONTROL PANEL..................... 11 5. BEFORE FIRST USE..................13 6. PROGRAMS....................13 7. OPTIONS......................16 8. SETTINGS......................16 9. DAILY USE......................17 10. HINTS AND TIPS..................... 21 11. CARE AND CLEANING..................22 12. -
Page 3: Safety Information
ENGLISH General information and tips Environmental information Subject to change without notice. SAFETY INFORMATION Before the installation and use of the appliance, carefully read the supplied instructions. The manufacturer is not responsible for any injuries or damage that are the result of incorrect installation or usage. - Page 4 1.2 Installation This appliance is for household and commercial use. • Follow the installation instructions supplied with the • appliance. Remove all the packaging and the transit bolts. • Keep the transit bolts in a safe place. If the appliance is •...
- Page 5 ENGLISH Do not put a container to collect possible water leakage • under the appliance. Contact the Authorised Service Centre to ensure which accessories can be used. 1.3 Electrical Connection The appliance must be correctly earthed. The • manufacturer is not responsible for the consequences of an inadequate earthing system.
- Page 6 The operating water pressure (minimum and maximum) • must be between 0.5 bar (0.05 MPa) and 10 bar (1.0 MPa). Ensure that there are no visible water leaks during and • after the first use of the appliance. 1.5 Use Do not change the speci ication of this appliance.
- Page 7 ENGLISH 1.8 Service To repair the appliance contact the Authorised Service • Centre. Use original spare parts only. Please note that self-repair or non-professional repair • can have safety consequences and might void the guarantee. Concerning the lamp(s) inside this product and spare •...
-
Page 8: Product Description
2. PRODUCT DESCRIPTION 2.1 Appliance overview Worktop Detergent dispenser Control panel Door handle Internal light Rating plate Drain pump filter and emergency door opening Feet for levelling the appliance The rating plate reports the model name (A) , product number (B), electrical ratings (C) and serial number (D). - Page 9 ENGLISH 2.3 Available from your Pedestal with the drawer authorized vendor Only appropriate accessories approved by Electrolux ensure the safety standards of the appliance. If unapproved parts are used, any claims will be invalidated. Stacking kit To put the appliance higher at the level what helps to easy load and remove the laundry.
-
Page 10: Technical Data
The liquid detergent can be loaded External detergent dispenser automatically from an external dispenser. Read carefully the instructions supplied with the accessory. 3. TECHNICAL DATA Dimension Width/ Height/ Total depth 59.7 cm /84.7 cm /64.6 cm Electrical connection Voltage 220 - 240 V Overall power 2200 W Fuse... -
Page 11: Control Panel
ENGLISH Connect the appliance to an earthed The power supply cable must be easily socket. accessible after installing the appliance. For any electrical work required to install this appliance, contact our Authorised Service Centre. The manufacturer does not accept any responsibility for damage or injury through failure to comply with the above safety precaution. - Page 12 4.2 Display The display shows: The child safety lock is activated. The child safety lock is deactivated. Extra rinse symbol. is the symbol indicating the rinse phase and + lights up when the Extra rinse is selected. Spin time indicator and symbol. The digit indicates minutes and seconds.
-
Page 13: Before First Use
ENGLISH Softener symbol: the appliance does load softener normally. No softener symbol: the appliance doesn't load softener. The phase symbols When a program is set, all the symbols of the phases related to the program come on. When the program starts, only the symbol of the phase in operation lashes. When the pahse is completed, the symbol remains steady lighted up. - Page 14 Program Maximum Program description Temperature range load (Type of load and level of soiling) Reference spin speed Spin Time White cotton and fast-coloured cotton. Normally 8 kg Normal Eco 1400 rpm soiled items. The energy consumption decreases 540 sec- and the time of the washing program is exten- onds - 5 ded, ensuring good washing results.
- Page 15 ENGLISH Program Maximum Program description Temperature range load (Type of load and level of soiling) Reference spin speed Spin Time All fabrics, except woollens and delicate fabrics. Spin 8 kg 1400 rpm To spin the laundry and to drain the water in the 360 sec- drum.
-
Page 16: Options
Disinfection ■ ■ ■ ■ ■ ■ 1) This option is automatically performed and cannot be removed from the program. 7. OPTIONS 7.1 Pre rinse minimum time (5 seconds) it restarts form the maximum time again. Press this button to add a pre rinse phase without detergent before washing. -
Page 17: Daily Use
ENGLISH • Before you press : the appliance If you deactivate the acoustic cannot start. signals, they continue operate when the appliance has a If the appliance is connected malfunction. to coin operated machine, the child lock activates 8.2 Child Lock automatically 5 minutes after the program start. - Page 18 9.3 Using detergent and additives 1. Measure out the detergent and the fabric conditioner. 2. Put the detergent and the fabric conditioner into the compartments. 3. Carefully close the detergent drawer 9.4 Detergent compartments CAUTION! Use only specified detergents for washing machine. Always obey the instructions that you find on the packaging of the detergent products.
- Page 19 ENGLISH 9.6 Activating the appliance • The indicator of the button stops lashing and stays on. Press the button to activate the • The indicator of the running phase appliance. A tune sounds (if it is activated). starts lashing on the display. •...
- Page 20 9.12 Cancelling a running 2. Press Start/Pause : • The appliance starts the program countdown. • When the countdown is 1. Press the button for some seconds completed, the program starts to cancel the program and to automatically. deactivate the appliance. You can cancel or change the WARNING! set of the delay start before...
-
Page 21: Hints And Tips
ENGLISH Turn the program knob to set a new Press the button to activate the cycle. appliance again. The display shows the end of the last set program. 10. HINTS AND TIPS -press the Start/Pause button. The WARNING! spin phase continues. Refer to Safety chapters. -
Page 22: Care And Cleaning
performance, but also helps to avoid • a greater impact for the environment. waste and protect the environment: 10.4 Ecological hints • Use only detergents and other treatments specially made for washing To save water, energy and to help protect machines. - Page 23 ENGLISH circulation and dry the humidity inside the a water descaling product for washing appliance: this will prevent mildew and machines. odours. Regularly examine the drum to prevent If the appliance is not used for a long time: limescale and rust particles. close the water tap and unplug the To remove rust particles use only special appliance.
- Page 24 11.8 Cleaning the detergent dispenser 11.9 Cleaning the drain filter Do not clean the drain filter if the water in the appliance is hot. Regularly check the drain pump filter and make sure that it is clean. Repeat the steps 2 and 3 until the water stops flowing out.
- Page 25 ENGLISH 180°...
- Page 26 11.10 Cleaning the inlet hoses and the valve filters Clean regularly both (for hot and for cold water) inlet hoses and both valve filters. 45° 20° 11.11 Emergency drain 11.12 Frost precautions Because of a malfunction, the appliance If the appliance is installed in an area cannot drain the water.
-
Page 27: Troubleshooting
ENGLISH WARNING! Make sure that the temperature is more than 0 °C before you use the appliance again. The manufacturer is not responsible for damages caused by low temperatures. 12. TROUBLESHOOTING WARNING! Refer to Safety chapters. 12.1 Alarm Codes and Possible failures The appliance does not start or it stops during operation. - Page 28 • The program was not finished properly or the appliance stopped too early. Switch the appliance off and on again. Internal fail. No com- • If the alarm code appears again, contact the Authorised munication between Service Centre. electronic elements of the appliance.
-
Page 29: Emergency Door Opening
ENGLISH Problem Possible solution • Make sure the levelling of the appliance is correct. Refer to The appliance makes "Installation instruction". an unusual noise and • Make sure that the packaging and/or the transit bolts are re- vibrates. moved. Refer to "Installation instruction". •... -
Page 30: Warranty
2. Disconnect the mains plug from the 5. Take out the laundry and then close mains socket. the appliance door. 3. Open the filter flap. 6. Close the filter flap. 4. Pull the emergency unlock trigger downward once. Pull it downward once again, keep it tensed and, in the meanwhile, open the appliance door. - Page 31 ENGLISH 4. Parts and Appliances not supplied by d. the Appliance was serviced or Electrolux are not covered by this repaired by anyone other than warranty. Electrolux, an authorised repairer 5. To the extent permitted by law, you will or ASC. 8.
-
Page 32: Environmental Concerns
may exchange information in relation to you to enable Electrolux to meet its obligations under this warranty. Important Notice Before calling for service, please ensure that the steps listed in clause 13 above have been followed. Warranty, Service and Spare Parts 1300 368 299 www.professional.electrolux.com.au www.mypro.electrolux.com...
Need help?
Do you have a question about the WE 170 P and is the answer not in the manual?
Questions and answers