
Subscribe to Our Youtube Channel
Related Manuals for Electrolux Professional Clarus Vibe WH6-7


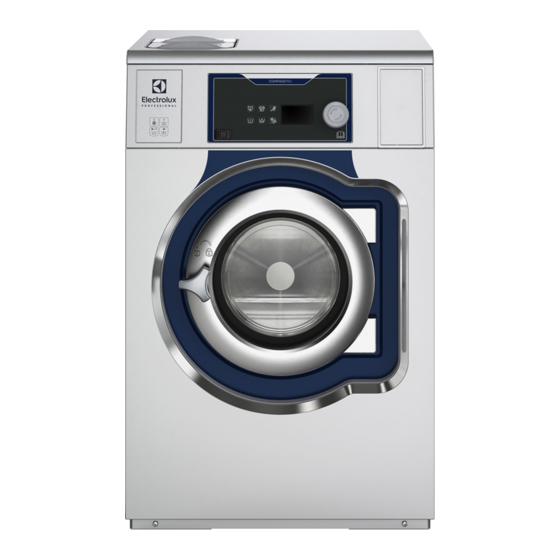
Summary of Contents for Electrolux Professional Clarus Vibe WH6-7
- Page 1 User manual Washer extractor WH6–7, WH6–8, WH6–11, WH6–14, WH6–20, WH6–27, WH6–33 Clarus Vibe Type W3..438917840/EN Original instructions 2022.08.08...
-
Page 3: Table Of Contents
Contents Contents 1 Safety Precautions ..........................5 General safety information......................6 Commercial use only........................6 Ergonomics certification ......................6 Symbols............................7 2 Warranty terms and exclusions......................8 3 General ..............................9 4 Handling ............................10 Load ............................10 Detergent ..........................10 To start a wash program ......................12 When program has ended ......................14 5 Menus and functions .........................15 Main menu ..........................15 5.1.1 Edit programs ........................16... -
Page 5: Safety Precautions
User manual 1 Safety Precautions • Servicing shall be carried out only by authorized personnel. • Only authorized spare parts, accessories and consumables shall be used. • Only use detergent intended for water-wash of textiles. Never use dry cleaning agents. •... -
Page 6: General Safety Information
User manual LAUNDROMAT/LAUNDERETTE MENCH CAMPING/MARINA OTHER SELF SERVICE – This appliance can be used by children aged from 8 years and above and persons with reduced physical, sensory or mental capabilities or lack of experience and knowl- edge if they have been given supervision or instruction concerning use of the appliance in a safe way and understand the hazards involved. -
Page 7: Symbols
User manual In case several machines are managed by the same operator the repetitive movements will increase and as a conse- quence of this the related biomechanical risk will increase exponentially. Follow the below recommendations to avoid, as much as possible, operators acquiring bodily injury. •... -
Page 8: Warranty Terms And Exclusions
Warranty will be applicable where the customer has used only genuine spare parts and has performed maintenance in accordance with Electrolux Professional user and maintenance documentation made available in paper or elec- tronic format. Electrolux Professional strongly recommends using Electrolux Professional approved cleaning, rinse and descaling agents to obtain optimal results and maintain product efficiency over time. -
Page 9: General
User manual 3 General There are a large number of wash programs for different business segments available in the machine but only the wash programs suitable for the business segment selected are visible on the program selection screen. It is possible to create new wash programs directly on the user interface. A wash program created in one model/size of machine can be transferred to another model/size without changing any parameters. -
Page 10: Handling
User manual 4 Handling 4.1 Load Load the goods into the machine according to recommendations and close the door. Recommended maximum load WH6–7 7 kg WH6–8 8 kg WH6–11 11 kg WH6–14 14 kg WH6–20 20 kg WH6–27 27 kg WH6–33 33 kg 4.2 Detergent... - Page 11 User manual Detergent container on the front of the machine (optional for WH6–14, WH6–20, WH6–27, WH6–33) Push to open the detergent container. Add the correct amount of detergent, bleach and softener according to recommendations. (Not valid if automatic dosing is used). fig.X00963A Pre-wash, liquid detergent.
-
Page 12: To Start A Wash Program
User manual 4.3 To start a wash program Tap to select a program from the list. Depending on machine set up the programs are displayed as a list or as a grid. fig.X01573A fig.X01573 In list view you can get a quick view of the main parameters in the wash program: the calculated program duration, the highest programmed temperature and the final extraction speed in G. - Page 13 User manual Activate the information menu for more details about selected program. Information about the different program parameters are shown on the screen. Information The actual temperature The highest programmed temperature If there is a Cool down module in the program or not Thermal disinfection (maintain temperature) Remaining time in the current program module Duration of the program...
-
Page 14: When Program Has Ended
User manual Before start it is possible to add information about the wash load to be run. The menu items are selected in the Set- tings menu. Follow the on screen instructions for each menu item. This information will be shown at the end of the wash cycle and will also be stored in Statistics and be included in reports. -
Page 15: Menus And Functions
User manual 5 Menus and functions 5.1 Main menu Push the menu button to enter the main menu. The menu button will not be visible if any of the self service segments is selected. To enter main menu in self service, push and hold at the menu button position for 10 seconds. -
Page 16: Edit Programs
User manual 5.1.1 Edit programs In this menu it is possible to change settings for any program other than the factory-made ones. Change program picture Rename program Duplicate program Copy module/parameter Paste module/parameter To duplicate and edit a program Activate the program you wish to duplicate with a long press. An extra menu with options will appear on the screen. Press the duplicate symbol to duplicate the program. - Page 17 User manual Header module: General The parameters that are valid for the whole wash program are set in the header module. • Start pumps at – Set the temperature at which dosing pumps should start in case “start at temperature” is selected in the wash module. •...
- Page 18 User manual Parameters in main wash, pre wash, rinse, pre rinse and soaking modules: Temperature settings • Filling with pre heating – Set if the water shall be heated to max; “Filling max. temperature”, during the filling phase. Can be used to shorten the total program time.
- Page 19 User manual Flushing in detergent box compartments Select which compartment(s) in the detergent box that shall be flushed in the module. The front mounted box has 6 compart- ments but 1a and 1b are flushed in parallel and this also applies to 2a and 2b. The top mounted box has 4 compartments. In factory made programs the compartments are used like below: •...
- Page 20 User manual Water level Water level in mm WH6–7 WH6–8 WH6–11 WH6–14 WH6–20 WH6–27 WH6–33 0.Low 1.Low Medium 2.Medium 3.Medium High 4.High 5.Extra High 6. Very High 6. Very high 5. Extra high 4. High 3. Medium high 2. Medium 1.
-
Page 21: Statistics
User manual 5.1.2 Statistics This function is used to check the statistics of the machine. For example total program run hours, used chemicals, power fails etc. -
Page 22: Pumps
User manual 5.1.3 Pumps In this menu you can manage dosing systems/pumps such as Dosave, Jetsave or other pumps connected to the machine. Pumps Select pump type connected • Select “Peristaltic” for Dosave (or any other dosing system or pumps connected to the digital (relay) outputs). •... -
Page 23: Settings
User manual 5.1.4 Settings In this menu, different settings to the machine can be made. The table show some of the settings that can be changed/set. Language • Default language – Choose from the drop down list which language that shall be used as default language on the machine. •... - Page 24 User manual • Programs Select if buttons for selection of chemicals shall be visible or not on the start screen. There can be a maximum of three buttons for chemical selection. One for detergent, one for bleach and one for softener. For each button it is possible to select the following: –...
- Page 25 User manual Payment and booking systems There are different ways to communicate with payment and booking systems. Some payment/booking systems use serial communication protocols, other systems use digital outputs/inputs. For systems that use digital signals, the following applies: • A payment system (coin selector or card reader) that is mounted inside the washer extractor should be connected to the internal coin input as described in the instruction that follows with the payment system.
-
Page 26: Service
User manual 5.1.5 Service This menu is mainly used for trouble shooting and functional tests. • It is possible to turn on/off outputs and also to check the status of inputs. • The drum motor can be ordered to run at a desired speed and direction. •... -
Page 27: Transfer
User manual 5.1.6 Transfer This menu is used to transfer/copy programs and settings to/from the machine by using a USB memory. Follow the instructions on the screen. • Download statistics report for the selected period. • Transfer wash programs to/from the USB memory by drag and drop. •... -
Page 28: Maintenance
User manual 6 Maintenance 6.1 General It is the responsibility of the owner of the machine/the laundry manager to make sure that maintenance is periodically performed. Note! Lack of maintenance may deteriorate the performance of the machine and may cause damage to components. - Page 29 User manual Detergent container on top of the machine Clean the detergent container at regular basis to avoid that it is being clogged by detergent residue. fig.X01622A Detergent container on the front of the machine Push to open the detergent container. To clean the different parts in the container they shall be removed from the container.
- Page 30 User manual Unlock the softener compartment with the security snap and remove it from the container. fig.X01618 Remove the siphons and the lid to the softener compartment. Clean all parts with hot water and for example a small brush. fig.X01620 Clean the detergent container and the area above the detergent container with for example a damp cloth.
-
Page 31: Deliming
User manual Remount all parts and insert the compartments in the detergent container. Make sure to lock the compartments when ready. fig.X01619B 6.4.1 Deliming When deliming is needed: Use the special machine cleaning program. If the program is not available, use the Settings menu to add the program to the program selection screen. -
Page 32: Water Inlet
User manual 6.6 Water inlet At regular basis, check the filter at the water inlet. Clean if necessary. Demount the hose to the water inlet and pull out the filter (A). When remounting, make sure the filter is in position and that the connections are tight. fig.7706 6.7 Cleaning the mop elements (Only valid for mop machines). -
Page 33: Disposal Information
User manual 7 Disposal information 7.1 Disposal of appliance at end of life Before disposing of the machine, make sure to carefully check its physical condition, and in particular any parts of the structure that can give or break during scrapping. The machine’s parts must be disposed of in a differentiated way, according to their different characteristics (e.g. - Page 36 Electrolux Professional AB 341 80 Ljungby, Sweden www.electroluxprofessional.com...
Need help?
Do you have a question about the Clarus Vibe WH6-7 and is the answer not in the manual?
Questions and answers