Table of Contents
Advertisement
Quick Links
Advertisement
Table of Contents

Related Manuals for Electrolux Professional WE170V


Summary of Contents for Electrolux Professional WE170V
- Page 1 User Manual Washing Machine WE170V 157037181-A-422021 Original Instructions.
-
Page 2: Table Of Contents
15. ENVIRONMENTAL CONCERNS..............31 WE’RE THINKING OF YOU Thank you for purchasing an Electrolux Professional appliance. You’ve chosen a product that brings with it decades of professional experience and innovation. Ingenious and stylish, it has been designed with you in mind. So whenever you use it, you can be safe in the knowledge that you’ll get great results every time. -
Page 3: Safety Information
ENGLISH SAFETY INFORMATION Before the installation and use of the appliance, carefully read the supplied instructions. The manufacturer is not responsible for any injuries or damage that are the result of incorrect installation or usage. Always keep the instructions in a safe and accessible location for future reference. - Page 4 Keep the transit bolts in a safe place. If the appliance is • to be moved in the future they must be reattached to lock the drum to prevent an internal damage. Always take care when moving the appliance as it is •...
- Page 5 ENGLISH 1.3 Electrical Connection The appliance must be correctly earthed. The • manufacturer is not responsible for the consequences of an inadequate earthing system. Always use a correctly installed shockproof socket. • Make sure that the parameters on the rating plate are •...
- Page 6 Ensure that there are no visible water leaks during and • after the first use of the appliance. 1.5 Use Do not change the specification of this appliance. • Obey the safety instructions on the detergent • packaging. Obey the maximum load volume of 8 kg (refer to the •...
- Page 7 ENGLISH Please note that self-repair or non-professional repair • can have safety consequences and might void the guarantee. The following spare parts will be available for 10 years • after the model has been discontinued: motor and motor brushes, transmission between motor and drum, pumps, shock absorbers and springs, washing drum, drum spider and related ball bearings, heaters and heating elements, including heat pumps, piping and...
-
Page 8: Product Description
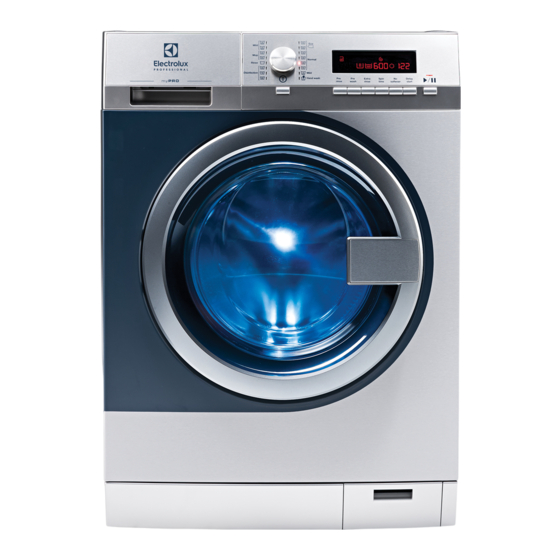
2. PRODUCT DESCRIPTION 2.1 Appliance overview Worktop Detergent dispenser Control panel Door handle Internal light Rating plate Emergency door opening Feet for levelling the appliance The rating plate reports the model name (A) , product number (B), electrical ratings (C) and serial number (D). - Page 9 ENGLISH If possible, install the appliance where the Pedestal with the drawer floor is more stable. 2.4 Available from your authorized vendor Only appropriate accessories approved by Electrolux ensure the safety standards of the appliance. If unapproved parts are used, any claims will be invalidated.
-
Page 10: Technical Data
The liquid detergent can be loaded External detergent dispenser automatically from an external dispenser. Read carefully the instructions supplied with the accessory. 3. TECHNICAL DATA Dimension Width/ Height/ Total depth 59.7 cm /84.7 cm /64.6 cm Electrical connection Voltage 230 V Overall power 2200 W Fuse... -
Page 11: Control Panel
ENGLISH Check that your domestic electrical The power supply cable must be easily installation can take the maximum load accessible after installing the appliance. required, also taking into account any For any electrical work required to install other appliances in use. this appliance, contact our Authorised Connect the appliance to an earthed Service Centre. - Page 12 4.2 Display The display shows: The child safety lock is activated. The child safety lock is deactivated. Extra rinse symbol. is the symbol indicating the rinse phase and + lights up when the Extra rinse is selected. Spin time indicator and symbol. The digit indicates minutes and seconds.
-
Page 13: Before First Use
ENGLISH Softener symbol: the appliance does load softener normally. No softener symbol: the appliance doesn't load softener. The phase symbols When a programme is set, all the symbols of the phases related to the pro- gramme come on. When the programme starts, only the symbol of the phase in operation flashes. When the pahse is completed, the symbol remains steady lighted up. - Page 14 Programme Maximum Programme description Temperature range load (Type of load and level of soiling) Reference spin speed Spin Time Cotton and synthetic items lightly soiled or worn 4 kg 1200 rpm only once. Cold 120 sec- onds - 5 seconds Cottons 8 kg White cottons Normal soil and light soil.
- Page 15 ENGLISH Programme Maximum Programme description Temperature range load (Type of load and level of soiling) Reference spin speed Spin Time All fabrics, except woollens and delicate fabrics. Spin 8 kg 1400 rpm To spin the laundry and to drain the water in the 360 sec- drum.
-
Page 16: Options
■ ■ Spin Disinfection ■ ■ ■ ■ ■ ■ 1) This option is automatically performed and cannot be removed from the programme. Suitable detergents for washing programmes Programme Universal Liquid Uni‐ Liquid for Delicates Special versal coloureds woollens powder ▲... -
Page 17: Settings
ENGLISH 7.4 Spin time Press this button again, the softener is loaded normally. By pressing this button you can decrease The related indicator comes on the spin time. Once you reach the minimum time (5 seconds) it restarts form 7.6 Delay start the maximum time again. - Page 18 • Open the detergent dispenser. • Install the flap for liquid detergent in the compartment 9.3 Using detergent and additives 1. Measure out the detergent and the fabric conditioner. 2. Put the detergent and the fabric conditioner into the compartments. 3.
- Page 19 ENGLISH Compartment for liquid additives (fabric conditioner, starch). Flap for powder or liquid detergent. 9.5 Liquid or powder detergent When you use the liquid detergent: • Position A for powder detergent • Do not use gelatinous or (factory setting). thick liquid detergents. •...
- Page 20 9.10 Cancelling the delay start If you set something incorrect, the display shows To cancel the delay start: the message 1. Press button to set the appliance to pause. 9.8 Starting a programme The related indicator flashes. 2. Press button Delay start repeatedly Press the button until the display shows .
-
Page 21: Hints And Tips
ENGLISH 9.13 At the end of the • You do not use the appliance for 5 minutes before you press the button programme The appliance stops automatically. Press the button to activate the In the display comes on. appliance again. •... - Page 22 • Button up pillowcases, close zippers, bleach for whites and laundry hooks and poppers. Tie up belts, sanitization, cords, shoelaces, ribbons and any – liquid detergents, preferably for low other loose elements. temperature wash programmes • Empty the pockets and unfold the (60 °C max) for all types of fabric, items.
-
Page 23: Care And Cleaning
ENGLISH • To use the correct quantity of a water softener for washing machines. In detergent, refer to the quantity areas where the water hardness is soft it is suggested by the detergent producer not necessary to use a water softener. and check the water hardness of your To know the water hardness in your area, domestic system. - Page 24 11.4 Descaling Regularly examine the seal and remove all objects from the inner part. If the water hardness in your area is high or moderate, we recommend that you use 11.7 Cleaning the drum a water descaling product for washing machines.
- Page 25 ENGLISH 11.8 Cleaning the detergent dispenser 11.9 Cleaning the inlet hoses and the valve filters Clean regularly both (for hot and for cold water) inlet hoses and both valve filters.
-
Page 26: Troubleshooting
45° 20° 12. TROUBLESHOOTING WARNING! Refer to Safety chapters. 12.1 Alarm Codes and Possible failures The appliance does not start or it stops during operation. First try to find a solution to the problem (refer to the tables). WARNING! Deactivate the appliance before carrying out any check. With some problems, the display shows an alarm code and the button may flash continuously: If the appliance is overloaded, remove some items... - Page 27 ENGLISH • Make sure that the water tap is open. • Make sure that the pressure of the water supply is not too The appliance does low. For this information, contact your local water authority. not fill with water • Make sure that the water tap is not clogged. properly.
-
Page 28: Emergency Door Opening
Problem Possible solution • Make sure that the couplings of the water hoses are tight and there is not water leakages. There is water on the • Make sure that the water inlet hose and the drain hose have floor. no damages. -
Page 29: Consumption Values
ENGLISH 4. Pull the emergency unlock trigger CAUTION! downward once. Pull it downward Make sure that the drum is once again, keep it tensed and, in the not rotating. Wait till the meanwhile, open the appliance door. drum stops rotating, if necessary. - Page 30 Values and programme duration may differ depending on different conditions (e.g. room temperature, water temperature and pressure, load size and type of laundry, supply voltage) and also if you change the default setting of a programme. 14.3 According to UK Ecodesign for Energy-Related Products and Energy Information Regulations Eco 40-60 pro‐...
-
Page 31: Environmental Concerns
ENGLISH Programme Litres h:mm °C Hand wash 0.28 0:55 1200 30°C 1) Reference indicator of the spin speed. 2) Suitable for washing heavily soiled textiles. 3) Suitable for washing lightly soiled cottons, synthetic and mixed fabrics. 4) It also performs as quick washing cycle for lightly soiled laundry. 15.
Need help?
Do you have a question about the WE170V and is the answer not in the manual?
Questions and answers