Midea i5C User Manual
Robot vacuum cleaner
Hide thumbs
Also See for i5C:
- Manual (76 pages) ,
- User manual (30 pages) ,
- Instruction manual (16 pages)
Table of Contents
Advertisement
Available languages
Available languages
Quick Links
MSmartHome
Download the app
& activate product
Warning notices: Before using this product, please read this manual carefully and keep it for future reference.
The design and specifications are subject to change without prior notice for product improvement.
Consult with your dealer or manufacturer for details.
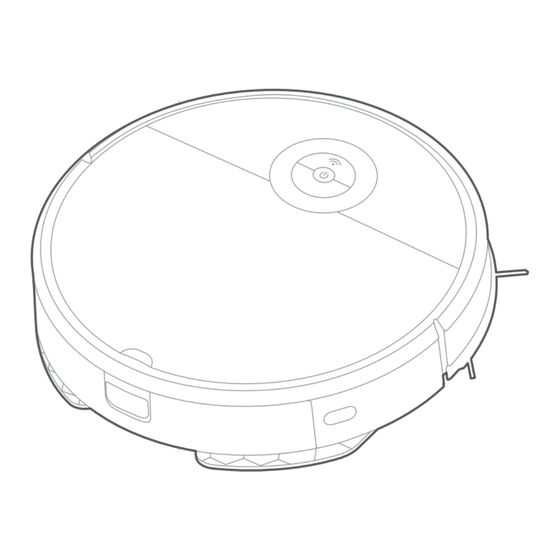
The diagram above is just for reference. Please take the appearance of the actual product as the standard.
Robot Vacuum Cleaner
USER MANUAL
i5C
Advertisement
Table of Contents

Related Manuals for Midea i5C


Summary of Contents for Midea i5C
- Page 1 Robot Vacuum Cleaner USER MANUAL MSmartHome Download the app & activate product Warning notices: Before using this product, please read this manual carefully and keep it for future reference. The design and specifications are subject to change without prior notice for product improvement. Consult with your dealer or manufacturer for details.
-
Page 2: Table Of Contents
THANK YOU LETTER Warning for the machine Thank you for choosing Midea! Before using your new Midea product, please read this manual thoroughly to ensure that you know how to operate the features and This appliance can be used by children aged from 8 years and above and persons... - Page 3 [symbol ISO 7000-0790 read operator's manual Docking base is only applicable to the product i5C. (Battery pack type : Li-ion, DC ( 2004-01 )] 14.4 V, 2600 mAh) The Docking base will automatically start charging after Robot Vacuum Cleaner...
-
Page 4: Specifications
This symbol indicates that a service technician should only operate and maintain this appliance in accordance with the operating instructions. Midea Robozone Technology Co.,Ltd. Add.: No.39 Caohu Avenue, Xiangcheng Economic Read these operating instructions carefully and attentively before using/commissioning the... -
Page 5: Product Overview
PRODUCT OVERVIEW Accessories Product Charging Base x1 Side Brush x4 Mop Cloth Holder x1 Bumper Start/Pause Cover Water Tank Release Button Power Cable x1 Filter x1 Mop Cloth x2 Water Tank Power Switch Dustbin Cleaning Brush x1 Remote Controller x1 Battery x2 Main Wheel Cover Plate of... -
Page 6: Quick Start Guide
QUICK START GUIDE APP & Voice Control First Use Step 1 Step 2 Wireless network MSmartHome Step 3 Step 4 Open the cover and slide power switch to Before first use, we recommend you turn on the robot. charge the robot for at least 6 hours. Press and hold for App connection. -
Page 7: Product Installation 1
PRODUCT INSTALLATION Installation of Charging Base Applicable to Google Assistant & Amazon Alexa: Make sure the power cable is connected into the charging base. Place the charging base flat against a wall and make sure there leaves enough space to the base, as shown in the figure below. Skill Name for Google Assistant Skill Name for Amazon Alexa Ensure the charging base is connected to a power supply. -
Page 8: Operation Instructions 1
OPERATION INSTRUCTIONS Remote Controller Function of Buttons NOTE Remote controller will work when within 16 feet of the robot. Recharging Direction Start/Pause Edge cleaning Start/Pause Spot cleaning Zig-zag cleaning Suction increase Power switch Suction decrease (under the cover) Direction Manually control the direction of the robot (forward, left, and right). Note that the robot does not vacuum when in manual mode. - Page 9 Charging Robot Vacuum Cleaning Open the cover and slide power switch to “ON” position to turn on the robot. Please clean up the wires and sundries scattered on the ground and remove precious, fragile and dangerous items that are easy to fall before cleaning. Place the robot on the charging base to start charging.
-
Page 10: App Setup And Operation 1
Add your robot vacuum to your app. Press the “ + ” button on the main screen of the app and select i5C from the available list of products. Connect your robot to your wireless network. After assembling and powering on the robot, press and hold the “... -
Page 11: Cleaning And Maintenance 1
CLEANING AND MAINTENANCE Cleaning the Side Brush Pull to remove the side brushes. Remove any tangled hair, debris, and then reinstall them. Cleaning the Main Brush It is recommended to clean the side brushes every week and replace them every 6-12 months. With the vacuum turned upside down, place your thumb in the open slot between the Use the cleaning brush or scissors to clean the tangled hair or threads. - Page 12 The filter is on the side of the dustbin. Reinsert the dustbin back in Wipe dry the water tank. Exposure to sunlight is not recommended. Remove debris by tapping the filter the robot. against your garbage bin. It is recommended to clean the You can clean the filter with water, filter element every week and but remember to dry it...
-
Page 13: Troubleshooting
TROUBLESHOOTING Problem Possible reason Solution The ground is slippery. If the floor is waxed, dry it ● before use. Operation of your appliance can lead to errors and malfunctions. The following tables The appliance has contain possible causes and notes for resolving an error message or malfunction. It is missed sweeps, Wires, shoes and other Minimize ground items as... -
Page 14: Trademarks, Copyrights And Legal Statement
The wireless network After system start-up, long This manual is created by Midea and Midea reserves all copyrights thereof. No entity or ● password or network is press network pairing button individual may use, duplicate, modify, distribute in whole or in part this manual, or changed. -
Page 15: Data Protection Notice
Midea/eureka/Comfee type or model i5E, i5 Extra, i5 Extra FR, MR08, VCR08, MR09, MR07, i5 Lite, VCR09W, VCR09B, i5 SR, i5 Extra CR, i5 Advance, I5C, I5C-BR to which this declaration relates is in conformity with the essential requirements and... - Page 16 Midea hereby declares that the appliance with MSmartHome functionality meets the essential requirements and other relevant provisions of the Directive 2014/53/EU. A detailed RED Declaration of Conformity can be found online at www.midea.com among the additional documents on the 2.4 GHz band:100mW max.
- Page 17 Takkebrev Advarsel til maskinen Vi vil gerne udtrykke vores taknemmelighed for at vælge Midea som dit foretrukne valg. Inden du bruger dit nyligt købte Midea-apparat, anbefaler vi, at du omhyggeligt gennemgår denne vejledning for at gøre dig bekendt med dens egenskaber og 1.
- Page 18 [symbol IEC 60417-5031 beskadiget. jævnstrøm ( 2002-10 )] 5. Dockingbasen kan kun bruges med i5C-enheden. (Li-ion, DC 14,4 V, 2600 mAh battericelle) time-lag miniature sikringslink, hvor X er symbolet for tids-/strømkarakteristikken Når robotstøvsugeren er vendt tilbage til dockingbasen, begynder opladningen som angivet i IEC 60127 med det samme.
- Page 19 Overhold instruktionerne Dette symbol betyder, at det pågældende apparat kun må betjenes og vedligeholdes af en servicetekniker i overensstemmelse med den medfølgende Midea Robozone Technology Co., Ltd. betjeningsvejledning. Adresse: No.39 Caohu Avenue, Xiangcheng Economic Før enheden tages i brug eller tages i brug, skal du sørge for at læse denne Development Zone, Suzhou, Jiangsu, China betjeningsvejledning grundigt og omhyggeligt og opbevare den i umiddelbar nærhed af...
- Page 20 PRODUKT OVERSIGT Tilbehør Navn på dele Ladebase x1 Sidebørste x4 Moppestofholder x1 Kofanger Start/Pause Dække over Udløserknap til vandbeholder Strømkabel x1 Filter x1 Moppe klud x2 Vandtank Afbryderen Støvbeholder Rengøringsbørste x1 Fjernbetjening x1 Batteri x2 Hovedhjul Dækplade af Manual x1 hovedbørste Næsehjul Hovedbørste...
- Page 21 HURTIG START GUIDE APP og stemmestyring Første brug Trin 1 Trin 2 Wireless network MSmartHome Trin 3 Trin 4 Åbn dækslet, og skub strømkontakten for Vi foreslår, at du oplader robotten i at tænde robotten. mindst 6 timer før dens første brug. Tryk og hold til app-forbindelse.
- Page 22 PRODUKTINSTALLATION Installation af ladebase 1. Sørg for, at ladestationens strømkabel er tilsluttet. Gælder for Google Assistant og Amazon Alexa: 2. Som vist på figuren nedenfor skal du placere opladningsbasen fladt mod en væg, så der er plads nok til basen. Færdighedsnavn for Google Færdighedsnavn til Amazon 3.
- Page 23 BETJENINGSINSTRUKTIONER Fjernbetjening Funktion af knapper BEMÆRK Fjernbetjeningen fungerer, når den befinder sig inden for en afstand af 6 fod fra robotten. Genopladning Retning Start/Pause Kantrensning Start/Pause Pletrensning Zig-zag rengøring Sugestigning Strømafbryder Sugefald (under dækslet) Nulstillingsknap (under låget) Retning Styr robottens retning manuelt (fremad, venstre og højre). Bemærk, at robotten ikke støvsuger, når den er i manuel tilstand.
- Page 24 Oplader robotstøvsuger Rengøring 1. Tryk og hold tænd/sluk-knappen nede for at tænde robotten. Før du begynder at rengøre, kan du venligst samle kabler og diverse genstande op, der er strøet ud over jorden, og fjerne alle værdifulde, knækkelige eller farlige genstande, der er tilbøjelige til at falde.
- Page 25 3. Tilføj din robotstøvsuger til din app. Tryk på knappen " + " på appens hovedskærm, og vælg i5C fra den tilgængelige liste over produkter. 4. Tilslut din robot til dit trådløse netværk. Når du har samlet og tændt robotten, skal du trykke på...
- Page 26 RENGØRING OG VEDLIGEHOLDELSE Rengøring af sidebørsten 1. Træk for at fjerne sidebørsterne. Fjern eventuelle sammenfiltrede hår, snavs, og geninstaller dem derefter. Rengøring af hovedbørsten 2. Det anbefales at rense sidebørsterne hver uge og udskifte dem hver 6.-12. måned. For at fjerne børsterulledækslet skal du vende støvsugeren og indsætte tommelfingeren i det blotlagte mellemrum mellem de to flige, og derefter løfte det af.
- Page 27 Tørrens vandtanken. Sollys frarådes. 3. Filtreringen er placeret på den 4. Placer støvbeholder tilbage i automaten, hvor den hører hjemme. Bank filteret mod din støvbeholder for at Det anbefales, at fjerne snavs, der har samlet sig. Du kan filterkomponenterne rengøres én bruge vand til at rense både filteret og gang om ugen, og at de udskiftes scrubberen, men du skal sikre dig, at de...
- Page 28 FEJLFINDING Problem Mulig årsag Løsning Jorden er glat. Hvis gulvet er vokset, skal det ● Betjening af dit apparat kan føre til fejl og funktionsfejl. Følgende tabeller indeholder tørres inden brug. Apparatet har mulige årsager og bemærkninger til afhjælpning af en fejlmeddelelse eller funktionsfejl. misset fejninger, Det anbefales at læse tabellerne nedenfor omhyggeligt for at spare tid og penge, som Ledninger, sko og andre...
- Page 29 Efter systemstart, længe Denne manual er lavet af Midea, og Midea forbeholder sig alle ophavsrettigheder Adgangskoden til det trådløse ● tryk på hertil. Ingen enhed eller enkeltperson må bruge, duplikere, ændre, distribuere helt eller netværk eller netværket netværksparringsknappen...
- Page 30 Extra, i5 Extra FR, MR08, VCR08, MR09, MR07, i5 Lite, VCR09W, VCR09B, i5 SR, i5 Extra CR, i5 Advance, I5C, I5C-BR pakkematerialer. som denne erklæring vedrører, er i overensstemmelse med de væsentlige krav og andre relevante krav i direktivet: 2014/53/EU 2011/65/EU (EF) Nr.
Need help?
Do you have a question about the i5C and is the answer not in the manual?
Questions and answers