Table of Contents
Advertisement
Quick Links
Download the app
& activate product
Warning notices: Before using this product, please read this manual carefully and keep it for future reference.
The design and specifications are subject to change without prior notice for product improvement.
Consult with your dealer or manufacturer for details.
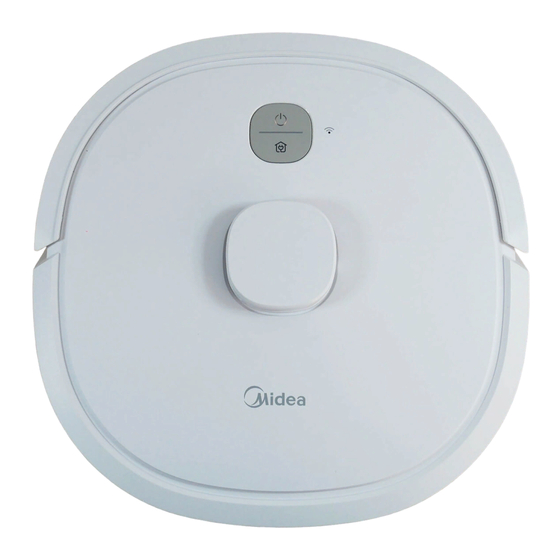
The diagram above is just for reference. Please take the appearance of the actual product as the standard.
Robot Vacuum Cleaner
USER MANUAL
M6
Advertisement
Table of Contents

Related Manuals for Midea M6


Summary of Contents for Midea M6
- Page 1 Robot Vacuum Cleaner USER MANUAL Download the app & activate product Warning notices: Before using this product, please read this manual carefully and keep it for future reference. The design and specifications are subject to change without prior notice for product improvement. Consult with your dealer or manufacturer for details.
-
Page 2: Table Of Contents
THANK YOU LETTER Warning for the machine Thank you for choosing Midea! Before using your new Midea product, please read this manual thoroughly to ensure that you know how to operate the features and functions that your new appliance o ers in a safe way. - Page 3 If the supply cord is damaged, it must be replaced by a special cord or assembly available from the manufacturer or its service agent. [symbol IEC 60417-5031 Docking base is only applicable to the product M6. (Battery pack type : Li-ion, DC direct current ( 2002-10 )] 14.4 V, 3350 mAh)
-
Page 4: Specifications 0
This symbol indicates that a service technician should only operate and maintain this appliance in accordance with the operating instructions. Midea Robozone Technology Co.,Ltd. Add.: No.39 Caohu Avenue, Xiangcheng Economic Read these operating instructions carefully and attentively before using/commissioning the... -
Page 5: Product Overview
PRODUCT OVERVIEW Accessories Product Charging Base x1 Power Cable x1 Filter x1 Power Button Recharge Button LIDAR Mop Cloth Holder x1 Mop Cloth x1 Side Brush x2 Dustbin/Water Tank Release Button Side Brush Cleaning Brush x1 Manual x1 Charging Contacts Reset Button Main Brush Dustbin/... -
Page 6: Quick Start Guide
QUICK START GUIDE Water Tank Use Guide Step 1 Step 2 Remove the dustbin from the robot. Open the rubber tank lid and fill the First Use tank with cold water. (Electric parts inside. Please do not immerse the tank into water.) Step 1 Step 2 Remove the protection bar. - Page 7 APP & Voice Control Applicable to Google Assistant & Amazon Alexa: Skill Name for Google Assistant Skill Name for Amazon Alexa “SmartHome” “SmartHome” Wireless network NOTE For using Google Assistant and Amazon Alexa, please make sure SmartHome APP has been downloaded and matched with your robot successfully. SmartHome* Step1.
-
Page 8: Product Installation
PRODUCT INSTALLATION OPERATION INSTRUCTIONS Function of Buttons Installation of Charging Base Make sure the power cable is connected into the charging base. Place the charging base flat against a wall and make sure there leaves enough space to the base, as shown in the figure below. Ensure the charging base is connected to a power supply. - Page 9 Charging Robot Vacuum Cleaning Press and hold the power button to turn on the robot. Please clean up the wires and sundries scattered on the ground and remove precious, fragile and dangerous items that are easy to fall before cleaning. Start / Pause Place the robot on the charging base to start charging.
-
Page 10: App Setup And Operation
Add your robot vacuum to your app. Press the “ + ” button on the main screen of the app and select M6 from the available list of products. Connect your robot to your wireless network. After assembling and powering on the robot, press and hold the “... -
Page 11: Cleaning And Maintenance
CLEANING AND MAINTENANCE SmartHome App Quick Guide NOTE Cleaning the Main Brush If the wireless network in your home is unstable, it may cause a certain delay in the related operations of the App. (The content of the SmartHome App is subject to change with the product technology update. - Page 12 Take the filter out from the dustbin. Reinsert the dustbin back in the Cleaning the Side Brush Remove debris by tapping the filter robot. It is recommended to clean against your garbage bin. the filter element every week and Pull to remove the side brushes. Remove any tangled hair, debris, and then You can clean the filter with water, replace it every 1-3 months.
-
Page 13: Troubleshooting
TROUBLESHOOTING Wipe dry the water tank. Exposure to sunlight is not recommended. Operation of your appliance can lead to errors and malfunctions. The following tables contain possible causes and notes for resolving an error message or malfunction. It is recommended to read the tables carefully below in order to save your time and money that may cost for calling to the service center. - Page 14 Problem/Cause Troubleshooting Solution Problem Possible reason Solution Check if the mobile phone is The mobile phone shall be The ground is slippery. If the floor is waxed, dry it ● ● accessed to network. accessed to network once before use. The appliance has again.
-
Page 15: Trademarks, Copyrights And Legal Statement
This manual is created by Midea and Midea reserves all copyrights thereof. No entity or individual may use, duplicate, modify, distribute in whole or in part this manual, or bundle or sell with other products without the prior written consent of Midea. -
Page 16: Doc And Cerifications
Robot Vacuum Cleaner trade name: Midea/eureka/Comfee type or model: M3LDS, VCR21, Tornado, CFR08, M6, NER600 to which this declaration relates is in conformity with the essential requirements and other relevant requirements of the Directive:...
Need help?
Do you have a question about the M6 and is the answer not in the manual?
Questions and answers