Kärcher SP 16.000 Dirt, SP 22.000 Dirt - Submersible Dirty Water Pump Manual
- Manual (148 pages) ,
- Original instructions manual (16 pages)
Advertisement
Intended use
Only use the device in private households.
Intended use:
- Removal of water from building sections in the event of flooding
- Transferring and pumping water from containers
- Water removal from wells and shafts
- Pumping fresh water out of boats and yachts For notes on functional principle, see chapter Operation.
Permissible feed fluids

Danger of death and risk of damage when pumping explosive, flammable or unsuitable substances! Flammable or explosive substances may ignite or explode.
Unsuitable substances can damage the pump. Do not pump explosive, flammable or corrosive liquids or gases (e.g. fuels, petroleum, nitro thinner) and do not pump fats, oils, salt water or waste water from sanitary facilities or water that has a lower flowing ability than clean water.
Permissible feed fluids:
- Fresh water up to a certain degree of soiling.
SP 16.000 Dirt:
Water with a degree of soiling up to grain size 20 mm
SP 22.000 Dirt:
Water with a degree of soiling up to grain size 30 mm - Swimming pool water with intended dosage of additives.
- Washing lye, e.g. from leaking washing machines. Then rinse and clean the pump with clear fresh water, see chapter Rinsing and cleaning.
- The temperature of the pumped liquids must lie between 5°C and 35°C.
Improper use
 ATTENTION
Risk of damage due to frost!
Operation during frost may damage the device. An incompletely emptied device can be damaged by frost.
Do not operate the device during frost.
Protect the device from frost.
ATTENTION
Risk of damage during continuous operation!
The device is not suitable for continuous operation.
Do not operate the device continuously for long periods (e.g. continuous circulation operation in ponds) or as a stationary installation (e.g. as a water lifting system, fountain pump).
 Note
Note
The manufacturer accepts no liability for possible damage caused by improper use or incorrect operation.
Hazard levels
- Indication of an imminent threat of danger that will lead to severe injuries or even death.

- Indication of a potentially dangerous situation that may lead to severe injuries or even death.

- Indication of a potentially dangerous situation that may lead to minor injuries.
ATTENTION
- Indication of a potentially dangerous situation that may lead to damage to property.
Accessories and spare parts
Only use original accessories and original spare parts. They ensure that the appliance will run fault-free and safely.
Information on accessories and spare parts can be found at www.kaercher.com.
Scope of delivery
The scope of delivery for the appliance is shown on the packaging. Check the contents for completeness when unpacking. If any accessories are missing or in the event of any shipping damage, please notify your dealer.
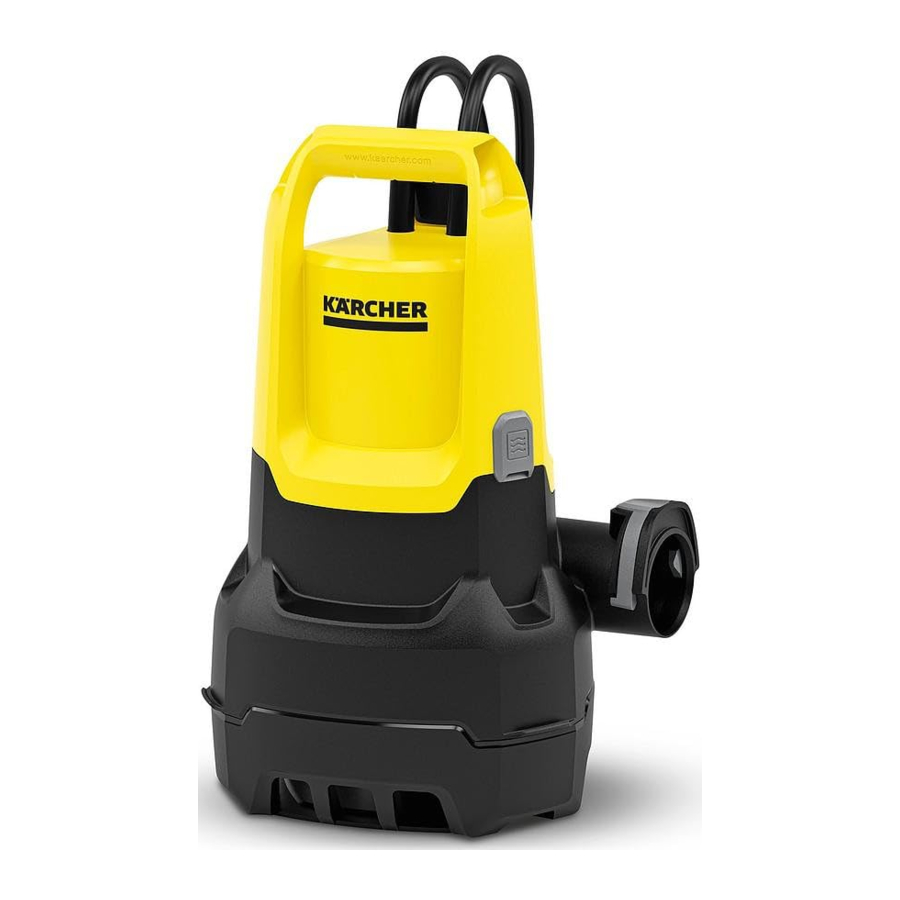
Device description
llustration A

- Carrying handle
- Power supply cable with plug
- Automatic venting device
- Quick-Connect
- Pump connecting piece G 1 ½ (1", 1 ¼" and 1 ½" hose connection and G 1 ½ thread )
- Connection nozzle (G 1 ½ thread)
- Lock (float switch)
- Height adjustment (float switch)
- Float switch
- *Pump connecting piece G 1 ( ¾' and 1' hose connection and G 1 thread)
- * Check valve
- G 1 Threaded connection (SP 16.000 Dirt)
- Pre-filter (SP 22.000 Dirt)
*Not included in the scope of delivery.
Initial startup

Risk of electric shock and risk of injury! The device contains electrical and mechanical components.
Always disconnect the device from the power supply before assembling, disassembling or cleaning.
Note
The shorter the hose length and larger the hose diameter, the higher the delivery rate.
To avoid clogging the pump, use a pre-filter for hose diameters smaller than 1 ¼'.
- SP 16.000 Dirt Special accessories
- SP 22.000 Dirt Integrated in the foot
The pump connection is equipped with a plug system (Quick-Connect).
The connection nozzle with pump connecting piece G 1 ½ and G 1 threaded connection are supplied unassembled with the device.
Note
Hoses with a diameter of 1', 1 ¼' and 1 ½' can be con-nected to the pump connecting piece G 1 ½. A sufficiently large hose diameter must be selected and the G 1 ½ pump connecting piece must be shortened at the grooves so that the required particle size can be pumped. A large hose diameter is also recommended for smaller particle sizes to allow a high flow volume.
Connecting a hose to the pump when using a 1', 1 ¼' or 1 ½' hose:
- Screw the G 1 ½ pump connecting piece onto the connection nozzle.
Illustration B

- Push the hose clamp onto the hose.
- Push the hose onto the G 1 ½ pump connecting piece and fasten it with a hose clamp.
- Push the connection nozzle into the Quick-Connect.
Illustration C

Connecting a hose to the pump when using a ¾' or 1' hose (SP 16.000 Dirt):
- Screw the G 1 threaded connection onto the connection nozzle.
- Fit the special accessory G 1 pump connecting piece(6.997-359.0 pump connecting piece G 1 (33.3 mm) incl. check valve - not included in the scope of delivery) onto the G 1 threaded connection:
- Place the check valve on the G 1 threaded con-nection so that the lettering "UP" is legible.
- Screw the pump connecting piece G 1 onto the G 1 threaded connection.
- Push the hose clamp onto the hose.
- Push the hose onto the pump connecting piece G 1 and fasten it with a hose clamp.
- Push the connection nozzle into the Quick-Connect.
Illustration C
")
")
Erecting/immersing the pump:
- Fit the height adjustment of the float switch into the lock.
Illustration D

- Place the pump securely on solid ground in the pumped liquid or immerse it via a rope attached to the carrying handle.

Note
The suction area must not be blocked by soiling. If the ground is muddy, place the pump on a brick or similar.
Make sure that the pump stands level. Do not carry the pump using the cable or hose.
Operation
Danger of death from electric shock. Danger of death from electric shock if live parts are touched.
During operation, do not touch the rope attached to the carrying handle or any objects that are in contact with the pumped liquid (e.g. pipelines protruding into the pumped liquid, railings) and do not reach into the pumped liquid.
Automatic venting device
- If the fluid level is low, any sucked-in air, or air present in the pump, may escape via the automatic venting device. Fluid can also leak along with air. If the pump has problems with suction when the fluid level is low, unplug and plug in the mains plug repeatedly to assist the suction process.
Illustration E


Automatic mode
- Adjust the float switch via the height adjustment and the cable length.
Note
If the pump is operated unattended, always set the float switch to the top position to ensure reliable pump switch-off.
Illustration F

Note
When the pump is set to the lowermost position, set the cable length between the float switch and the lock to 2.5 cm, see marking on the cable.
Illustration G

- Plug the mains plug into the socket.
Note
In automatic mode, the float switch controls the pumping process automatically.
The pump switches on as soon as the float switch reaches the switch-on height caused by the rising fluid level.
The pump switches off as soon as the float switch reaches the switch-off height caused by the sinking fluid level.
The float switch must be able to move freely. The cable length between the float switch and the locking device must be at least 2.5 cm.
Switch-on height / switch-off height (float switch in lowest position):
| Min / Max | SP 16.000 Dirt | SP 22.000 Dirt |
| Switch-on height cm* | 18 / 21 | 20 / 24 |
| Switch-off height cm* | 4 / 12 | 6 / 15 |
Switch-on height / switch-off height (float switch in uppermost position):
| Min / Max | SP 16.000 Dirt | SP 22.000 Dirt |
| Switch-on height cm* | 28 / 31 | 33 / 36 |
| Switch-off height cm* | 14 / 22 | 19 / 27 |
* The switching heights vary depending on the position of the float switch and the cable length between the float switch and the lock. We recommend retaining the set cable length.
Manual mode
Note
In manual mode, the pump stays switched on. The fluid level must be at least 60 mm (SP 16.000 Dirt) or 50 mm (SP 22.000 Dirt) for the pump to prime itself in manual mode. The pump can pump up to a residual fluid height of 25 mm (SP 16.000 Dirt) or 35 mm (SP 22.000 Dirt). The specified residual fluid height is only achieved in manual mode.
The float switch must be able to move freely.
- Fasten the float switch in the lock pointing upwards.
Illustration H


ATTENTION
Risk of damage from dry running!
Dry running leads to increased wear on the pump.
Do not leave the pump unattended in manual operation. In case of dry running, immediately pull the mains plug out of the socket.
- Plug the mains plug into a mains socket.
Finishing operation
- Pull the mains plug out of the socket. The device stops.
ATTENTION
Risk of damage!
Risk of damage due to dried soiling or additives.
Rinse and clean the device immediately after each use. - If dirty liquids or liquids with additives have been pumped, rinse and clean the device immediately after finishing operation, see chapter Rinsing and cleaning.
- Drain the device and accessories and let them dry.
Care and maintenance
Risk of electric shock and risk of injury! The device contains electrical and mechanical components.
Cleaning and user maintenance may not be carried out by children.
Rinsing and cleaning
ATTENTION
Risk of damage!
Risk of damage due to dried soiling or additives.
Rinse and clean the device immediately after each use.
- If dirty liquids or liquids with additives have been pumped, the device must be rinsed afterwards: Use the device to pump clear fresh water without additives until all soiling or additives have been flushed out of the device.
Risk of electric shock and risk of injury! The device contains electrical and mechanical components.
Always disconnect the device from the power supply before assembling, disassembling or cleaning.
- Pull the mains plug out of the socket.
- Press the Quick-Connect button and remove the connection nozzle.
Illustration C - Where necessary, remove residue from the hose and on Quick-Connect.
- Clean the outside of the device with a soft, clean cloth and clear fresh water.
- Drain the device and accessories and let them dry.
Service
The device is maintenance-free.
Transport
Manual transport
Risk of injury from tripping!
There is a risk of injury from tripping on loose cables and hoses.
Be careful of cables and hoses when moving the device.
- Lift and carry the device by the carrying handle.
Transport in vehicles
Risk of injury, risk of damage!
Note the weight of the device during transport. Store or secure the device in accordance with applicable guidelines so that it cannot slip or be thrown around during transport.
- When transporting the device in vehicles, secure it to prevent it from slipping or overturning in accordance with the respectively applicable guidelines.
Storage
ATTENTION
Risk of damage due to frost!
An incompletely emptied device can be damaged by frost.
Completely empty the device and accessories before storing them.
Protect the device from frost.
Store the device in a frost-free place and not outdoors.
Risk of injury and damage!
The device may tip over on sloping surfaces.
Be aware of the weight of the device during storage.
- Completely empty the pump and accessories.
- Allow the pump and accessories to dry out.
- Store the pump in a frost-protected place.
Troubleshooting guide
Malfunctions often have simple causes that you can remedy yourself using the following overview. When in doubt, or in the case of malfunctions not mentioned here, please contact your authorised Customer Service.
| Fault | Cause | Rectification | |
The pump is running, but not delivering | Air is in the pump. |
| |
| The suction area is clogged. |
| ||
| The fluid level is too low in manual operation. |
| ||
The pump does not start up/stops suddenly during operation | The power supply is disconnected. |
| |
| The thermal protection switch has switched off the pump because of overheating. |
| ||
| Dirt particles block the suction area. |
| ||
The pumping capacity decreases | The suction area is clogged. |
| |
The delivery rate is too low | The maximum delivery head is exceeded. The hose diameter and the hose length have been selected incorrectly. |
| |
Quick-Connect cannot be opened or closed | The push-fit system is dirty. |
| |
Technical data
| SP 16.000 Dirt | SP 22.000 Dirt | ||
| Device performance data | |||
| Mains voltage | V | 230-240 | 230-240 |
| Power frequency | Hz | 50 | 50 |
| Nominal power | W | 550 | 750 |
| Maximum flow rate | l/h | 16,000 | 22,000 |
| Pressure (max.) | MPa (bar) | 0.08 (0.8) | 0.08 (0.8) |
| Delivery height (max.) | m | 8 | 8 |
| Immersion depth (max.) | m | 7 | 7 |
| Perm. temp. feed fluid | °C | 5...35 | 5...35 |
| Particle size (max.) of permissible feed fluids | mm | 20 | 30 |
| Minimum fluid level (manual mode) | mm | 60 | 50 |
| Residual fluid height | mm | 25 | 35 |
| Weight (without accessories) | kg | 4.9 | 6.5 |
Subject to technical modifications.
Optimising the flow rate
The flow rate is further increased:
- The lifting height is reduced.
- The diameter of the hose used is increased.
- The length of the hose used is decreased.
- The smaller the pressure loss caused by the connected up accessories.
![]()


Documents / Resources
References
Download manual
Here you can download full pdf version of manual, it may contain additional safety instructions, warranty information, FCC rules, etc.
Download Kärcher SP 16.000 Dirt, SP 22.000 Dirt - Submersible Dirty Water Pump Manual
Advertisement


Need help?
Do you have a question about the SP 16.000 Dirt and is the answer not in the manual?
Questions and answers