Kärcher VC 3, VC 3 Plus - Vacuum Cleaner Manual
- Original instructions manual (123 pages) ,
- Manual (122 pages) ,
- Original operating instructions (102 pages)
Advertisement

 Please read these original operating instructions and the enclosed safety instructions prior to the initial use of your device. Proceed accordingly. Keep both booklets for future reference or subsequent owners.
General notes
Proper use
This universal vacuum cleaner is intended for the private use at home and not for commercial purposes. The manufacturer is not liable for any damage that may occur on account of improper use or wrong operation. Use the universal vacuum cleaner only with:
- Original spare parts, accessories and special accessories.
The universal vacuum cleaner is not suitable for
- Vacuuming off human beings or animals.
- Vacuuming up:
Small living creatures (e.g. flies, spiders, etc.).
Substances that are harmful for health, have sharp edges, are hot or glowing.
Moist or liquid substances.
Easily inflammable or explosive substances and gases.
Depending on equipment
The parquet nozzle supplied is not suitable for use on carpets.
Customer Service
Our KÄRCHER branch will be pleased to help you fur-ther in the case of questions or faults. See address.
Spare parts
Only use original accessories and spare parts, they en-sure the safe and trouble-free operation of the device. For information about accessories and spare parts, please visit www.kaercher.com.
Scope of delivery
The scope of delivery of your appliance is illustrated on the packaging. Check the contents of the appliance for completeness when unpacking.
In the event of missing accessories or any transport damage, please contact your dealer.
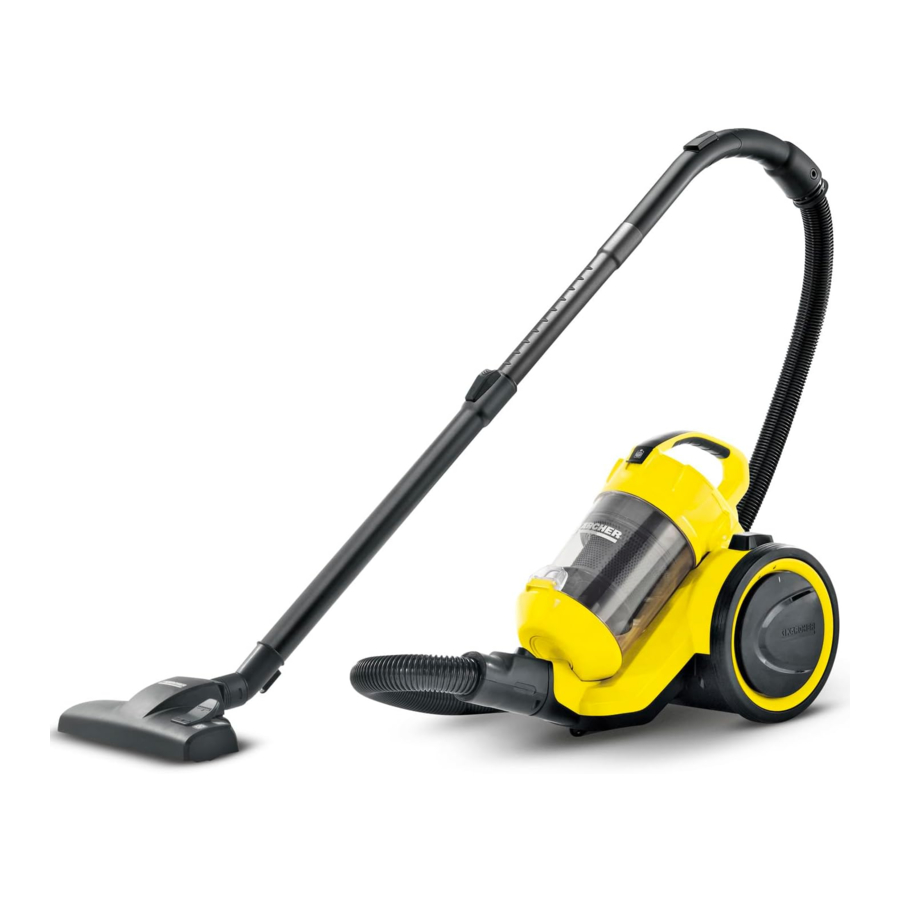
Description of the Appliance

- Running wheels
- Mains plug
- Push button take-up cable
- Parking position
- Carrying handle
- On/Off button
- Cover HEPA filter
- HEPA filter
- Handle
- Suction control
- Telescopic suction pipe
- Adjustable telescopic suction pipe
- Furniture brush
- Crevice nozzle
- Switch lever
- Floor nozzle
- *Parquet nozzle
(Depending on equipment) - Suction hose
- Hose release button
- Dust container
- Dust container lock
- Dust bin release button
Operation
Start up
- Snap the suction hose hub into the suction opening.
![]()
- For removal, compress the latch and pull off the suction hose hub.
- Connect handle and suction tube and insert.
![]()
- Connect the floor nozzle and telescopic suction pipe and insert.
- Use the adjustment of the telescopic suction pipe and adjust the telescopic suction pipe to the desired length.
![]()
- For parking or during short breaks, hook the floor nozzle into the park bracket at the rear of the unit.
![]()
- Hold the mains cable on the plug and pull it out. Insert the mains plug into a socket.
![]()
- Turn on the machine.
![]()
- The power suction adjustment is at the power suction control:
![]()
- Suction control open, little suction power
- Suction control closed, high suction power
Adjust the suction power to suit the suction requirement- Low suction power – for laced curtains, textiles, upholstered furniture, cushions
- Medium suction power – for slightly dirty carpets/ carpeted floors, precious carpets
- Highest suction power – for hard floors, very dirty carpets and carpeted floors
- Empty dust container when the marking -MAX- is reached at the latest.
See Chapter "Emptying the dust container".


The appliance will shut down automatically if there is a danger of overheating. Turn the appliance off and pull the power plug. Ensure that the floor nozzle, the telescopic suction pipe or the suction hose is not clogged or check if the filter must be changed. After the elimination of the disturbance, allow the appliance to cool down for a at least 1 hour; then the appliance is ready for operation again.
Suction using accessories
Using accessories
- Furniture brush: for cleaning furniture and delicate objects with care, dusting books, air vents in the car, etc.
- Crevice nozzle: for edges, joints and heaters
Replace the Accessories
- Insert the handle in the desired accessory until the stop.
![]()
Note: The accessories can also be used when the telescopic suction pipe is attached.

Floor nozzle
Reversible floor nozzle
- Carpets and carpeted floors:
Select the following switch setting:
![]()
![]()
- Hard surfaces:
Select the following switch setting:
![]()
![]()


Parquet nozzle
* depending on model
- Used to vacuum sensitive and smooth floors (parquet, marble, terracotta etc.).
Finish operation
- Turn off the appliance and disconnect the mains plug.
![]()
- Push the take-up cable button. The cable will pull itself automatically into the appliance.
![]()
- Hang the floor nozzle on the backside of the appliance into the parking holder, and push into the pause position.
See Illustration 4


Transport, storage
- Hold the appliance at the carrying handle when you want to transport it and store it in dry rooms.
Note: It is recommended that you first completely push in the telescopic suction pipe.
Cleaning and care
ATTENTION
- Before working on the appliance, switch it off and pull out the plug of the vacuum cleaner!
- Only use the device when all filters and the dust container are installed.
Otherwise the motor can get damaged. - Defective filters and filters that can no longer be cleaned must be replaced.
Emptying the dust container
- Empty dust container when the marking -MAX- is reached at the latest.
![]()
- Push the lock and remove the dust container.
![]()
- Hold the dust container over a dust bin. Operate the locking lever.
![]()
- As soon as the dust container is empty, close the cover, the lock snaps into place.
- Place the dust container into the device and snap it into place.
Note
Ensure the correct seating of the dust container upon insertion.


Cleaning the cyclone separator
Clean the cyclone separator in case of coarse soiling.
- Push the lock and remove the dust container.
See Illustration 14 - Turn the cover of the dust container in the counterclockwise direction so that the marking points to the unlocking symbol.
![]()
- Remove dust container.
For quick cleaning - Clean the cyclone separator by using a soft sponge and wipe with a moist cloth.
![]()
For thorough cleaning: - Disassemble the cyclone separator and clean the sieve and ring under running water.
![]()
Note
The dust container can also be cleaned under running water.
ATTENTION- Do not immerse the cyclone separator into water.
- Do not wash the parts using detergents or boiling water.
- Allow the cyclone separator and the dust container to dry completely before installing it in the device.
- Turn the cover of the dust container in the clockwise direction so that the marking points to the locking symbol.
See Illustration 16 - Place the dust container into the device and snap it into place.


Cleaning the motor protection filter
Wash the motor protection filter on a weekly basis or in case of visible soiling.
The motor protection filter is located in the casing above the dust container.
- Push the lock and remove the dust container.
See Illustration 14 - Unlatch the lock and open the cover.
![]()
- Remove the motor protection filter.
- Remove the foam inlay from the frame.
![]()
- Wash foam inlay in warm water (max. 40°C).
- Thoroughly rinse the foam inlay and allow it to air-dry.
ATTENTION- Never clean the foam inlay in the washing machine and do not dry it by means of a hair dryer.
- Do not wash the parts using detergents or boiling water.
- Allow the foam inlay to dry completely before installing it in the device (at least 24 hours).
- Insert the motor protection filter with the foam inlay into the top part of the dust container.
- Snap in the cover.
- Place the dust container into the device and snap it into place.


HEPA filter
Filter for pure blower air.
Note
- Clean the HEPA filter in case of visible soiling.
- Replace the HEPA filter in case of damage
ATTENTION
Material damage due to incorrect cleaning of the HEPA filter.
- Do not rinse out the HEPA filter!
- Never clean the filter in the washing machine and do not dry it by means of a hair dryer.
- Turn the cover in the counter-clockwise direction so that the marking points to the unlocking symbol.
![]()
- Remove the HEPA-filter.
- Carefully empty/knock dirt out of the HEPA filter.
- Insert HEPA filter.
- Turn the cover in the clockwise direction so that the marking points to the locking symbol.

Cleaning the accessories
- Handle and suction tube can be disconnected in order to clean or if clogged. Push the 2 interlocks and pull apart.
![]()
- Connect handle and suction tube and insert.

Technical specifications
| Kärcher | VC 3 (ERP) VC 3 Plus (ERP) | |
| Voltage | V | 220-240 |
| Current type | Hz | 50/60 |
| Protective class | II | |
| Weight (without accessories) | kg | 4.4 |
| Action radius | m | 7.5 |
| Actual dust container volume | l | 0.9 |
| Dimensions | ||
| Length | mm | 396 |
| Width | mm | 270 |
| Height | mm | 332 |
| Vacuum min. | kPa | ≥ 16 |
| HEPA filter | HEPA 13 | |
| Eco design as per 666/2013: | ||
| Sound power level LWA | dB(A) | 76 |
| Rated power input | W | 700 |
Subject to technical modifications!

Documents / Resources
References
Download manual
Here you can download full pdf version of manual, it may contain additional safety instructions, warranty information, FCC rules, etc.
Advertisement


Need help?
Do you have a question about the VC 3 and is the answer not in the manual?
Questions and answers