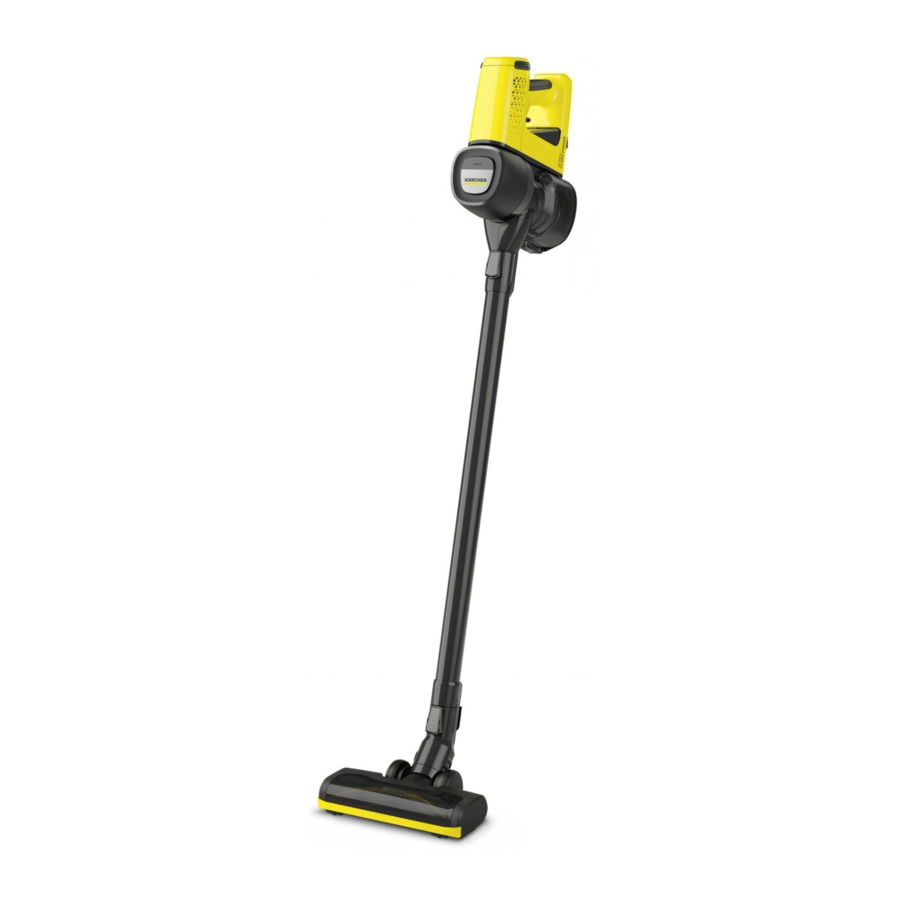
Kärcher VC 4 Cordless myHome, VC 4 Cordless Premium myHome - Battery-power Vacuum Cleaner Manual
- Manual (172 pages) ,
- Original instructions manual (28 pages) ,
- Manual (16 pages)
- Also fits for
- Vc 4 cordless premium myhome
Advertisement
- 1 Intended use
- 2 Accessories and spare parts
- 3 Scope of delivery
- 4 Description of the unit
- 5 Installing the wall bracket
- 6 Initial startup
- 7 Operation
-
8
How to use the Accessories
- 8.1 General instructions for use
- 8.2 Motor-driven multi-function brush
- 8.3 2-in-1 upholstery nozzle
- 8.4 Crevice nozzle
- 8.5 Soft brush
- 8.6 Flexible crevice nozzle
- 8.7 Flexible extension hose
- 8.8 Large upholstery nozzle
- 8.9 2-in-1 furniture brush
- 8.10 Mini turbo brush
- 8.11 LED crevice nozzle
- 8.12 Soft motor-driven brush (Hard floor nozzle)
- 9 Transportation
- 10 Storage
- 11 Care and service
- 12 Troubleshooting guide
- 13 Removing and installing the battery
- 14 Technical data
- 15 Documents / Resources
Intended use
- Only use the device in private households.
- The device is intended exclusively for cleaning dry surfaces
- The following are not in accordance with the intended use:
- Cleaning people, animals, plants or clothing on the body.
- Soaking up water or other fluids.
- Extraction of glowing ashes, coal, cigarettes or other flammable or easily inflammable substances.
- Use in the vicinity of explosive or highly flammable substances.
Accessories and spare parts
Only use original accessories and original spare parts. They ensure that the appliance will run fault-free and safely.
Information on accessories and spare parts can be found at www.kaercher.com.
Scope of delivery
The scope of delivery for the appliance is shown on the packaging. Check the contents for completeness when unpacking. If any accessories are missing or in the event of any shipping damage, please notify your dealer.
Description of the unit
The scope of delivery of the unit (dependent on model) is shown on the packaging. These operating instructions describe all possible options. See graphics page for illustrations.
Illustration A

- Battery/error message LED indicator light
- Unlocking buttons for removing the exhaust air foam filter
- Exhaust air foam filter cover
- Boost function button (increase suction performance)
- On/Off switch with locking lever
- Handle
- Replaceable battery
- Battery unlocking button
- Unlocking button for removing the dust container removal
- Air inlet filter
- Dust container flap
- Removable dust container
- Dust container cover flap unlocking button
- Dust container suction fitting
- Motorized electric brush with universal brush roller
- Suction pipe
- Crevice nozzle
- Wall bracket
- Charger
- ** 2-in-1 upholstery nozzle
- ** Flexible extension hose
- ** Flexible crevice nozzle
- ** Large upholstery nozzle
- ** 2-in-1 furniture brush
- ** Mini turbo brush
- ** Soft brush
- ** LED crevice nozzle
- ** Air inlet filter
- ** Filter cleaning tool
- ** Soft motorized brush (hard floor nozzle)
** optional
Installing the wall bracket
The scope of delivery includes a wall bracket as well as screws and dowels for tidy storage of the vacuum cleaner.
 Note
Note
Mount the wall bracket at a suitable point using the screws and dowels supplied.
For safe storage of the device, position the lower edge of the wall bracket 1.04 m from the floor.
Illustration E

ATTENTION
Material damage due to incorrect installation Incorrect installation can damage both the device and the floor covering if it falls.
Use suitable mounting tools for wall mounting. Take the weight of the device and the loading capacity of the installation location into account when selecting the fasteners.

Risk of electric shock and injuries Make sure there are no electrical cables, water or gas pipes in the wall around the mounting area.
Initial startup
Installing accessories
Note
The multi-function brush is also driven by its own integrated motor and must therefore always be connected directly to the hand-held device or the suction pipe in order to ensure the power supply.
All other accessor parts can also be used directly with the hand-held device or with the suction pipe to increase the reach.
- Push the suction pipe on to the suction fitting of the dust container until it audibly clicks into place.
- Press the unlocking button and remove the suction pipe from the suction fitting.
Illustration B
![]()
- Push the floor nozzle on to the suction pipe until it audibly clicks into place.
- Press the unlocking button and remove the floor nozzle from the suction pipe.
Illustration C
![]()
- Push the accessory, such as the crevice nozzle, on to the suction fitting of the dust container or suction pipe until it audibly clicks into place.
Illustration D
![]()


Battery charging
Note
The device is not supplied with a charged battery. Fully charge the battery before using it for the first time. Please observe the enclosed safety instructions for battery powered vacuum cleaners.
- To charge the device, attach it to the wall bracket included in the scope of delivery.
Illustration E - Plug the charger into a socket.
Insert the connecting plug into the charging socket of the device.
The LED indicator light flashes green during the charging process.
Illustration F
![]()
- When the device is fully charged, the LED indicator light lights up continuously green for 2 min. and then goes out.
Remove the charger from the power socket and charging socket.
Remove the device from the wall bracket.
Illustration G
![]()


The device is ready for use.
Operation
LED display
The LED on the head of the device shows information on the charging state of the battery and error messages.
Battery charging state
| LED | Duration of lighting | Meaning |
| Lights up green | continuously | Battery charged |
| Flashes green | 1 s on / 1 s off | 2 min remaining running time (-1 min/+2 min) |
| Flashes green | 125 ms on / 125 ms off | Battery fault |
The progress of charging the battery can be read from the green LED. The LED only lights up when the battery is correctly installed.
While charging
| LED | Duration of lighting | Meaning |
| Flashes green | 0.2 s from off to on / 0.6 s on / 0.2 s from on to off / 1 s off | Battery is charging |
| Lights up green | 2 min continuous lighting, then off | Battery fully charged |
Error message
| LED | Duration of lighting | Meaning |
| Flashes red | 125 ms on / 125 ms off | Floor nozzle blocked |
Changing accessories
To change accessories, see chapter Installing accessories
Vacuuming
- Install the required accessories, see chapter Installing accessories.
- Switch on the device, depending on cleaning requirements:
- Press the On/Off switch and keep it pressed during operation.
or
- Turn the locking lever to switch the device directly to continuous operation.
Illustration H
![]()

- If necessary, press the Boost button to increase the dust intake.
Illustration I
![]()

Note
When the device is switched off, the boost function is automatically disabled.
The boost function can also be switched off by pressing the Boost button again.
Ending operation
- Switch off the device.
Release the On/Off switch or disable the locking lever.
Note
To ensure an optimum suction performance, empty the dust container and clean the air inlet filter after each use.
Empty the dust container at the latest when the "MAX" marking is reached.
- Remove the suction pipe or accessory.
- Empty the dust container into a waste container.
- Press the unlocking button.
The dust container flap opens. - Empty the dust container.
Illustration J
![]()
- Press the unlocking button.
- To close the flap, push the dust container upwards until it clicks into place.
- Clean the air inlet filter, see chapter Cleaning the air inlet filter
- Attach the device to the wall bracket.
Illustration E - Charge the device, see chapter Battery charging.

How to use the Accessories
General instructions for use
- Which accessories are included in the scope of delivery is shown on the device packaging.
- Accessories not included in the packaging can be purchased in a KÄRCHER specialist shop or fromwww.kaercher.com.
- Test the accessory at an inconspicuous point before using it in a sensitive area.
- Follow the manufacturer's cleaning instructions.
- Connect the motor-driven electric nozzle to the suction pipe or the hand-held device.
- Also connect the other accessory parts, such as crevice nozzle, to the hand-held device or push it directly onto the suction pipe to increase the reach.
Motor-driven multi-function brush
Ideal for hard floors and carpets.
The motor-driven multi-function brush removes dirt stuck between the carpet fibres particularly effectively.
2-in-1 upholstery nozzle
The frame with the surrounding bristles can be taken off pressing the unlocking button.
- The soft brush is suitable for furniture with hard surfaces
- The wide brush is used to clean upholstered furniture, curtains, etc.
Crevice nozzle
For edges, joints, heaters and areas that are difficult to reach.
Soft brush
The soft brush has particularly soft bristles for cleaning sensitive surfaces such as keyboards, lamps, etc.
Flexible crevice nozzle
The flexible crevice nozzle increases the reach. For cleaning hard-to-reach places, such as between the car seats.
Flexible extension hose
Due to the extension and flexibility, hard-to-reach areas such as in the car can be reached and cleaned.
Large upholstery nozzle
For cleaning textile surfaces such as sofas, armchairs, mattresses, car seats, etc.
2-in-1 furniture brush
For gentle cleaning of sofas and delicate furniture. Depending on requirements, the accessory can be used as a furniture or upholstery nozzle by pressing the button.
Mini turbo brush
Ensures efficient removal of pet hair and dust particles from upholstered furniture, mattresses or other soft surfaces. The rotating round brush picks up even the finest hairs.
LED crevice nozzle
For cleaning corners and hard-to-reach areas. Thanks to the lights, even the finest dust in dark gaps becomes visible.
Soft motor-driven brush (Hard floor nozzle)
For hard floors and sensitive wooden floors. Extracts coarse and fine dirt simultaneously.
Transportation
The battery has been tested in accordance with the relevant rules for international transport, and can be transported / shipped.
Storage
ATTENTION
Moisture and heat
Risk of damage
Store batteries only indoors in a dry place with low humidity and temperatures below 20°C.
Care and service
General care instructions
- Clean the device and plastic accessory parts with a commonly available plastic cleaner.
Cleaning the air inlet filter
Note
The device can be cleaned manually or using a filter cleaning device.
- Switch off the device.
- Manually cleaning the air inlet filter.
- Pull the soiled air inlet filter down at the filter stick, carefully beat it and clean it with a damp cloth or running water.
Illustration K
![]()
- Reinsert the fully dried air inlet filter.
- Check for correct seating.
- Pull the soiled air inlet filter down at the filter stick, carefully beat it and clean it with a damp cloth or running water.
- Cleaning the air inlet filter with a filter cleaning device.

Note
A new air inlet filter must be installed in the dust container during filter cleaning.
- Push the filter cleaning device on to the suction pipe branch and pull the air inlet filter out of the device using the filter stick.
- Push the soiled air inlet filter into the filter clean-ing device.
- Insert a new air inlet filter into the dust container.
Illustration L
![]()
- Switch on the device and let it run in boost mode while turning the side cover.
Illustration M
![]()
- Remove the cleaned air inlet filter from the filter cleaning tool and reinsert it in the dust container after removing the new air inlet filter.
- Check that the air inlet filter is correctly seated.


Cleaning the dust container and cyclone filter
Note
The dust container and cyclone filter can be cleaned with or without removing the dust container. We recommend removing the dust container from the device for easy cleaning.
Note
Before cleaning the dust container and cyclone filter, empty the dust container, see chapter Ending operation
- Switch off the device.
- Press the unlocking button for the dust container and remove the dust container from the hand-held device.
Illustration N
![]()
- Remove the cyclone filter from the dust container by turning it anticlockwise.
- Remove the cyclone filter from the dust container and take the air inlet filter out of the cyclone filter.
Illustration O
![]()


ATTENTION
Short circuit hazard
There are cables or contacts in the dust container and cyclone filter for the power supply.
Make sure that the cables or contacts do not get wet when cleaning.
- Clean the dust container and cyclone filter with a soft brush or a slightly damp cloth.
Illustration P
![]()
- Clean the air inlet filter, see chapter Cleaning the air inlet filter
- Re-insert the dry dust container and cyclone filter with air inlet filter into the device and close the flap.
- Attach the dust container to the handheld device.
- Hold the dust container at an angle against the handheld device while holding the top on the hook of the handheld device.
- Push the dust container upwards until the hook on the handheld device engages in the slot in the dust container.
- The dust container must audibly click into place.
Illustration Q
![]()


Clean the exhaust air foam filter/replace the exhaust air foam filter
Note
The exhaust air foam filter ensures pure exhaust air.
- Clean the exhaust air foam filter if it is visibly dirty.
- Replace the exhaust air foam filter if damage is visible.
- Switch off the device.
- Clean the exhaust air foam filter.
- Press both side unlocking buttons at the same time and remove the cover with the exhaust air foam filter.
Illustration R
![]()
- Press both side unlocking buttons at the same time and remove the cover with the exhaust air foam filter.

ATTENTION
Short circuit hazard
Power supply cables or contacts are located in the cover of the exhaust air foam filter.
Before cleaning with water, remove the cover from the exhaust air foam filter so that the cables or contacts do not get wet.
- Carefully tap off the exhaust air foam filter or if it is heavily soiled:
- Pull off the cover of the exhaust air foam filter.
- Clean the exhaust air foam filter under running water. Do not rub or brush off.
ATTENTION
Health risk
Exhaust air foam filters that are not completely dry when installed in the device can be a breeding ground for spores and mould.
Make sure that the exhaust air foam filter is completely dry on installation.
- Then allow the exhaust air foam filter to dry completely.
- Fasten the cover to the exhaust air foam filter.
Illustration S
![]()
- Insert the exhaust air foam filter into the device until it latches into place.
- Press the cover down in the middle to ensure that the cover sits correctly on the device.
Illustration U
![]()


- Replace the exhaust air foam filter.
- Press both side unlocking buttons at the same time and remove the exhaust air foam filter.
Illustration R - Remove the cover of the exhaust air foam filter and dispose of the used filter.
- Fasten the new exhaust air foam filter to the cover.
Illustration T
![]()
- Insert the exhaust air foam filter into the device until it latches into place.
- Press the cover down in the middle to ensure that the cover sits correctly on the device.
Illustration U
- Press both side unlocking buttons at the same time and remove the exhaust air foam filter.

Cleaning the multi-function nozzle
- Switch off the device.
- Remove accessories.
ATTENTION
Short circuit hazard
The multi-function brush contains electrical components.
You must not immerse the multi-function brush in water or clean it with a damp cloth.
- Clean the multi-function brush.
- Unlock the brush roll cover / support with a coin or other object and remove it.
Illustration V
![]()
- Remove the brush roll from the brush opening in the direction of the arrow.
Illustration W
![]()
- Remove the dirt e.g. with a brush. Any tangled threads or hairs can be carefully cut off with scissors.
- Carefully clean the brush opening with a cloth or soft brush.
Illustration X
![]()
- Insert the brush roll into the brush opening.
- Lock the brush roll with a coin or other object.
Illustration Y
![]()
- Unlock the brush roll cover / support with a coin or other object and remove it.


Cleaning the mini turbo nozzle
- Switch off the device.
- Remove accessories.
ATTENTION
Short circuit hazard
The mini turbo nozzle contains electrical components. Do not immerse the mini turbo nozzle in water or clean it with water.
- Clean the mini turbo nozzle.
- Press down the brush roller cover and remove the brush roller.
Illustration Z
![]()
- Remove residue, e.g. with a brush. Any tangled threads or hairs can be carefully cut off with scissors.
- Carefully clean the brush opening with a cloth or soft brush.
Illustration AA
![]()
- Diagonally insert the brush roller fully into the brush opening, pressing upwards until the cover has clicked into place.
Illustration AB
![]()
- Press down the brush roller cover and remove the brush roller.


Troubleshooting guide
Malfunctions often have simple causes that you can remedy yourself using the following overview. When in doubt, or in the case of malfunctions not mentioned here, please contact your authorised Customer Service.
The device does not start up
Battery is empty.
- Charge the rechargeable battery.
Battery is not inserted correctly.
- Push the battery into the mount until it locks into place.
Battery is defective.
- Replace the battery.
The battery is not charging
The charging plug/mains plug is not connected correctly.
- Connect the charging plug/mains plug correctly.
The socket is defective.
- Check that the socket is working.
The wrong charger is being used
- Check that the correct charger is being used.
The device stops during operation or the suctionperformance is poor
The battery has overheated.
- Stop work and wait until the battery temperature is back in the normal range.
The accessories, the suction opening on the dust container or the suction pipes are clogged.
- Remove the clog with a suitable aid.
The dust container is full.
- Empty the dust container.
The filters are soiled.
- Clean the filters, see chapter Care and service.
Roller brush is blocked.
- Remove any blockage.
Abnormal engine noise
The accessories, the suction opening on the dust container or the suction pipes are clogged.
- Remove the clog with a suitable aid.
Removing and installing the battery
ATTENTION
Frequent removal of the battery
Frequent removal of the battery can damage the battery.
Only remove the battery for maintenance and care if the device is not used for a long period of time or if the device has to be sent for servicing.
Removing the battery
- Press the unlocking button.
- Remove the battery from the device.
Illustration AC
![]()

Inserting the battery
ATTENTION
Dirty contacts
Damage to the device and battery
Check the battery mount and the contacts for soiling and clean them as necessary before inserting the battery.
Note
Use only fully charged batteries.
- Push the battery into the mounting in the device until it audibly latches into place.
Illustration AD
![]()

Technical data
| Electrical connection | ||
| Voltage of charger | V | 21,6 |
| Nominal power | W | 140 |
| Battery pack type | Li-ION | |
| Charger | 26 V TEK *EU | |
| Model | YLJXA-E260040 | |
| Part number | 9.769-119.0 | |
| Nominal voltage of charger | V | 100 240 |
| Frequency | Hz | 50 - 60 |
| Charging time when the battery is completely discharged | min | 345 |
| Protection class |  | II |
| Device performance data | ||
| Tank content | l | 0,65 |
| Operating time when battery is fully charged in normal operation | min | 30 |
| Operating time in maximum mode when battery fully charged | min | 18 |
| Dimensions and weights | ||
| Weight (without accessories) | kg | 1,55 |
Subject to technical modifications.

Documents / Resources
References
Download manual
Here you can download full pdf version of manual, it may contain additional safety instructions, warranty information, FCC rules, etc.
Advertisement


Need help?
Do you have a question about the VC 4 Cordless myHome and is the answer not in the manual?
Questions and answers