Kärcher FC 4-4 - Hard Floor Cleaner Manual
- Manual (208 pages) ,
- Quick start manual (2 pages) ,
- Manual (3 pages)
Advertisement
Intended use
Use the device exclusively with battery packs and chargers from the KÄRCHER Battery Power 4 V system.
 | Suitable battery packs are marked with the BP 4 V symbol. |
 | Only charge the battery pack with the chargers approved for charging. |
Use the floor cleaner exclusively for hard floor cleaning in your private household and only on waterproof hard floors.
Do not clean water-sensitive floor coverings such as e.g. untreated cork floors, since the moisture can penetrate and damage the floor.
The device is suitable for cleaning PVC, linoleum, tiled, stone, oiled and waxed parquet, laminate and all waterresistant floor coverings.
Accessories and spare parts
Only use original accessories and original spare parts. They ensure that the appliance will run fault-free and safely.
Information on accessories and spare parts can be found at www.kaercher.com.
Scope of delivery
The scope of delivery for the appliance is shown on the packaging. Check the contents for completeness when unpacking. If any accessories are missing or in the event of any shipping damage, please notify your dealer.
Symbols on the device

Risk of electric shock
The device contains electrical components.
Never clean the device under running water. Do not immerse the device in water.

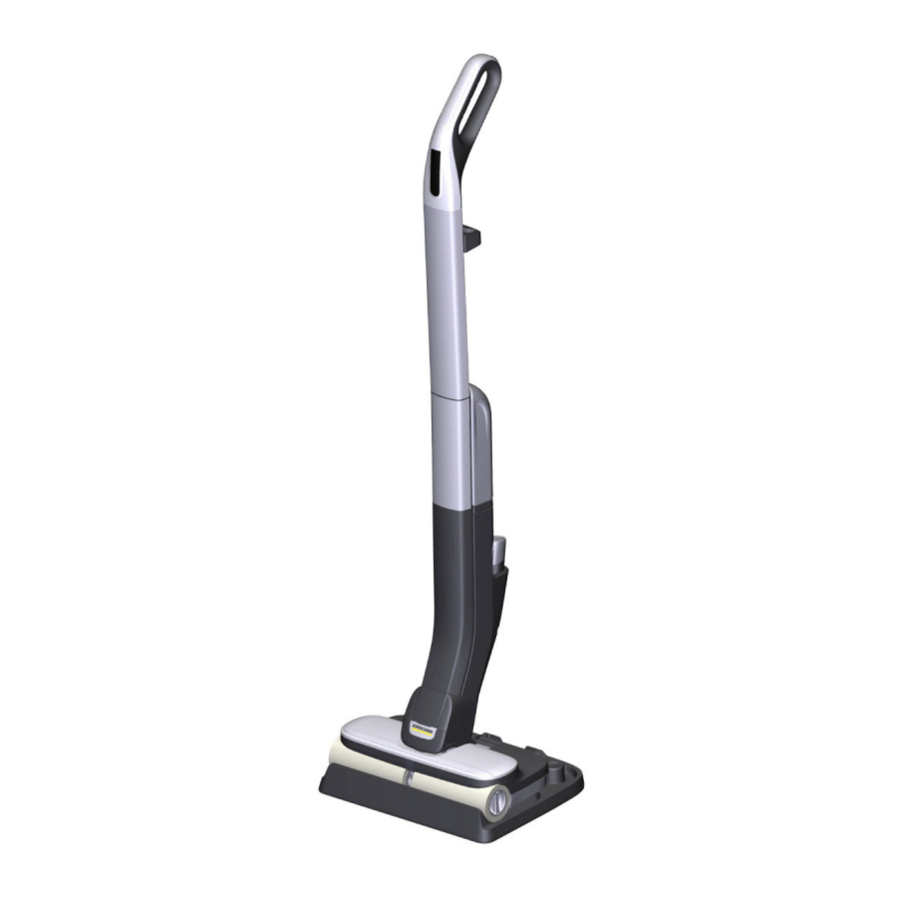
Device description
The maximum amount of equipment is described in these operating instructions. Depending on the model used, there are differences in the scope of delivery (see packaging).
Illustration A

- ON/OFF switch
- Button for adjusting the cleaning level
Switching between cleaning level 1 and 2 - "Cleaning level 2" indicator
Increased roller speed and water quantity - "Cleaning level 1" indicator
Normal roller speed and water quantity - "MIN MAX" indicator (red)
The fresh water tank is empty
The waste water tank is full - "Battery" indicator (green)
Battery run time display - Wall anti-slip handle
- Handle
- Fresh water tank
- Battery packs (KÄRCHER Battery Power 4 V)
- Quick charger Duo (KÄRCHER Battery Power 4 V)
- Battery pack holder
- Removable hair filters
- Floor head
- Unlocking button for hair filters
- Handle unlocking button
- Waste water tank tongue
- Waste water tank
- Universal cleaning rollers
- * Cleaning rollers for stone floors
- Cleaning brush
- Detergent RM 536 (30 ml)
- * Detergent RM 536 (500 ml)
- * Detergent RM 537 (30 ml)
- Parking and cleaning station
- Raised elements for storing the rollers
* optional
Installation
Install the handle bar
- Hold the basic device firmly.
- Insert the handle bar as far as it will go into the basic device until it audibly latches into place. The handle bar must sit firmly in the unit.
Illustration B
![]()

Initial startup
Charging battery packs
- Charge the battery packs (see operating instructions and safety instructions for the battery packs and the charger).
Illustration C
![]()

Fitting the battery packs
- Press the battery packs into the battery pack holder on the device until they audibly latch into place.
Illustration D
![]()

Fitting the waste water tank
- Place the waste water tank on the floor.
- Set the device on the waste water tank and press down so that the waste water tank audibly latches into place.
The waste water tank must sit tightly in the device.
Illustration E
![]()

Installing the rollers
- Twist the cleaning rollers onto the roller holder all the way to the end stop.
Illustration F
![]()
- Pay attention to the colour coding on the inner side of the roller and on the roller holder on the device (e.g. blue to blue).
- After installation, check that the cleaning rollers are tightly seated.

Filling the fresh water tank
- Grasp the fresh water tank by the recessed grips at the side and remove it from the device.
- Open the tank cap and turn it to the side.
Illustration G
![]()
- Fill the fresh water tank with cold or lukewarm fresh water.
- Add KÄRCHER detergent or care agent to the fresh water tank as required.

ATTENTION
Overdosing or underdosing of the detergent or care agent
Can result in poor cleaning results.
Follow the dosage recommendations for the detergent or care agent.
- Close the tank cap.
- Fit the fresh water tank into the device.
The fresh water tank must sit tightly in the device.
Illustration H
![]()

Operation
General instructions on operation
ATTENTION
Moisture
Material damage to sensitive floors
Check the surface to be cleaned for water sensitivity at an inconspicuous location before using the device.
Do not clean water-sensitive floor coverings such as e.g. untreated cork floors, since the moisture can penetrate and damage the floor.
ATTENTION
Material damage
Damage to the device from pointed, large and/or bulky objects.
The device must not be stored and used on hard coarse dirt and objects, as the parts can get stuck under the waste water tank and cause scratches on the floor and tank.
Before starting work and storing the device, remove objects such as shards, pebbles, screws or toy parts from the floor.
Illustration AF

Note
- To avoid striped patterns, test the device on an inconspicuous area before using on sensitive surfaces, e.g. wood or fine stone.
- Do not allow it to remain in one area, but keep it in motion.
- Observe the instructions for the floor covering manufacturer.
Note
Work backwards towards the door so that no footprints are generated on the freshly washed floor.
Illustration AG

- Floor cleaning is performed using a to and fro movement at the same speed as when vacuuming.
Note
For an optimum cleaning result, wash the rollers in the washing machine at 60°C before initial use.
ATTENTION
Material damage due to loose rollers
This may damage the washing machine.
Place the rollers in a laundry net and load the washing machine with extra laundry.
ATTENTION
Damage due cleaning the rollers with fabric softener or using a clothes dryer
Damage to the microfibres
Do not use fabric softener when cleaning in a washing machine.
Do not dry the rollers in a clothes dryer.
Starting work
ATTENTION
Uncontrolled motion
Damage to the device and material damage The cleaning rollers start rotating as soon as the device is switched on.
Hold the handle tight to prevent the device from moving away independently.

Risk of injury
The cleaning rollers start rotating as soon as the device is switched on. Injuries can occur due to uncontrolled movement.
Hold the handle tight to prevent the device from moving away independently.
ATTENTION
Fresh water tank or waste water tank not installed
Material damage
Before starting cleaning work, ensure that the fresh water tank is filled with water and the waste water tank is fitted in the device.
- Press the ON/OFF switch.
The device switches on.
The cleaning level 1 indicator for normal roller speed and normal water quantity lights up.
Illustration I
![]()
- Wait until the rollers rotate.
- Switch to cleaning level 2 using the button for setting the cleaning level.
This increases the roller speed and water quantity.
The Cleaning level 2 indicator lights up.
Illustration J
![]()
- Move the device back and forth until the rollers are sufficiently moistened.


Note
Selection of cleaning level 1 or cleaning level 2 depends on the type of floor to be cleaned (e.g. wooden or stone floor).
The device is set to cleaning level 1 after initial start-up. The cleaning level setting last used always remains activated after interrupting and resuming work.
Battery run time
The "Battery" indicator shows the remaining battery run time:
Illustration L

- 3 LEDs light up - 70% to 100% battery run time
- 2 LEDs light up - 40% to 70% battery run time
- 1 LED lights up - 20% to 40% battery run time
A roller start-stop motion and optical signals warn of a depleted battery.
- Approx. 5 minutes before the battery is depleted, the lowest LED flashes and the rollers rotate three times in the form of a quick start-stop motion.
- All LEDs flash for 30 seconds when the battery is empty and the device has switched off.
Emptying the waste water tank and refilling the cleaning fluid
- Press the ON/OFF switch. The device switches off.
- Fix the floor head with the foot and push the handle forward.
The device stands by itself.
Illustration M
![]()
- Release the waste water tank: Stand with your foot on the tongue of the waste water tank and push the handle bar forward.
The waste water tank releases from the device.
Illustration N
![]()
- For draining the waste water tank, do not transport the waste water tank by the top cover, but hold it level using both hands.
- Empty the waste water tank through the openings. In the case of adhering soiling, remove the cover of the waste water tank and rinse the waste water tank with fresh water.
Illustration O
![]()
- Fit the waste water tank (see chapter Fitting the waste water tank).
- If the fresh water tank is empty, the "MIN MAX" indicator (red) lights up.
Illustration K
![]()
- If the fresh water tank is empty, the "MIN MAX" indicator (red) lights up.
- Fill the fresh water tank (see chapter Filling the fresh water tank).


ATTENTION
Danger from escaping water
Risk of damage
Empty the waste water tank every time the fresh water tank is empty and before filling the fresh water tank to prevent the waste water tank from overflowing.
Interrupting operation
ATTENTION
Damp rollers
Moisture damage to sensitive floors
Park the device in the parking station during longer work breaks to prevent damage to sensitive floors through wet rollers.
- Press the ON/OFF switch. The device switches off.
- Fix the floor head with the foot and push the handle forward.
The device stands by itself.
Illustration M - Park the device on the parking and cleaning station.
Finishing operation
- Press the ON/OFF switch. The device switches off.
- Fix the floor head with the foot and push the handle forward.
The device stands by itself.
Illustration M - Park the device on the parking and cleaning station.
Illustration Y
![]()

ATTENTION
Adhering dirt deposits
Adhering dirt deposits can damage the device in the long term.
It is recommended to clean the device completely after each application.
- Clean the device (see chapter Floor head cleaning by means of rinsing process).
Storing the device
ATTENTION
Liquids/moist dirt
Unpleasant odours can develop if the device contains liquids/moist dirt when stored.
Completely empty the fresh water tank and waste water tank before storing the device.
Use the cleaning brush to remove hair and dirt particles from the hair filter in the floor head cover.
Allow the cleaned rollers to dry in the air, e.g. on the raised elements of the parking station. Do not place the wet rollers in an enclosed cupboard to dry.
- Allow the empty waste water tank to dry before fitting it into the device.
- Park the device on the parking and cleaning station.
Illustration Z
![]()
- Press the handle unlocking button.
- Pull the handle upwards and away.
- Hook the handle on the device using the strap.
Illustration AA
![]()
- Place the wet rollers to dry on the raised elements of the parking and cleaning station.
Illustration AB
![]()
- Remove the battery packs (see chapter Removing the battery pack).
- Charge the battery packs, see operating instructions and safety instructions for the battery packs and the charger.
- Store the device in a dry room.
Illustration AD
![]()


Removing the battery pack
Note
During longer work breaks, remove the battery packs from the device and secure them against unauthorised use.
- Press the ON/OFF switch.
The device switches off. - Press the battery pack unlocking button, and pull the battery packs out of the battery pack holder.
Illustration AE
![]()

Care and service
General instructions

Danger due to the device inadvertently starting up
Risk of injury
Remove the battery packs prior to all work on the device.
Floor head cleaning by means of rinsing process
ATTENTION
Dirt or detergent residues
The waste water tank and the hair filters must be cleaned regularly to ensure that dirt does not accumulate in the tank and hair filters. Dirt particles can clog the hair filters and slots if the device is not cleaned after use.
The accumulation of dirt and bacteria can also result in the development of unpleasant odours in the device.
On completion of work, place the device in the cleaning station and start the rinsing process.
Clean the floor head in the cleaning station only by using the automatic rinsing process and not by pouring water into the station separately. Make sure that the waste water tank is attached.
Do not hold the underside of the floor head under water.
- Press the ON/OFF switch. The device switches off.
- Fix the floor head with the foot and push the handle forward.
The device stands by itself.
Illustration M - Release the waste water tank: Stand with your foot on the tongue of the waste water tank and push the handle bar forward.
Illustration N - Empty the waste water tank and reinsert it until it latches into place (see chapter Emptying the waste water tank and refilling the cleaning fluid).
- Place the device with an empty waste water tank in the parking and cleaning station.
- Fill the fresh water tank with 100 ml of fresh water without detergent or care agents up to the mark on the label (see chapter Filling the fresh water tank).
Illustration P
![]()

Note
It is not necessary to add detergent for the rinsing process.
- Hold the ON/OFF switch and the cleaning level adjustment button simultaneously pressed for 3 seconds.
Illustration Q
![]()
- The indicators light up repeatedly from top to bottom.
The rinsing process starts and takes approx. 90 seconds.
Illustration R
![]()


Note
At the start of the rinsing process, the water runs from the fresh water tank onto the rollers for approx. 45 seconds. During this time the device is silent. Only at the end of the rinsing process do the rollers start to turn for approx. 30 seconds.
- Once the rinsing process has finished, the "MIN MAX" indicator (red) flashes for 10 seconds.
Illustration K - Release the waste water tank: Stand with your foot on the tongue of the waste water tank and push the handle bar forward.
Illustration N - Empty and clean the waste water tank (see chapter Cleaning the waste water tank).
- Press the hair filter unlocking button. The hair filters are released.
- Remove and clean the hair filters (see chapter Cleaning the hair filters).
Illustration S
![]()
- Remove and clean the rollers (see chapter Cleaning the rollers).
Illustration T - If water is still present in the fresh water tank, remove and empty the fresh water tank.

Cleaning the waste water tank
ATTENTION
Adhering dirt deposits
Adhering dirt deposits can damage the device in the long term.
Clean the waste water tank regularly.
For information on the waste water tank display and the waste water tank emptying procedure, see chapter
Emptying the waste water tank and refilling the cleaning fluid.
- Remove the waste water tank cap.
- Clean the waste water tank and cap with fresh water.
Illustration U
![]()
- Alternatively, the waste water tank can be cleaned in a dishwasher.

Note
The rubber seals of the waste water tank cap can become sticky when cleaned in a dishwasher. This does not affect their sealing ability.
Cleaning the rollers
ATTENTION
Detergent residue in the rollers
Foaming
Wash the rollers under running water or clean them in a washing machine each time after using the device.
ATTENTION
Damage due cleaning the rollers with fabric softener or using a clothes dryer
Damage to the microfibres
Do not use fabric softener when cleaning in a washing machine.
Do not dry the rollers in a clothes dryer.
ATTENTION
Material damage due to loose rollers
This may damage the washing machine.
Place the rollers in a laundry net and load the washing machine with extra laundry.
- Press the ON/OFF switch.
The device switches off. - Fix the floor head with the foot and push the handle forward.
The device stands by itself.
Illustration M - Park the device on the parking and cleaning station.
Illustration Y - Unscrew the cleaning rollers via the recessed grip.
Illustration T - Clean the cleaning rollers under running water on in a washing machine at max. 60°C without washing agents.
Illustration V
![]()
- Clean the roller drive with a moist cloth.
- Place the wet rollers to dry on the raised elements of the parking and cleaning station.
Illustration AB - Store the device in a dry room.
Illustration AD

Cleaning the hair filters
ATTENTION
Adhering dirt deposits
Adhering dirt deposits can damage the device in the long term.
It is recommended to clean the device completely after each application.
ATTENTION
Adhering dirt deposits
Adhering dirt deposits can damage the device in the long term.
Clean both hair filters regularly with the cleaning brush.
ATTENTION
Damage due to cleaning the hair filters in a dishwasher
The washing process can distort the scraper edge and it will no longer press on the rollers correctly. This worsens the cleaning result.
Do not clean the hair filters in a dishwasher but rather under running water.
- Press the ON/OFF switch. The device switches off.
- Fix the floor head with the foot and push the handle forward.
The device stands by itself.
Illustration M - Park the device on the parking and cleaning station.
Illustration Y - Press the hair filter unlocking button.
The hair filters are released and can be removed.
Illustration S - Clean both hair filters under running water.
- Remove adhering dirt deposits, e.g. in the filter comb, using the cleaning brush.
Illustration X
Illustration W

- Insert the hair filters into the floor head and allow them to latch into place. Both hair filters must sit tightly in the device.
Illustration AC
![]()


Cleaning and care agents
ATTENTION
Use of unsuitable detergents and care agents
The use of unsuitable detergents and care agents can damage the device and loss of eligibility for warranty claims.
Use only KÄRCHER detergents.
Take care to ensure the correct dosage.
Note
Use KÄRCHER detergent or care agents for floor cleaning as necessary.
- Observe the manufacturer's dosing quantity recommendations when dosing with detergent or care agents.
- To prevent foaming, fill the fresh water tank with water first and the add the detergent or care agent.
- To prevent the tank from overflowing, be sure to leave enough space for the detergent or care agent when filling with water. To do this, observe the Max marking on the fresh water tank.
Troubleshooting guide
Malfunctions often have simple causes that you can remedy yourself using the following overview. When in doubt, or in the case of malfunctions not mentioned here, please contact your authorised Customer Service.
The device does not work
The battery packs are not sitting correctly in the device.
- Press the battery packs into the battery pack holder on the device until they latch into place.
The charging state of the battery packs is too low.
- Charge the battery packs, see chapter Charging battery packs.
The battery packs or charger is defective.
- Replace the battery packs or charger, see chapter Intended use.
The error LED ("Battery" indicator) flashes when the device is switched on and the device does not start
The battery packs are empty.
- Charge the battery packs, see chapter Charging battery packs.
The error LED ("Battery" indicator) flashes while the device is being used
Device has overheated during use (e.g. when operating in high ambient temperatures).
- Stop working and allow the device to cool down.
- Allow the device to cool down if the device switches off by itself.
The device can only be switched on again once it has cooled down enough.
The indicators light up repeatedly from top to bottom
The device is in the 90-second rinsing process for cleaning the floor head
- Wait approx. 90 seconds. After this, the rinsing process is finished and the indicators no longer light up (see chapter Floor head cleaning by means of rinsing process).
The device does not absorb dirt
There is no water in the fresh water tank. The "MIN MAX" indicator (red) lights up.
- Refill water in the fresh water tank, see chapter Emptying the waste water tank and refilling the cleaning fluid.
The fresh water tank is not sitting properly in the device.
- Insert the fresh water tank so that it is firmly seated in the device.
The waste water tank is missing or not sitting properly in the device.
- Insert the waste water tank in the device so that it audibly latches into place.
The hair filters are missing or are not sitting correctly in the device.
- Fit the hair filters correctly in the device.
The rollers are missing or not sitting properly in the device.
- Fit the rollers or twist the rollers as far as they will go onto the roller holder.
The rollers are dirty or worn out.
- Clean the rollers (see chapter Cleaning the rollers.
Safety instructions
Read these safety instructions, these original instructions, the safety instructions provided with the battery pack and the original instructions for the battery pack/ standard charger supplied before using the device for the first time. Act in accordance with them. Keep the booklets for future reference or for future owners. In addition to the notes in the operating instructions, you also need to take into consideration the general safety regulations and accident prevention guidelines applicable by law.
Hazard levels

- Indication of an imminent threat of danger that will lead to severe injuries or even death.
- Indication of a potentially dangerous situation that may lead to severe injuries or even death.
- Indication of a potentially dangerous situation that may lead to minor injuries.
ATTENTION
- Indication of a potentially dangerous situation that may lead to damage to property.
Electrical components
- Do not immerse the device in water.
- Never touch contacts or lines.
- Do not expose the device with the battery packs to strong sunlight, heat or fire.
- Switch off the device before all care and maintenance work.
- The appliance contains electrical components - do not clean the appliance under running water.
- Have repair work carried out by the authorised customer service only.
- Check the device and accessories for proper condition and operational safety before each use. Do not use the device if it is damaged.
ATTENTION
- Do not insert any objects into the battery mount except for battery packs of the KÄRCHER Battery Power 4 V system.
Safe handling
- Risk of asphyxiation. Keep packaging film out of the reach of children.
- Only use the device for its proper use. Take into account the local conditions and beware of third parties, in particular children, when working with the device.
- Adhere to the respective safety regulations in hazard zones (e.g. service stations). Never operate the device in explosive spaces.
- Children and persons unfamiliar with these instructions are not allowed to operate the device. The age of the operator may be limited by local restrictions.
- The device is not intended for use by children, persons with restricted physical, sensory or mental abilities or persons unfamiliar with these instructions.
- Persons with reduced physical, sensory or mental capabilities and persons lacking experience and knowledge may only use the appliance if they are properly supervised, have been instructed on use of the appliance safely by a person responsible for their safety, and understand the resultant hazards involved.
- Children must not play with the appliance.
- Children must be supervised to prevent them from playing with the appliance.
- Keep the device out of the reach of children when it cools down.
- Children may only perform cleaning work and user maintenance under supervision.
- Keep all parts your body (e.g. fingers, hair) away from the rotating cleaning rollers
- Risk of injury from sharp objects (e.g. splinters). Protect your hands while cleaning the floor head.
- Do not use the appliance if it has been dropped beforehand, is visibly damaged or if it is leaking.
- Only operate or store the device in accordance with the description or figure.
- Accidents or damage due to the device falling over. Before all actions with or on the device, you must make sure that it is stable.
- Never leave the device unsupervised while it is in operation.
ATTENTION
- Device damage. Never fill the water reservoir with solvents, liquids containing solvents or undiluted acids (e.g. detergents, petrol, paint thinners and acetone).
- Only switch on the device when the fresh water tank and waste water tank are installed.
- Do not pick up sharp or larger objects with the device, such as e.g. glass shards, gravel or toy parts.
- Do not fill the fresh water container with vinegar, decalcification agents, essential oils or similar substances. Avoid taking up these substances with the device.
- Use the device only on hard floors with a watertight coating, such as e.g. varnished parquet, enamelled tiles or linoleum.
- Do not use the device for cleaning carpets or carpeted floors.
- Do not guide the device over the floor grilles of convection heating systems. The device cannot vacuum up the escaping water when it is guided over a floor grille.
- Switch off the device at the main switch/power switch during longer breaks and after use.
- Do not operate the device at temperatures below 0°C.
- Protect the device from rain. Do not store the device outdoors.
Register your product
www.kaercher.com/welcome

Documents / Resources
References
![www.kaercher.com]() Cleaning equipment and pressure washers | Kärcher International
Cleaning equipment and pressure washers | Kärcher International![www.kaercher.com]() Home and Garden Warranty Registration USA | Kärcher
Home and Garden Warranty Registration USA | Kärcher
Download manual
Here you can download full pdf version of manual, it may contain additional safety instructions, warranty information, FCC rules, etc.
Advertisement


Need help?
Do you have a question about the FC 4-4 and is the answer not in the manual?
Questions and answers