Table of Contents
Advertisement
Quick Links
Technical Support and E-Warranty Certificate www.vevor.com/support
SAND-ICE MIXER WITH
SOUND INSULATION COVER
INSTRUCTION MANUAL
MODEL:HS-212C-US-B/HS-212C-AU-B/
HS-212C-US-W/HS-212C-AU-W
We continue to be committed to provide you tools with competitive price.
"Save Half", "Half Price" or any other similar expressions used by us only represents an
estimate of savings you might benefit from buying certain tools with us compared to the major
top brands and doses not necessarily mean to cover all categories of tools offered by us. You
are kindly reminded to verify carefully when you are placing an order with us if you are
actually saving half in comparison with the top major brands.
Advertisement
Table of Contents

Related Manuals for VEVOR HS-212C-US-B


Summary of Contents for VEVOR HS-212C-US-B
- Page 1 Technical Support and E-Warranty Certificate www.vevor.com/support SAND-ICE MIXER WITH SOUND INSULATION COVER INSTRUCTION MANUAL MODEL:HS-212C-US-B/HS-212C-AU-B/ HS-212C-US-W/HS-212C-AU-W We continue to be committed to provide you tools with competitive price. "Save Half", "Half Price" or any other similar expressions used by us only represents an estimate of savings you might benefit from buying certain tools with us compared to the major top brands and doses not necessarily mean to cover all categories of tools offered by us.
- Page 3 CustomerService@vevor.com This is the original instruction, please read all manual instructions carefully before operating. VEVOR reserves a clear interpretation of our user manual. The appearance of the product shall be subject to the product you received. Please forgive us that we won't inform you again if there are any technology or software updates on our product.
-
Page 4: Important Caution
Warning-To reduce the risk of injury, user must read instructions manual carefully. IMPORTANT CAUTION Product in the long-term start-up operation or use in the presence of someone, such as long-term or personnel leave, out of the plug please pull up. ... - Page 5 When the plug is damaged or the socket is wet, do not use it to avoid fire, electric shock, or short circuit. Please keep your hands or face away from the machine when it is working. Do not let children operate the machine alone. Please put the machine in a place children can not reach so as not to get electrified.
-
Page 6: Safety Matters
If the power cord is damaged, it must be replaced by a professional in the manufacturer's maintenance department or similar department in order to avoid danger. SAVE THESE INSTRUCTIONS. TECHNICAL PARAMETER Model HS-212C-US-B HS-212C-AU-B HS-212C-US-W HS-212C-AU-W Colour Black Black White... -
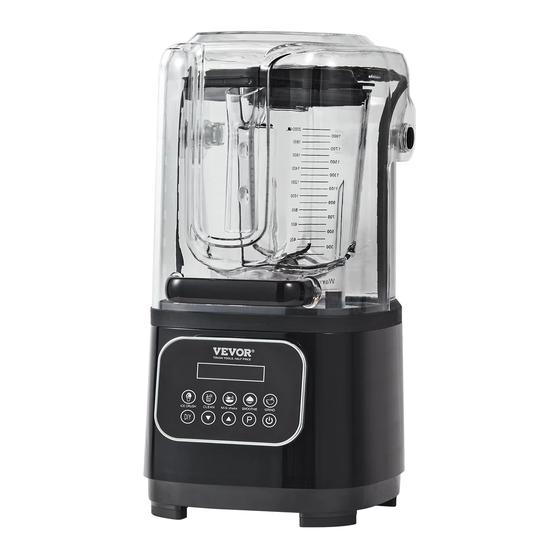
Page 7: Product Structure
PRODUCT STRUCTURE - 5 -... -
Page 8: Cleaning Method
OPENING DIAGRAM CLEANING METHOD When cleaning and maintenance,be sure to unplug the plug. Carefully scrub with a sponge or rag, and dry it with a cup. Do not reach into the cleaning in the cup. Wipe the rotation shaft with a dry cloth (remember!Water is not rinsed). - Page 9 PRODUCT USE INSTRUCTIONS ★ The function key of this product is a touch mode, first turn on the power, put a cup(cup handle toward the front), cover the active cover, point the start/ stop function key (with switch pattern key)Other functional lights. Ingredients Place the ingredients into the conditioning cup,the order of ingredients into the cup:generally put soft ingredients, then put hard ingredients,then put liquid...
- Page 10 2. CLEAN 2.1 When the system is on standby, touch the corresponding cleaning function and then touch the "start / cancel" switch to start the system. 2.2 Workflow:[Working time:30S] To start work, the motor press 1 gear 2S, then switch to 9 gear 13S, continuous operation 2 cycle times.
- Page 11 5.2 Workflow:[Working time:36S] Start work,the motor starts 3 gear work 6S,then switch to 9 gear work 12 S,continuous cycle work after 2 times. 6. DIY 6.1 A、When the system is on standby,touch the corresponding DIY function icon and + /- icon and switch icon are flashing, the default gear is in three gear and 60 seconds,when touching the +/- icon is added, one step in 5 seconds(change within 10-90S),press the cycle change;after the time adjustment,touch the key to work;...
-
Page 12: Troubleshooting And Maintenance
MAKING FRUIT SAND ICE Fruit sand ice 1. Add materials: ice, fruit, water, and three are not. 2. Cover the cover after pouring the material into the stirring cup. If you want to make a thicker drink, please insert the stir bar in the upper cover. 3. - Page 13 Simple troubleshooting Fault condition Exclusion method a.Check if the power is inserted. b.Check that the high and low connector is inserted. c.Check whether the protector at the bottom of the machine is disconnected. If so, press the protector button to restore the machine to work. 1.Not working 2.No work lights Check that there is an ON/OFF Power switch...
- Page 14 Let the host placed in Host imbalance the plane Vibrate Conditioning Cup is not Place the Cup is really completely placed on the placed on the host host Please adjust the Excessive ingredient amount of ingredients Please adjust the Cup covered Survival exceeds sections water Cup cover...
- Page 16 Technical Support and E-Warranty Certificate www.vevor.com/support...
Need help?
Do you have a question about the HS-212C-US-B and is the answer not in the manual?
Questions and answers
I have power but the buttons don't work, the blender does not engage.
The buttons on the VEVOR HS-212C-US-B blender may not be working due to the following reasons:
1. The power plug is not properly inserted into a compliant socket.
2. The ON/OFF power switch is not turned on.
3. The high and low connectors are not inserted correctly.
4. The protector at the bottom of the machine is disconnected—press the protector button to restore function.
5. The feeding or automatic switch may be shorted.
6. The cover may not be properly placed to activate the security switch.
If none of these apply, maintenance service is required.
This answer is automatically generated