Table of Contents
Advertisement
Quick Links
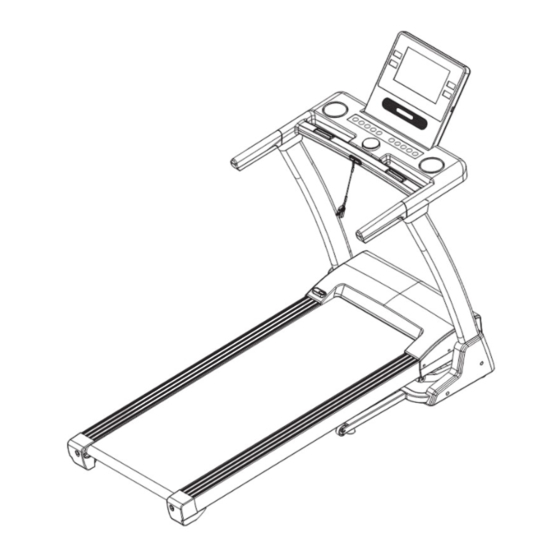
TR 1410 TREADMILL
AUTO
INCLINE
BLUETOOTH ENABLED
USER MANUAL
AUDIO ENABLED
FITLOG APP ENABLED
10" TFT TOUCH SCREEN
CAUTION
READ ALL PRECAUTIONS AND
INSTRUCTIONS IN THIS MANUAL
BEFORE USING THIS EQUIPMENT.
KEEP THIS MANUAL FOR
FUTURE REFERENCE.
#22M07T007 TR1410 Treadmill - User Manual.indd 1
FITLOG AND
CARDIO
@trojanhealth
Trojan Health and Fitness SA
www.trojanhealth.co.za
2022/10/26 8:20 AM
Advertisement
Table of Contents

Related Manuals for Trojan TR 1410


Summary of Contents for Trojan TR 1410
- Page 1 BLUETOOTH ENABLED USER MANUAL AUDIO ENABLED FITLOG APP ENABLED 10” TFT TOUCH SCREEN @trojanhealth CAUTION Trojan Health and Fitness SA READ ALL PRECAUTIONS AND INSTRUCTIONS IN THIS MANUAL BEFORE USING THIS EQUIPMENT. www.trojanhealth.co.za KEEP THIS MANUAL FOR FUTURE REFERENCE. #22M07T007 TR1410 Treadmill - User Manual.indd 1...
-
Page 2: Table Of Contents
INDEX • Important Safety Instructions ________________________________ • Pre Assembly Check List _____________________________________ • Hardware & Tools List ________________________________________ • Parts List ___________________________________________________ • Exploded Drawing ___________________________________________ • Assembly Steps _____________________________________________ 10 • Folding Instructions __________________________________________ 13 • Console Functions ___________________________________________ 14 •... -
Page 3: Important Safety Instructions
IMPORTANT SAFETY INSTRUCTIONS It is the sole responsibility of the purchaser of Trojan products to read the owner’s manual, warning labels and instruct all individuals, on proper usage of the equipment. Understanding each and every warning to the fullest is important. If any of these instructions or warnings are unclear please contact Trojan Customer Services on 0861 876 526, within the Republic of South Africa. - Page 4 INSPECTION • Do not use or permit use of any equipment that is damaged, or has worn or broken parts. For all Trojan equipment use only replacement parts supplied by Trojan. • Always make sure that all nuts and bolts are tightened prior to each use.
-
Page 5: Pre Assembly Check List
PRE ASSEMBLY CHECK LIST Thank you for choosing the Trojan TR1410 Treadmill. We take great pride in producing this product and hope it will provide many hours of quality exercise to make you feel better, look better and enjoy life to its fullest. -
Page 6: Hardware & Tools List
HARDWARE & TOOLS LIST INSTRUCTIONS FOR ASSEMBLY • Before you start to assemble, please check the hardware packaging to make sure all parts are included. • Basic tools, such as spanners will be provided for assembly. 10. Allen Key (#5) 11. -
Page 7: Parts List
PARTS LIST Description Description Main Frame Moving Wheel Base Frame Foot Pad Left Upright Tube Safety Key Incline Bracket Isolation Nylon Pad Console Base Board Cushion Running Board Strengthen Tube Strengthen Tube Cushion Tubing Assembly Ring Wire Protector A Front Roller Ring Wire Protector B Rear Roller Oil Plug... - Page 8 Description Description Bolt M8 x 25 Lock Washer M8 Bolt M6 x 40 Pulse Iron Bolt M8 x 65 Handrail Cover Bolt M8 x 16 Speaker Clip Bolt M10 x 42 Shingle Pressing Plate Bolt M10 x 55 Bolt M8 x 40 Bolt M10 x 45 Bolt M10 x 45 Bolt M8 x 25...
-
Page 9: Exploded Drawing
EXPLODED DRAWING #22M07T007 TR1410 Treadmill - User Manual.indd 9 2022/10/26 8:20 AM... -
Page 10: Assembly Steps
ASSEMBLY STEPS 1. PREPARATION • Before assembling make sure that you will have enough space around the item. • Use the supplied parts and hardware for the assembly. • Before assembling, please check whether all the required parts have been supplied as per the exploded drawing on the opposite page. - Page 11 ASSEMBLY STEPS STEP 3: STEP 3 Use Allen Key (5mm) (10), 1 Bolt (70) and 1 Lock washer (88) to lock the Right Upright Tube (72) onto the Base Frame (2). Use Allen Key (5mm) (10), 1 Bolt (62) and 1 Lock washer (88) to lock the Right Upright Tube (72) onto the Base Frame (2).
- Page 12 ASSEMBLY STEPS STEP 5: STEP 5 Use the Screwdriver Wrench (12), 1 Screw (74) to lock the Handrail Cover (90) to the Right Handlebar (24). Use the Screwdriver Wrench (12), 1 Screw (74) to lock the Handrail Cover (90) to the Left Handlebar (23). Use the Screwdriver Wrench (12), 2 Screw (74) to lock the Right Base Cover (28) to the Right Upright Tube...
-
Page 13: Folding Instructions
FOLDING INSTRUCTIONS PULLING UP Pull up the Base Frame at position (A) using one hand until you hear a clicking sound that indicates the Pressure Bar (B) is securely locked in place. PULLING DOWN Support place (A) with one hand, and gently push Pressure Bar (B) with one foot until Pressure Bar (B) unlocks. -
Page 14: Console Functions
CONSOLE FUNCTIONS INTERACTIVE CENTRE DIAL FUNCTIONS The interactive centre dial displays - speed, time, distance, calories, heart rate and slope. The display of information changes every 3 seconds, KEY FUNCTIONS: Main functions: Start / Pause / Stop button. By pressing down on the Dial the treadmill will start after a 3 second countdown on a Quick Start Mode, running at the minimum speed. - Page 15 CONSOLE FUNCTIONS HEART RATE TEST: When holding the hand pulse with both hands, the pulse window will display your heart rate after 5 seconds. In order to obtain an accurate heart rate reading, use when the machine has stopped. Ensure you hold the hand pulse for more than 30 seconds.
- Page 16 CONSOLE FUNCTIONS CONSOLE WINDOW DISPLAYS AND TOUCH KEYS FUNCTION EXPLAINED After the treadmill has been connected to power the Console Screen will display as follows: The Console Screen will then enter the standby main display interface as shown below: INTERFACE DISPLAY INSTRUCTIONS As shown above, the main selection options are free mode, Exercise Mode, Program Mode, Custom mode, Outdoor Mode, User management, System Settings, Local Music, Local Video and Online App.
- Page 17 CONSOLE FUNCTIONS FUNCTIONAL OPERATION INSTRUCTIONS FREE MODE: By selecting the “Free Mode” icon, the below screen will be shown which allows the user to run freely and increase or decrease the speed and incline based on their requirement. If in other multimedia applications, simply press the start button to automatically enter the Free Mode.
- Page 18 CONSOLE FUNCTIONS Once the desired program has been selected the user can also select the duration of exercise. Once program and exercise duration has been selected the user simply needs to press the “confirm” button and then the start key. After 3 seconds the treadmill will automatically start and will adjust the speed and incline based on the program selected by the user.
- Page 19 CONSOLE FUNCTIONS NOTE: Whilst in operation the user can return to a previous screen by selecting on the screen. EXERCISE MODE: When in the Standby interface the user can select the “Exercise Mode” icon which will then display the below screen showing three additional sub-section icons as shown below: By selecting the “Time Mode”...
- Page 20 CONSOLE FUNCTIONS By selecting the “Calorie Mode” the user can select the desired calories that they would like to burn. This screen will be displayed as shown below. By sliding the blue point the desired calorie burn is selected. Once the desired Distance, Duration or Calorie burn has been selected the user needs to confirm this by pressing the “Confirm”...
- Page 21 CONSOLE FUNCTIONS Here, the user can custom design up to 8 training programs that suits their workout needs. By selecting the user can select between U1-U8 in order to begin selecting their desired custom program. The console screen will display as follows: Once a U1-U8 has been selected the below screen will be shown: #22M07T007 TR1410 Treadmill - User Manual.indd 21 2022/10/26 8:20 AM...
- Page 22 CONSOLE FUNCTIONS Here, the user can increase or decrease both the Incline (Orange) and Speed (Blue) by simply touching one of the bars in each column and sliding it to the desired level. NOTE: it is highly recommended that each column should not exceed 10 in order to avoid a sharp change in speed or incline.
- Page 23 CONSOLE FUNCTIONS Once the desired scene has been selected and entered the user needs to press the “START” button in order to begin the workout. Speed and Incline can be increased or decreased during operation automatically by the user selecting the respective increase/decrease button on the console. ENTERTAINMENT/MULTIMEDIA OPERATION INSTRUCTIONS On the right side of the standby main interface screen icons Local Music, Local Video and Online App are illustrated as shown below:...
- Page 24 CONSOLE FUNCTIONS LOCAL VIDEO By selecting the Local Video icon, the user will enter the local video player which enables the user to select videos already loaded on their personal USB attached externally to the treadmill. ONLINE APP By selecting the Online App icon, the user will enter the Online App options screen which will display as follows: Here, the user can select from Spotify, IMDb and Web Browser.
- Page 25 CONSOLE FUNCTIONS BACKLIGHT BRIGHTNESS By pressing the “Backlight Brightness” icon the below sub-category display will be shown. Here, the user can adjust the console display brightness by sliding the blue point to the desired setting. WIFI By pressing the “WIFI” icon the below sub-category display will be shown. Here, the user can select the desired WIFI network by following the below steps: Press the screen to select WIFI “on”...
- Page 26 CONSOLE FUNCTIONS Here the user can select what APP’s or information they would like to delete. RECOVERY By pressing the “Recovery” icon the below sub-category display will be shown. Here, the user can restore the console back to factory settings. UPGRADE By pressing the “Upgrade”...
- Page 27 CONSOLE FUNCTIONS Here, the user can upgrade the system to the next version update (if available) by simply pressing on the “Check for Updates” icon and selecting download on the next version update (if available). WALLPAPER By pressing the “Wallpaper” icon the below sub-category display will be shown. Here, the user can select between several already pre-installed wallpapers.
- Page 28 OTHER By pressing the “Other” icon the below sub-category display will be shown Here, the user can set the Date and Time, read the user manual and select whether they want the voice activation function to be on or not. USER MANAGEMENT INSTRUCTIONS By selecting the “User Management”...
- Page 29 CONSOLE FUNCTIONS DATA TABLE Set time / 20 = running time for each section Program / Time Speed Incline Speed Incline Speed Incline Speed Incline Speed Incline Speed Incline Speed Incline Speed Incline Speed Incline Speed Incline Speed Incline Speed Incline Speed Incline...
- Page 30 CONSOLE FUNCTIONS Speed Incline Speed Incline Speed Incline Speed Incline Speed Incline Speed Incline Speed Incline Speed Incline Speed Incline #22M07T007 TR1410 Treadmill - User Manual.indd 30 2022/10/26 8:20 AM...
-
Page 31: Fitlog App
FITLOG APP FITLOG APP Fitlog is a Sports App developed to track and store all your fitness data in one place while allowing you to plan weekly and monthly exercise, weight, and fitness goals. Using Bluetooth, the App connects to a variety of fitness equipment such as treadmills, exercise bikes or spinners, steppers and ellipticals, and records all exercise sessions. - Page 32 Step 2 Search the Device List Step 4 Step 3 You will be redirected to the Home Page after your device and Trojan Slide left or right to switch Treadmill have been paired between different Bluetooth successfully. devices, select the corresponding Select your workout modes.
- Page 33 KINOMAP APP THIRD-PARTY APPLICATIONS KINOMAP Search, download, and install Kinomap through the App Store or Google Play Create your account Login to the APP Select “Equipment Management” Select the “Device Type” Select the “FTMS” Icon The APP will now search for your Equipment, once found, select the Equipment you wish to pair.
- Page 34 Open your favorite music player on your device Press PLAY/PAUSE to listen to the music or pause at any moment Your Volume can be controlled and adjusted on your Device and your Trojan Treadmill. #22M07T007 TR1410 Treadmill - User Manual.indd 34...
-
Page 35: Fitness Tips & Techniques
Always consult your physician before beginning any exercise program. MUSCLE CHART The exercise routine that is performed on the Trojan TR1410 Treadmill will develop the lower body muscle group as well as condition the circulatory system and provide a good aerobic workout. These muscle groups are highlighted on the muscle chart below. -
Page 36: Conditioning Guidelines
CONDITIONING GUIDELINES How you begin your exercise program depends on your physical condition. If you have been inactive for several years, or are severely overweight, you must start slowly and increase your time on the equipment, a few minutes per workout. Initially, you may be able to exercise only for a few minutes in your target zone, however, your aerobic fitness will improve over the next 6 to 8 weeks. -
Page 37: Warm Up & Cool Down
WARM UP & COOL DOWN WORKOUT GUIDELINES Each workout should include the following 3 parts: 1. A WARM-UP: 5 to 10 minutes of stretching and light exercise. A proper warm-up increases your body temperature, heart rate, and circulation in preparation for exercise. 2. -
Page 38: Maintenance
MAINTENANCE CLEANING The Trojan TR1410 Treadmill can be cleaned with a soft cloth and mild detergent. Do not use abrasives or solvents on plastic parts. Please wipe your perspiration off the Trojan TR1410 Treadmill after each use. Please inspect all assembly bolts and pedals on the machine for proper tightness before use. -
Page 39: Trouble Shooting
TROUBLE SHOOTING GUIDE ERROR CODE FAULT DESCRIPTION FAULT SOLUTION Communication error between Check that all cables are connected correctly, the computer and the controller. and they are not damaged. Check if the controller is fully operational when the unit is powered up. Check that all internal cables are connected correctly. -
Page 40: Repair Procedure
Any claim in terms of the warranty must be supported by a proof of purchase or a warranty number. Warranty numbers can be issued through contacting our Trojan Call Centre on 0861 876 526 or online at www.trojanhealth.co.za. Customers residing outside South Africa can contact us on +27 10 206 4405. If such proof is not available, then notwithstanding anything to the contrary herein, the service agent’s prevailing... -
Page 41: 2-Year Limited Warranty
Do not return the product to the store. Call the Trojan Call Centre on 0861 876 526 to log the faulty product (under warranty or out of warranty). Customers residing outside South Africa can contact us on +27 10 206 4405.
Need help?
Do you have a question about the TR 1410 and is the answer not in the manual?
Questions and answers