
Subscribe to Our Youtube Channel
Related Manuals for Grundig GEBM12600BHI


Summary of Contents for Grundig GEBM12600BHI
- Page 1 İT Built-in Oven User Manual Forno incassato Manuale Utente GEBM12600BHI 385441840_1/ EN/ İT/ R.AB/ 16/06/23 16:05 7768287684...
- Page 2 Welcome! Dear Customer, Thank you for choosing the Grundig product. We want your product, manufactured with high quality and technology, to offer you the best efficiency. Therefore, carefully read this manual and any other documentation provided before using the product.
-
Page 3: Table Of Contents
General Warnings About Baking Table of Contents in the Oven ........1 Safety Instructions ....... 6.1.1 Pastries and oven food..... 30 Intended Use ......... 6.1.2 Meat, Fish and Poultry....32 Child, Vulnerable Person and Pet 6.1.3 Grill..........33 Safety ..........6.1.4 Test foods ......... -
Page 4: Safety Instructions
1 Safety Instructions • This section includes the Intended Use safety instructions necessary • This product is designed to be to prevent the risk of personal used at home. It is not suitable injury or material damage. for commercial use. •... -
Page 5: Electrical Safety
they are supervised or trained • When the door is open, do not about the safe use and haz- put any heavy objects on it or ards of the product. allow children to sit on it. You • Children should not play with may cause the oven to tip over the product. -
Page 6: Transportation Safety
• The product must not be • If the power cable is damaged, plugged into the outlet during it must be replaced by the installation, repair, and trans- manufacturer, an authorized portation. service or a person to be spe- • Plug the product into an outlet cified by the importer com- that meets the voltage and pany in order to prevent pos-... -
Page 7: Installation Safety
• The product is heavy, carry the • To prevent overheating, the product with at least two product should not be in- people. stalled behind decorative • Do not use the door and / or doors. handle to transport or move Safety of Use the product. -
Page 8: Temperature Warnings
• The hinges of the product door Accessory Use move when opening and clos- • It is important that the wire ing the door and might jam. grill and tray are placed prop- When opening / closing the erly on the wire shelves. For door, do not hold the part with detailed information, refer to the hinges. -
Page 9: Maintenance And Cleaning Safety
• Do not heat closed tins and • Food not suitable for grilling glass jars in the oven. The carries a fire hazard. Grill only pressure that would build-up food that is suitable for heavy in the tin/jar may cause it to grill fire. -
Page 10: Environmental Instructions
2 Environmental Instructions 2.1 Waste Directive aging waste with the household or other wastes, take it to the packaging material 2.1.1 Compliance with the WEEE Dir- collection points designated by the local ective and Disposing of the authorities. Waste Product 2.3 Recommendations for Energy This product complies with EU WEEE Dir- Saving... -
Page 11: Your Product
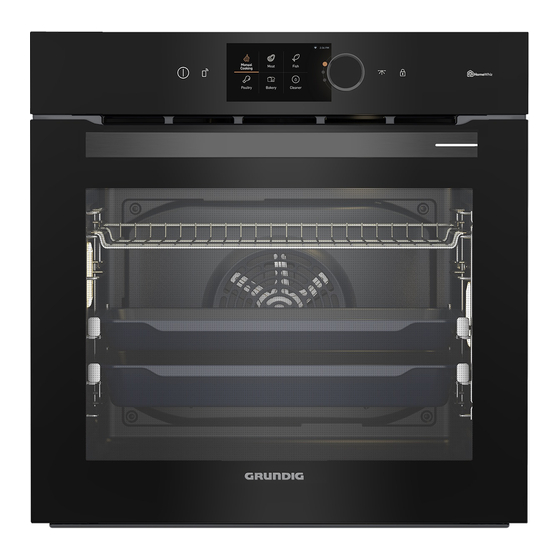
3 Your product 3.1 Product Introduction 1 Control panel 2 Lamp 3 Wire shelves 4 Fan motor (behind the steel plate) 5 Door 6 Handle 7 Lower heater (under the steel plate) 8 Shelf positions 9 Upper heater 10 Ventilation holes 3.2 Product Control Panel Introduc- Varies depending on the model. -
Page 12: Control Panel
3.2.1 Control Panel 1 On/off key 2 Remove control key 3 Touch display 4 Oven control knob 5 Lamp key 6 Key lock key If there are knob(s) controlling your Touch display product, in some models this/these You can activate all kinds of functions by knob(s) may be so that they come out touching on the touch display, and you can when pushed (buried knobs). -
Page 13: Product Accessories
The hot air heated by the fan heater is distributed equally and Fan Heating 40-280 rapidly throughout the oven with the fan. It is suitable for multi-tray cooking at different shelf levels. In order to save energy, you can use this function instead of Eco Fan Heating 160-220 using “Fan Heating”... -
Page 14: Use Of Product Accessories
3.5 Use of Product Accessories Cooking shelves There are 5 levels of shelf position in the cooking area. You can also see the order of the shelves in the numbers on the front frame of the oven. On models with wire shelves : Pastry tray It is used for pastries such as cookies and biscuits. - Page 15 On models without wire shelves : It is also crucial to place the trays on the side shelves properly. The tray has one dir- ection when placing it on the shelf. While placing the tray on the desired shelf, its side designed for holding must be on the front.
- Page 16 Tray stopping function - On models with wire shelves There is also a stopping function to pre- vent the tray from tipping out of the wire shelf. While removing the tray, release it from the rear stopping socket and pull it towards yourself until it reaches the front side.
-
Page 17: Technical Specifications
3.6 Technical Specifications General specifications Product external dimensions (height/width/depth) (mm) 595 /594 /567 Oven installation dimensions (height / width / depth) 590 - 600 /560 /min. 550 (mm) Voltage/Frequency 220-240 V ~; 50 Hz Cable type and section used/suitable for use in the min. -
Page 18: First Use
4 First Use Before you start using your product, it is 02:25 Settings 2098 recommended to do the following stated in Date (Year) 2099 the following sections respectively. Timer 2018 4.1 First Timer Setting Updating 2019 Factory Defaults 2020 Always set the time of day before using your oven. -
Page 19: Initial Cleaning
Set the timer 02:49 Settings Wireless Network ü After setting the date; English Brightness 1. Touch the "Timer" field on the screen. Turkish Notification Sound 2. With "Timer (Hour)" field enabled, set Italiano the time by turning the control knob to Language the right / left. -
Page 20: Using The Oven
NOTICE: Some detergents or cleaning NOTICE: During the first use, smoke and agents may cause damage to the surface. odour may come up for several hours. This Do not use abrasive detergents, cleaning is normal and you just need good ventila- powders, cleaning creams or sharp objects tion to remove it. - Page 21 Touch the button on the control panel for Baking 02:25 approximately 3 seconds and activate the Top+Bottom+Fan key lock When the key lock is activated, key on the control board will remain lit. Fan Heating When the key lock is active, only Multi (3D) Cooking key works.
- Page 22 setting the baking starting time, skip Baking 02:25 Top+Bottom+Fan this setting by pressing on the control 200 C Temperature knob once. Duration Indefinitely Baking 02:25 Top+Bottom+Fan 23:58 min. Duration 23:59 Baking In Steps START 02:26 Starting Time 02:26 7. To set the baking time: If you want to 02:27 operate your baking in the function and Baking In Steps...
- Page 23 ð If only the baking time is adjus- If you bring the control knob to the ted, the oven stops to work at the "CANCELLED" level and press on end of baking time. “The Baking the knob once, all your baking set- Has Ended”...
- Page 24 ined according to the type and weight explained in the “Settings” field. If you of the meal. These recipes are avail- want to cook without setting the baking able under the "Meat Dishes","Fish", starting time, you can immediately start "Poultry", "Breads", "Desserts", "Piz- baking by touching "START"...
-
Page 25: Settings
5.3 Settings 1. Touch the "Brightness" field on the screen. It is recommended to make the date, time and language settings before using your 02:25 Settings oven for the first time. You can complete Wireless Network these settings by following all setting ex- Brightness planations. - Page 26 2. Turn the control knob to the right / left Settings 02:25 to select the language you want. Language Waiting screen 02:49 Settings Wireless Network Standby English Brightness Turkish Water hardness Notification Sound Italiano ð If you will only set the display saver, Language switch to the upper menu by touching the “...
- Page 27 with other settings, continue the other 02:25 Settings settings by tapping the relevant set- Date (Day) ting on the screen. During the pro- Timer cesses of the oven other than baking, Updating when the screen is not touched, it will switch to the standby mode at the end Factory Defaults of the duration you have set.
- Page 28 firmed and the next submenu setting 2. While the "Factory Defaults” field is act- is activated. If you will continue with ive, “Reset” option will be displayed on other settings, continue the other set- the screen. Restore factory defaults by tings by tapping the relevant setting pressing the control knob once.
-
Page 29: General Information About Baking
CE declaration of conformity Arçelik A.Ş. declares that this product complies with the 2014/53/EU Directive. A detailed RED Declaration of Con- formity is available online in the support.grundig.com website within the additional documents in the product page for your product. -
Page 30: General Warnings About Baking In The Oven
Plus, this section describes some of the • For good baking performance, place your foods tested as producers and the most food on the recommended correct shelf. appropriate settings for these foods. Ap- Do not change the shelf position during propriate oven settings and accessories baking. - Page 31 • If the cake is moist, use a small amount • If the pastry is getting cooked slowly, of liquid or reduce the temperature by make sure that the thickness of the 10°C. pastry you have prepared does not over- •...
-
Page 32: Meat, Fish And Poultry
Food Accessory to be Operating func- Shelf position Temperature (°C) Baking time used tion (min) (approx.) Round black metal mould, 20 Apple pie Fan Heating 50 … 65 cm in diameter on wire grill ** Pizza Standard tray * Top+Bottom Heat 3 5 …... -
Page 33: Grill
• After the cooking time is expired, keep • Fish should be placed on the medium or the meat in the oven for approximately low level shelf in a heat resistant plate. 10 minutes. The juice of the meat is bet- •... -
Page 34: Test Foods
• Depending on the thickness of the tray to the lower shelf to collect the oils. pieces to be grilled, the cooking times The oven tray you will slide should be given in the table may vary. sized to cover the entire grill area. This •... -
Page 35: Maintenance And Cleaning
Food Accessory to be Operating func- Shelf position Temperature (°C) Baking time used tion (min) (approx.) Round springform pan, 26 cm in dia- Sponge cake Fan Heating 35 … 45 meter on wire grill** ** Round black metal mould, 20 Apple pie Top+Bottom Heat 2 50 …... - Page 36 cream, abrasive and scratching scrub- • The oven must cool down before clean- ber, wire, sponges, cleaning cloths con- ing the cooking area. Cleaning on hot taining dirt and detergent residues). surfaces shall create both fire hazard • No special cleaning material is needed in and damage the enamel surface.
-
Page 37: Cleaning Accessories
Plastic parts and painted surfaces If your product is a wire shelf model, re- move the wire shelves before cleaning the • Clean plastic parts and painted surfaces side walls. Then complete the cleaning as using dishwashing detergent, warm wa- described in the "General Cleaning Inform- ter and a soft cloth or sponge and dry ation"... -
Page 38: Removing The Inner Glass Of The Oven Door
Removing the oven door 1. Open the oven door. 2. Open the clips in the front door hinge socket on the right and left by pushing them downwards as shown in the fig- ure. 3. Hinge types vary as (A), (B), (C) types according to the product model. -
Page 39: Cleaning The Oven Lamp
7.7 Cleaning the Oven Lamp In the event that the glass door of the oven lamp in the cooking area becomes dirty; clean using dishwashing detergent, warm water and a soft cloth or sponge and dry with a dry cloth. In case of oven lamp fail- ure, you can replace the oven lamp by fol- lowing the sections that follow. -
Page 40: Troubleshooting
3. If your oven lamp is type (A) shown in the figure below, rotate the oven lamp as shown in the figure and replace it with a new one. If it is type (B) model, pull it out as shown in the figure and re- place it with a new one. - Page 41 The product does not work. room you specified. This device belongs to another home.” or if you forgot in • Fuse may be faulty or blown. >>> Check which"HomeWhiz" account the fuses in the fuse box. Change them if necessary or reactivate them. •...
- Page 42 Benvenuto! Gentile cliente, Grazie per aver scelto il prodotto Grundig . Vogliamo che il tuo prodotto, realizzato con al- ta qualità e tecnologia, ti offra la massima efficienza. Quindi, prima di utilizzare il prodotto leggere con attenzione il presente manuale e qualsiasi altra documentazione fornita in dotazione.
- Page 43 6.1.1 Pasticcini e alimenti da forno... 72 Indice 6.1.2 Carne, pesce e pollame..... 75 1 Istruzioni relative alla sicurezza .. 44 6.1.3 Grill..........75 Uso previsto ........44 6.1.4 Alimenti di prova ....... 76 Sicurezza di bambini, persone di- 7 Manutenzione e pulizia ....78 sabili e animali domestici.....
-
Page 44: Istruzioni Relative Alla Sicurezza
1 Istruzioni relative alla sicurezza • Questa sezione contiene istru- Uso previsto zioni di sicurezza necessarie a • Questo prodotto è progettato prevenire rischi di lesioni per- per essere usato in casa. Non sonali o danni alle cose. è utilizzabile per scopi com- •... -
Page 45: Sicurezza Elettrica
non sono in grado di sviluppa- • AVVERTENZA: Durante l'uso, re le proprie capacità fisiche, le superfici accessibili del pro- sensoriali o mentali, o che non dotto sono calde. Tenere i hanno esperienza e conoscen- bambini lontano dal forno. za, purché siano sorvegliati o •... - Page 46 un piano cottura). Qualora ciò superficie posteriore, i colle- non fosse possibile, sull'im- gamenti potrebbero danneg- pianto elettrico al quale il pro- giarsi. dotto è collegato dovrebbe es- • Non incastrare i cavi elettrici sere presente un meccanismo nello sportello del forno e non (fusibile, interruttore, commu- passarli su superfici calde.
-
Page 47: Sicurezza In Fase Di Trasporto
tatto con l'acqua (ad esempio, • Controllare l'aspetto generale acqua che potrebbe fuoriusci- del prodotto per eventuali re dal contatore). danni che potrebbero essersi • Non toccare la presa con le verificati durante il trasporto. mani umide! Non scollegare Installazione in sicu- mai tirando il cavo, estrarre rezza sempre la presa. -
Page 48: Avvertenze Sulla Temperatura
• Non utilizzare l'apparecchiatu- dotto e i suoi elementi riscal- ra se il vetro dello sportello danti. I bambini di età inferiore anteriore è stato rimosso o si agli 8 anni non dovrebbero av- è incrinato. vicinarsi al prodotto se non •... -
Page 49: Sicurezza Nella Cottura
• Gli accessori possono dan- elementi del riscaldatore, ri- neggiare il vetro dello sportello muovere eventuali pezzi ec- quando lo si chiude. Spingere cessivi di carta oleata appesi sempre gli accessori all'estre- all'accessorio o al contenitore. mità dell’area di cottura. Non utilizzare mai carta anti- grasso a una temperatura del Sicurezza nella cot-... -
Page 50: Istruzioni Relative All'ambiente
• Non lavare il prodotto spruz- aggressivi, raschietti metallici, zando o versandovi acqua! C'è pagliette d’acciaio o candeg- rischio di scossa elettrica! gina. Questi materiali possono • Non utilizzare pulitori a vapore causare graffi e rotture delle per pulire il prodotto, poiché superfici di vetro. - Page 51 • Se specificato nella ricetta o nel manuale sulla griglia. Inoltre, se si cucinano i pa- utente, preriscaldare sempre. Non aprire sti uno dopo l'altro, si risparmia energia lo sportello del forno frequentemente perché il forno non perde il suo calore. durante la cottura.
-
Page 52: Il Prodotto
3 Il prodotto 3.1 Presentazione del prodotto 1 Pannello di controllo 2 Lampada 3 Ripiani a filo 4 Motorino ventola (dietro alla piastra in acciaio) 5 Sportello 6 Maniglia 7 Riscaldatore inferiore (sotto la pia- 8 Posizioni del ripiano stra d'acciaio) 9 Riscaldatore superiore 10 Fori di ventilazione 3.2 Introduzione e utilizzo del pannel-... -
Page 53: Pannello Di Controllo
3.2.1 Pannello di controllo 1 Tasto On/Off 2 Tasto del telecomando 3 Display touch 4 Manopola di controllo del forno 5 Tasto della lampada 6 Tasto blocco tastiera Se ci sono delle manopole che controllano Display touch il prodotto, in alcuni modelli queste mano- Puoi attivare tutti i tipi di funzioni toccando pole possono essere tali da uscire quando sul display touch, e puoi scorrere le funzio-... -
Page 54: Accessori Del Prodotto
Grazie alla ventola, l'aria calda riscaldata dai riscaldatori su- periore e inferiore viene distribuita equamente e rapidamente Statico+Ventola 40-280 in tutto il forno. La cottura viene effettuata con un solo vasso- Grazie alla ventola, l'aria calda riscaldata dal riscaldatore su- periore viene distribuita equamente e rapidamente in tutto il Ris. -
Page 55: Uso Degli Accessori Del Prodotto
Vassoio profondo Si consiglia di non utilizzare vassoi Viene utilizzato per la pasticceria, per frig- e griglie a contatto diretto con gli gere pezzi grossi, cibi succosi o per la rac- alimenti. colta di oli fluenti durante la cottura alla 3.5 Uso degli accessori del prodotto griglia. - Page 56 Su modelli senza ripiani in filo metalli- Su modelli senza ripiani in filo metalli- co : co : è fondamentale posizionare correttamente è fondamentale posizionare correttamente il grill a filo sui ripiani laterali. Il grill a filo i vassoi sui ripiani laterali. Il vassoio può può...
- Page 57 Su modelli con ripiani in filo metallico : Posizionamento corretto del grill a filo e del vassoio sulle guide telescopicheSu modelli con ripiani in filo metallico e gui- de telescopiche Grazie alle guide telescopiche, i vassoi o il grill a filo possono essere facilmente in- stallati e rimossi.
-
Page 58: Specifiche Tecniche
3.6 Specifiche tecniche Specifiche generiche Dimensioni esterne del prodotto (altezza/larghezza/pro- 595 /594 /567 fondità)(mm) Dimensioni di installazione del forno (altezza/larghezza/ 590 - 600 /560 /min. 550 profondità)(mm) Tensione/Frequenza 220-240 V ~; 50 Hz Tipo di cavo e sezione utilizzati/adatti all'uso nel prodot- min.H05VV-FG 3 x 1,5 mm2 Consumo energetico totale (kW) Tipo di forno... -
Page 59: Primo Utilizzo
4 Primo utilizzo Prima di iniziare ad utilizzare il prodotto, si 02:25 Impostazioni 2098 raccomanda di procedere come segue e Data (anno) 2099 indicato nelle seguenti sezioni. Timer 2018 4.1 Prima impostazione del timer Aggiornamento 2019 Impostazioni di fabbrica 2020 Prima di utilizzare il forno, impo- stare sempre l'ora del giorno. -
Page 60: Pulizia Iniziale
Sullo schermo sarà attivato il campo 2. Ruotare la manopola di controllo a de- "Timer (ora)" e le impostazioni della stra/sinistra per selezionare la lingua data eseguite saranno confermate. desiderata. Impostare il timer 02:49 Impostazioni Rete wireless ü Dopo aver impostato la data; Inglese Luminosità... -
Page 61: Utilizzo Del Forno
Prima di utilizzare gli accessori: AVVISO: Durante il primo utilizzo, il fumo e l'odore potrebbero risalire per diverse Pulire gli accessori che saranno stati ri- ore. Questo è normale e si necessita solo mossi dal forno con acqua detergente e di una buona ventilazione per rimuoverli. - Page 62 Attivazione della connessione del teleco- Cottura 02:25 mando del forno Statico 1. Toccare il pulsante sul pannello di con- trollo per circa 3 secondi. La connes- Statico+Ventola sione del telecomando sarà attivata. Ris. con ventola 2. Toccare il pulsante sul pannello di con- trollo per circa 3 secondi.
- Page 63 6. Per modificare la temperatura: L'im- cottura inizi a un'ora stabilita dall'uten- postazione della temperatura rimarrà te, è possibile regolare l'ora di inizio attiva quando si accede alla visualizza- della cottura impostando i minuti con la zione delle informazioni sulla funzione manopola di controllo nel campo "Ora che si utilizzerà...
- Page 64 re, su questa schermata oppure portare Se durante la cottura lo sportello la manopola di controllo al livello "SAL- del forno viene aperto, sullo scher- TA" e saltare il preriscaldamento toc- mo viene visualizzato il simbolo " cando una volta la manopola di control- ".
- Page 65 nopola, il forno torna alla schermata del 5. Per accedere al menu dei piatti, toccare menu principale. ISe si porta la mano- il piatto selezionato o premere una vol- pola di controllo al livello "SALVA" e la ta la manopola di controllo. È possibile si preme una volta, è...
-
Page 66: Impostazioni
10.Per leggere il contenuto della ricetta, è Impostazioni 02:25 possibile toccare su "Contenuto" dispo- Rete wireless nibile sullo schermo e quindi scorrere il Luminosità SCAN display o ruotare la manopola di con- Suono di notifica trollo a destra/sinistra. Per uscire dalla schermata delle ricette, toccare il pul- Lingua sante "... - Page 67 2. Con il campo "Luminosità" abilitato, im- 02:49 Impostazioni postare il livello di luminosità ruotando Rete wireless Inglese la manopola di controllo a destra/sini- Luminosità Turco stra. Suono di notifica Italiano ð Se si intende impostare solo la lumi- Lingua nosità, passare al menu superiore toc- cando il pulsante sullo schermo.
- Page 68 schermo. L'impostazione viene con- Impostazioni 02:25 fermata e viene attivata la successiva Lingua impostazione del sottomenu. Se si in- Schermata di attesa tende continuare con altre impostazio- Standby ni, proseguire toccando la relativa im- postazione sullo schermo. Durante i Durezza dell'acqua processi del forno diversi dalla cottura, ð...
- Page 69 6. Con il campo "Data (giorno)" abilitato, 02:49 Impostazioni impostare il giorno corrente ruotando la Data (anno) manopola di controllo a destra/sinistra. Timer (minuti) 02:25 Impostazioni Aggiornamento Data (giorno) Impostazioni di fabbrica Timer ð Se si intende impostare solo il timer, Aggiornamento passare al menu superiore toccando il Impostazioni di fabbrica...
- Page 70 1. Toccare il campo "Impostazioni di fab- 3. Ruotare la manopola di controllo verso brica" sullo schermo. destra/sinistra e selezionare la rete a cui il proprio dispositivo intelligente è Impostazioni 02:25 collegato e premere una volta la mano- Aggiornamento pola. Impostazioni di fabbrica Reset Impostazioni...
-
Page 71: Informazioni Generali Sulla Cottura
Dichiarazione di conformità CE Arçelik A.Ş. dichiara che questo prodotto è conforme alla Direttiva 2014/53/EU. Una dichiarazione di conformità RED dettagliata è disponibile online sul sito web support.grundig.com tra i documenti aggiuntivi nella pagina del prodotto. Il periodo di supporto per l'aggiornamento garanzia del prodotto. -
Page 72: Pasticcini E Alimenti Da Forno
• L'utilizzo degli accessori in dotazione • I valori indicati nelle tabelle di cottura garantisce le migliori prestazioni di cot- sono determinati in base ai test effettua- tura. Osservare sempre le avvertenze e le ti nei nostri laboratori. I valori adatti al informazioni fornite dal produttore per le singolo caso potrebbero differire da que- pentole esterne che si utilizzeranno. - Page 73 Tabella di cottura per pasticcini e cibi da forno Suggerimento per la cottura con un vassoio singolo Alimento Accessorio da Funzione opera- Posizione del ri- Temperatura (°C) Tempo di cottura utilizzare tiva piano (min) (approssi- mativ.) Vassoio standard Torta sul vassoio Statico 30 …...
- Page 74 Suggerimenti per cucinare con due vassoi Alimento Accessorio da Funzione opera- Posizione del ri- Temperatura (°C) Tempo di cottura utilizzare tiva piano (min) (approssi- mativ.) 2-Vassoio stan- dard * Torte di piccole Ris. con ventola 2 - 4 25 … 35 dimensioni 4-Vassoio per pa- sticceria *...
-
Page 75: Carne, Pesce E Pollame
6.1.2 Carne, pesce e pollame • Scaduto il tempo di cottura, lasciare la carne in forno per circa 10 minuti. Il suc- I punti chiave della cottura alla griglia co della carne è meglio distribuito alla • Prima di cucinarli, il condimento con carne fritta e non esce quando la carne succo di limone e pepe aumenterà... -
Page 76: Alimenti Di Prova
Avvertenze generali • Posizionare i pezzi da grigliare sul grill a filo o sul vassoio del grill a filo distri- • Gli alimenti non adatti alla cottura al grill buendoli senza superare le dimensioni determinano un rischio di incendio. Gri- del riscaldatore. - Page 77 Tabella di cottura per i pasti di prova Suggerimento per la cottura con un vassoio singolo Alimento Accessorio da Funzione opera- Posizione del ri- Temperatura (°C) Tempo di cottura utilizzare tiva piano (min) (approssi- mativ.) Shortbread (bi- Vassoio standard Statico 20 …...
-
Page 78: Manutenzione E Pulizia
Grill Alimento Accessorio da utiliz- Posizione del ripia- Temperatura (°C) Tempo di cottura zare (min) (approssima- tiv.) Polpette di carne (vi- Grill a filo 20 … 30 tello) - 12 quantità Pane tostato Grill a filo 1 … 3 Si consiglia di preriscaldare per 5 minuti tutti i cibi da grigliare. Girare i pezzi di cibo dopo 1/2 del tempo totale di cottura al grill. -
Page 79: Accessori Per La Pulizia
Superfici smaltate • È possibile rimuovere le macchie di cal- cio (macchie gialle) sulla superficie del • Dopo ogni utilizzo, pulire le superfici vetro con il decalcificante disponibile in smaltate con detersivo per piatti, acqua commercio, oppure con un agente decal- calda e un panno morbido o una spugna cificante come l'aceto o il succo di limo- e asciugarle con un panno asciutto. -
Page 80: Pulizia Dell'interno Del Forno (Area Di Cottura)
blocco tasti, prima di eseguire la pulizia 3. Per riattaccare i ripiani, le procedure del pannello di controllo impostare il applicate per la sua rimozione devono blocco tasti. In caso contrario, i tasti po- essere ripetute però in ordine inverso. trebbero essere involontariamente pigia- 7.5 Pulire lo sportello del forno Per pulirli, è... -
Page 81: Rimuovere Il Vetro Interno Dello Sportello Del Forno
poraneamente sui punti di pressione su entrambi i lati del componente e rimuo- verlo. 6. la cerniera di tipo (C) è disponibile nei tipi di sportelli ad apertura/chiusura morbida. 7. Mettere lo sportello del forno in posizio- ne semiaperta. 3. Come mostrato in figura, sollevare deli- catamente il vetro più... -
Page 82: Pulizia Della Lampada Del Forno
interno (2) deve essere fissato alla fes- • Le lampade utilizzate in questo prodotto sura di plastica più vicina al vetro più devono resistere a condizioni fisiche interno (1). estreme come temperature superiori a 50°C. 6. Nel rimontare il vetro più interno (1), fa- Se il forno è... -
Page 83: Risoluzione Dei Problemi
4. Se la lampada del forno è del tipo (A), come mostrato in figura, ruotare la lam- pada come mostrato in figura e sosti- tuirla con una nuova. Se è un modello del tipo (B), estrarla come mostrato in figura e sostituirla con una nuova. 3. - Page 84 Il comando che si desidera inviare dall'ap- Nell'applicazione “HomeWhiz" vengono pliczione “HomeWhiz" non viene esegui- visualizzati termini diversi dalla lingua che to. (se le condizioni di accesso remoto so- ho specificato. no soddisfatte) • Nei casi in cui la potenza di Internet sia •...
Need help?
Do you have a question about the GEBM12600BHI and is the answer not in the manual?
Questions and answers