
Subscribe to Our Youtube Channel
Related Manuals for Grundig GEBM19600DXHI


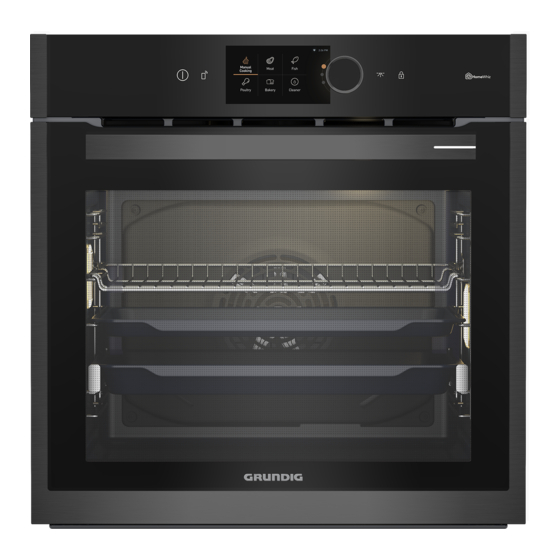
Summary of Contents for Grundig GEBM19600DXHI
- Page 1 Built-in Oven User Manual GEBM19600DXHI 385441553/ EN/ R.AA/ 27/08/2022 09:52 7727188430...
-
Page 2: Table Of Contents
General Warnings About Baking Table of Contents in the Oven ........1 Safety Instructions......6.1.1 Pastries and oven food..... 30 Intended Use ......... 6.1.2 Meat, Fish and Poultry....33 Child, Vulnerable Person and Pet 6.1.3 Grill..........33 Safety ..........6.1.4 Test foods ......... - Page 3 Welcome! Dear Customer, Thank you for choosing the Grundig product. We want your product, manufactured with high quality and technology, to offer you the best efficiency. Therefore, carefully read this manual and any other documentation provided before using the product.
-
Page 4: Safety Instructions
1 Safety Instructions • This section includes the Intended Use safety instructions necessary • This product is designed to be to prevent the risk of personal used at home. It is not suitable injury or material damage. for commercial use. •... -
Page 5: Electrical Safety
they are supervised or trained • When the door is open, do not about the safe use and haz- put any heavy objects on it or ards of the product. allow children to sit on it. You • Children should not play with may cause the oven to tip over the product. -
Page 6: Transportation Safety
• The product must not be • If the power cable is damaged, plugged into the outlet during it must be replaced by the installation, repair, and trans- manufacturer, an authorized portation. service or a person to be spe- • Plug the product into an outlet cified by the importer com- that meets the voltage and pany in order to prevent pos-... -
Page 7: Installation Safety
• The product is heavy, carry the • To prevent overheating, the product with at least two product should not be in- people. stalled behind decorative • Do not use the door and / or doors. handle to transport or move Safety of Use the product. -
Page 8: Temperature Warnings
• The hinges of the product door Accessory Use move when opening and clos- • It is important that the wire ing the door and might jam. grill and tray are placed prop- When opening / closing the erly on the wire shelves. For door, do not hold the part with detailed information, refer to the hinges. -
Page 9: Maintenance And Cleaning Safety
• Do not heat closed tins and • Food not suitable for grilling glass jars in the oven. The carries a fire hazard. Grill only pressure that would build-up food that is suitable for heavy in the tin/jar may cause it to grill fire. -
Page 10: Environmental Instructions
2 Environmental Instructions 2.1 Waste Directive aging waste with the household or other wastes, take it to the packaging material 2.1.1 Compliance with the WEEE Dir- collection points designated by the local ective and Disposing of the authorities. Waste Product 2.3 Recommendations for Energy This product complies with EU WEEE Dir- Saving... -
Page 11: Your Product
3 Your product 3.1 Product Introduction 1 Control panel 2 Lamp 3 Wire shelves 4 Fan motor (behind the steel plate) 5 Door 6 Handle 7 Lower heater (under the steel plate) 8 Shelf positions 9 Upper heater 10 Ventilation holes 3.2 Product Control Panel Introduc- Varies depending on the model. -
Page 12: Control Panel
3.2.1 Control Panel 1 On/off key 2 Remove control key 3 Touch display 4 Oven control knob 5 Lamp key 6 Key lock key If there are knob(s) controlling your Touch display product, in some models this/these You can activate all kinds of functions by knob(s) may be so that they come out touching on the touch display, and you can when pushed (buried knobs). -
Page 13: Product Accessories
The hot air heated by the fan heater is distributed equally and rapidly throughout the oven with the fan. It is suitable for Fan Heating 40-280 multi-tray cooking at different shelf levels. In order to save energy, you can use this function instead of Eco Fan Heating 160-220 using “Fan Heating”... -
Page 14: Use Of Product Accessories
3.5 Use of Product Accessories Cooking shelves There are 5 levels of shelf position in the cooking area. You can also see the order of the shelves in the numbers on the front frame of the oven. On models with wire shelves : Barrier coated pastry tray It is used for pastries such as cookies and biscuits. - Page 15 On models without wire shelves : It is also crucial to place the trays on the side shelves properly. The tray has one dir- ection when placing it on the shelf. While placing the tray on the desired shelf, its side designed for holding must be on the front.
- Page 16 Tray stopping function - On models with wire shelves There is also a stopping function to pre- vent the tray from tipping out of the wire shelf. While removing the tray, release it from the rear stopping socket and pull it towards yourself until it reaches the front side.
-
Page 17: Technical Specifications
3.6 Technical Specifications General specifications Product external dimensions (height/width/depth) (mm) 595 /594 /567 Oven installation dimensions (height / width / depth) 590 - 600 /560 /min. 550 (mm) Voltage/Frequency 220-240 V ~; 50 Hz Cable type and section used/suitable for use in the min. -
Page 18: First Use
4 First Use Before you start using your product, it is 02:25 Settings 2098 recommended to do the following stated in Date (Year) 2099 the following sections respectively. Hour 2018 4.1 First Timer Setting Update 2019 Restore Settings 2020 Always set the time of day before using your oven. -
Page 19: Initial Cleaning
Set the timer 02:49 Settings Wi-fi ü After setting the date; English Brightness 1. Touch the "Hour" field on the screen. Türkçe Notice Sound 2. With "Time (Hour)" field enabled, set the Italiano Language time by turning the control knob to the right / left. -
Page 20: Using The Oven
NOTICE: Some detergents or cleaning NOTICE: During the first use, smoke and agents may cause damage to the surface. odour may come up for several hours. This Do not use abrasive detergents, cleaning is normal and you just need good ventila- powders, cleaning creams or sharp objects tion to remove it. - Page 21 2. Touch the button on the control panel 4. Select the baking function you want by for approximately 3 seconds. Remote turning the control knob to the right/left control connection will end. or sliding your finger over the display. Activating the key lock MANUAL COOKING 02:25 By using the key lock feature, you can...
- Page 22 MANUAL COOKING If you want to cook without setting the 02:25 Top+Bottom+Fan baking starting time, skip this setting by 200 C Temperature pressing on the control knob once. Time Timeless MANUAL COOKING 02:25 Top+Bottom+Fan 23:58 Time 23:59 Step Cooking START 02:26 Start Time 02:26...
- Page 23 12.When the preheating is completed, the oven starts to cook and is heated suggestion for the shelf position, where up to the adjusted temperature. It you will place the oven tray, is shown maintains this temperature until on the display. You can place your meal the end of the baking time.
-
Page 24: Settings
3. Turn the control knob to the right / left temperature. This process cannot be skipped in the meals defined for pre- to select the "Automatic Cooking” menu you want. heating. 8. For the automatic meal menu recipe: You can enter the submenus by We advise you to cook according to the touching main menus which ap- recipes available in the timer for the... - Page 25 Set the wireless connection 2. With the "Brightness" field enabled, set the brightness level by turning the con- ü While in the settings menu; trol knob to the right/left. 1. Touch the "Wi-fi" setting field on the ð If you will only set the brightness set- screen.
- Page 26 3. Touch the “ ” key on the display to Settings 02:25 confirm the setting. Language Display Saver ð The language setting change re- quires the watch to be restarted. Standby For this, a warning screen is dis- Waterhardness played to restart on the screen. 4.
- Page 27 ting is activated. If you will continue Settings 02:25 with other settings, continue the other Date (Day) settings by tapping the relevant set- Hour ting on the screen. During the pro- Update cesses of the oven other than baking, when the screen is not touched, it will Restore Settings switch to the standby mode at the end ð...
- Page 28 firmed and the next submenu setting 2. While the "Restore Settings” field is act- is activated. If you will continue with ive, “Reset” option will be displayed on other settings, continue the other set- the screen. Restore factory defaults by tings by tapping the relevant setting pressing the control knob once.
-
Page 29: General Information About Baking
CE declaration of conformity Arçelik A.Ş. declares that this product complies with the 2014/53/EU Directive. A detailed RED Declaration of Con- formity is available online in the support.grundig.com website within the additional documents in the product page for your product. -
Page 30: General Warnings About Baking In The Oven
Plus, this section describes some of the • For good baking performance, place your foods tested as producers and the most food on the recommended correct shelf. appropriate settings for these foods. Ap- Do not change the shelf position during propriate oven settings and accessories baking. - Page 31 • If the cake is moist, use a small amount • If the pastry is getting cooked slowly, of liquid or reduce the temperature by make sure that the thickness of the 10°C. pastry you have prepared does not over- •...
- Page 32 Food Accessory to be Operating func- Shelf position Temperature (°C) Baking time used tion (min) (approx.) Round black metal mould, 20 cm in Top+Bottom Heat 2 50 … 65 Apple pie diameter on wire grill ** Round black metal mould, 20 cm in 50 …...
-
Page 33: Meat, Fish And Poultry
6.1.2 Meat, Fish and Poultry • After the cooking time is expired, keep the meat in the oven for approximately The key points on grilling 10 minutes. The juice of the meat is bet- • Seasoning it with lemon juice and pep- ter distributed to the fried meat and does per before cooking whole chicken, turkey not come out when the meat is cut. -
Page 34: Test Foods
• Close the oven door during grilling. • Depending on the thickness of the pieces to be grilled, the cooking times Never grill with the oven door open. given in the table may vary. Hot surfaces may cause burns! • Slide the wire grill or the wire grill tray to The key points of the grill the desired level in the oven. -
Page 35: Maintenance And Cleaning
Food Accessory to be Operating func- Shelf position Temperature (°C) Baking time used tion (min) (approx.) Round cake mould, 26 cm in Sponge cake Top+Bottom Heat 2 30 … 40 diameter with clamp on wire grill Round cake mould, 26 cm in 35 …... - Page 36 • Do not use steam cleaning products for Enamelled surfaces cleaning. • After each use, clean the enamel sur- • Some detergents or cleaning agents faces using dishwashing detergent, cause damage to the surface. Unsuitable warm water and a soft cloth or sponge cleaning agents are: bleach, cleaning and dry them with a dry cloth.
-
Page 37: Cleaning Accessories
• You can remove the calcium stains (yel- 7.3 Cleaning the Control Panel low stains) on the glass surface with the • When cleaning the panels with knob- commercially available descaling agent, control, wipe the panel and knobs with a with a descaling agent such as vinegar damp soft cloth and dry with a dry cloth. -
Page 38: Cleaning The Oven Door
2. Open the clips in the front door hinge socket on the right and left by pushing them downwards as shown in the fig- ure. 3. Hinge types vary as (A), (B), (C) types according to the product model. The following figures show how to open each type of hinge. -
Page 39: Removing The Inner Glass Of The Oven Door
Illustration 6: Hinges - open position 7. Get the oven door to a half-open posi- Illustration 3: Hinges - closed position tion. 8. Pull the removed door upwards to re- lease it from the right and left hinges Illustration 4: Hinges - open position and remove it. -
Page 40: Cleaning The Oven Lamp
6. While reassembling the innermost glass (1), pay attention to place the printed side of the glass on the inner glass. It is crucial to place the lower corners of the innermost glass (1) to meet the lower plastic slots. 7. -
Page 41: Troubleshooting
2. Remove the glass cover by turning it 2. Remove the wire shelves according to counter clockwise. the description. 3. If your oven lamp is type (A) shown in the figure below, rotate the oven lamp as shown in the figure and replace it 3. - Page 42 • (If there is timer on your appliance) Keys After introducing your product to the on the control panel do not work. >>> If "HomeWhiz" application, If there is an er- your product has a key lock, the key lock ror saying “An error occurred while associ- may be enabled, disable the key lock.
Need help?
Do you have a question about the GEBM19600DXHI and is the answer not in the manual?
Questions and answers