
Related Manuals for EPLO E16BP


Summary of Contents for EPLO E16BP
- Page 1 Model : E16BP Installation Manual Customer Service Email: service@eploglobal.com Thank you for choosing our products. Please read the instructions carefully before installation and keep it available for future maintenance or reference.
-
Page 2: Table Of Contents
Content Safety instructions Technical specification List of materials Technical drawing Parts identification Toilet installation Preparation Maintenance 1. Main unit care and maintenance 2. Spray nozzle maintenance and care 3. Filter maintenance Emergency troubleshooting 1. Power and water failure 2. Failure of remote control 3. - Page 3 IMPORTANT SAFEGUARDS When using electrical products, especially when children are present, basic safety precautions should always be followed, including the following: The appliance is not to be used by persons (including children) with reduced physical, sensory or mental capabilities, or lack of experience and knowledge, unless they have been given supervision or instruction.
- Page 4 Keep the cord away from heated surfaces. Never use while sleeping or drowsy. Never drop or insert any object into any opening or hose. Do not use outdoors or operate where aerosol (spray) products are being used or where oxygen is being administered. Connect this product to a properly grounded outlet only.
-
Page 5: Safety Instructions
IMPORTANT SAFETY INSTRUCTIONS Indicates that failure to follow the instruction may cause body CAUTION – injury or property damage. Do not install or use the product in wet places as steam room etc. It is recommended to use water-proof electrical outlet which should be installed in a place where is not easily to get wet. - Page 6 11. L'exposition directe au soleil est interdite. 12. Utilisez uniquement de l'eau du robinet ou de l'eau potable, sinon vous risquez de causer des éraflures. 13. Ne raccordez pas l'alimentation en eau à la sortie de l'appareil de chauffage. S'assurer que la température de l'eau d'entrée est comprise entre 3~35 /37.4~95 .
-
Page 7: Technical Specification
Technical specification Rated voltage 110V-120V, 60Hz Rated power 865W Main Unit Water proof IPX4 Power cord length About 1.8m Flush volume 1.6/1.1Gpf, 6.0L(full flush)/4.1L(half flush) Flushing mode Siphonic jet Rough-in 305mm Toilet Outlet outside diameter ≤100mm Drainage method S-trap Water pressure range 0.07MPa-0.8MPa (static water pressure) Heating mode Instant... - Page 8 Deodorization Deodorization method Diatom Deodorization Surface temperature 6-level adjustment Heating power Open and close device Quiet soft-close Heated seat After 10 minutes of use, the seat Burn protection temperature will automatically drop slowly to a low level Seat sensor, Temperature sensor, Thermal Safety device fuse, Thermostat, Leakage protection plug Night light assembly...
-
Page 9: List Of Materials
List of materials Main Unit Remote Control Components Sealing Flange Installation Cardboard Installation Manual Braided Hose Installation Manual (Installed) NPT 1/2 Angle Valve Mounting Kit Battery Box (battery not supplied) -
Page 10: Technical Drawing
Technical drawing 690mm 1. The drawing is for reference only, and we reserve the right to modify the product appearance. 2. Product appearance is subject to change in kind. -
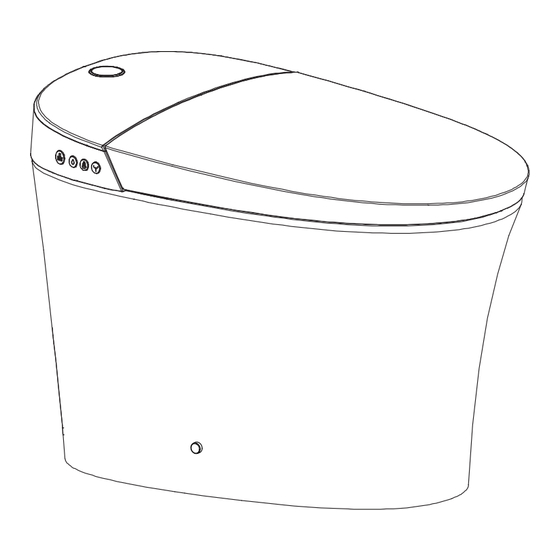
Page 11: Parts Identification
Parts identification Left side Bumper Indicator light Button Seat Ceramic toilet Right side Washing baffle Drying baffle Rear washing Remote Front control sensor washing Spray nozzle Touch the sensing area with foot to activate a half flush... -
Page 12: Toilet Installation
Toilet installation 1. Installation of angle valve 2. Installation of battery box Draw drain outlet centerline on the floor. Before activating the power-off flushing Install angle valve at proper position on function, install a 9V alkaline battery (not the wall according to the dimension of supplied) into the battery box in advance. - Page 13 3. Cardboard installation 5. Mounting bracket installation Assemble the mounting bracket with Align cardboard with the centerline of bolts and then install them to the drain outlet. pre-installed flange plate on the ground Draw contour line according to cardboard. and lock tight with nuts. Mounting bracket Drain outlet Washer...
- Page 14 6. Ceramic toilet installation 7. Screw installation Install a sealing flange into drain outlet. Put the screw through the fixing sleeve and then install it through the holes (on Install ceramic toilet on the corresponding both sides of the toilet ceramic) to the position.
-
Page 15: Preparation
Preparation 1. Turn on the angle valve Check the threaded connection for leaks to ensure complete sealing. Turn the angle valve counterclockwise to the full open position. (Note: The angle valve opens with a large torque for the first time.) Angle valve 2. -
Page 16: Maintenance
Maintenance Main unit care and maintenance Spray nozzle maintenance and care 1. Shut off power supply before doing When no one is seated, short press maintenance. “REAR/MOVE” Button on the main unit, the nozzle will automatically stretch out 2. Use only a soft, damp cloth to clean. to allow access for cleaning. -
Page 17: Filter Maintenance
Emergency troubleshooting Filter maintenance No water supply Put around 2.1Gal (8L) water into a barrel If poor spray performance occurs under and flush the ceramic bowl. normal conditions: Note: Avoid water spilling from bowl. 1. Turn off power and the angle valve 2. -
Page 18: Failure Of Remote Control
Product unused for a period of time Battery replacement When the product is left unused for a Unplug DC connector and remove the long time, especially in cold weather, battery box. it is highly recommended to drain the Install new batteries. water to prevent freezing. -
Page 19: Description Of The Button Function
Description of the button function 1. When no one is seated, press and hold Stop Button (about 3 seconds) to enter shutdown mode (red light off), press Stop Button again to return to functional mode (red light on). In shutdown mode, all functions and buttons (with the exception of the Stop Button) will not operate. -
Page 20: Description Of Indicator Light
Description of indicator light 1. When the unit starts up, it displays water temperature information by default. Temperature display light,water temperature indicator and separator are all on.Seat temperature indicator and ECO indicator are 50% on. 2. When water temperature is in a non-neutral state, and there is a seat temperature adjustment. -
Page 21: Troubleshooting Guide
Troubleshooting guide Problem Cause Solution Straighten the hose to remove the kink Water supply hose is kinked No water Angle valve is off Turn on the angle valve from nozzle A water failure occurred Restore the water supply Water supply hose is kinked Straighten the hose to remove the kink Poor water Angle valve is not fully... - Page 22 The picture of product may not be entirely consistent with actual appearance and color because of product improvements, please in kind prevail. ASVFAF0401008A-1.0...
Need help?
Do you have a question about the E16BP and is the answer not in the manual?
Questions and answers