
Subscribe to Our Youtube Channel
Related Manuals for EPLO EP-W20


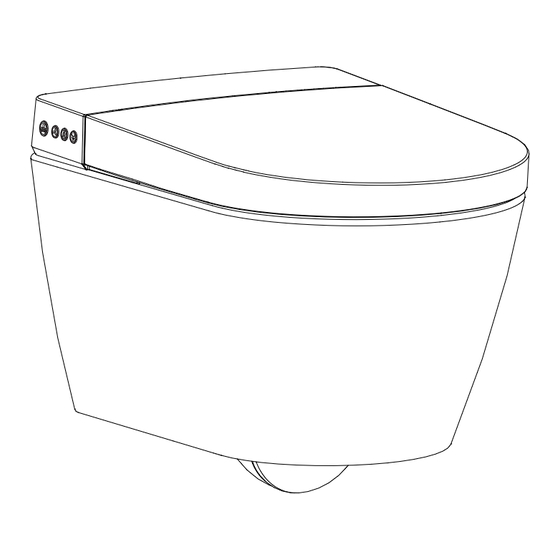
Summary of Contents for EPLO EP-W20
- Page 1 Model: EP-W20 service@eploglobal.com Installation Manual Thank you for choosing our products. Please read the instructions carefully before installation and keep it available for future maintenance or reference.
-
Page 2: Table Of Contents
Content Safety instructions List of materials Technical drawings Required accessories for in-wall carrier Installation tools Installation dimensions Pre-installation confirmation Before installation Installation procedures... -
Page 3: Safety Instructions
SAFETY INSTRUCTIONS When using electrical products, especially when children are present, basic safety precautions should always be followed, including the following: 1. The appliance is not to be used by persons (including children) with reduced physical, sensory or mental capabilities, or lack of experience and knowledge, unless they have been given supervision or instruction. - Page 4 IMPORTANT SAFETY INSTRUCTIONS CAUTION – Failure to follow the instructions may cause bodily injury or property damage. 1. Do not install or use the product in wet places such as a steam room etc. 2. It is recommended to use water-proof electrical outlet which should be installed in a place where is not easily to get wet.
-
Page 5: List Of Materials
List of materials Main Unit Remote Control Components Installation Manual Installation Manual Velcro Decorative Cap Transition Piece Ball Valve Locking Nut (M12) Flat Washer... - Page 6 List of materials Power Cord Hose (Refer to the actual product)
-
Page 7: Technical Drawings
Technical drawings (Unit: mm) Ground floor Ground floor Ground floor... -
Page 8: Required Accessories For In-Wall Carrier
Required accessories for in-wall carrier Bolts Silicone sponge Extended drain pipe Flush pipe (with protective sleeve) Gasket Gasket Installation tools Drill Caulk gun Marker Tape measure (with 1/4” drill bit) Wire stripper File Assorted spanners Cutter Assorted screwdrivers Teflon tape Ruler Spirit level Installation dimensions... -
Page 9: Pre-Installation Confirmation
Pre-installation confirmation (Unit: mm) Circuit pre-installation: Install a fixed electrical supply circuit (Neutral wire, live wire and ground wire included.) · Confirm the electrical connection location. · Reserve pipeline for electrical circuit Circuit breaker pre-installation · Connect a separate upstream circuit breaker. ·... -
Page 10: Before Installation
Before installation 1. Minimum static water pressure: 0.08+MPa (8.5L+L/min), failure to meet this pressure will not achieve the best flushing effect. Note: Apply the methods below if you don't have water pressure testing device. Open the angle valve to check the water volume. If the water volume after 10 seconds is greater than 1.42L, then it is OK to proceed installation. - Page 11 Installation Procedures 1. Unpack and confirm the list of 2. Open lid and seat, then remove materials. screws and washers. 3. Close lid and seat, and then remove the bidet. Be careful not to damage the product.
-
Page 12: Installation Procedures
Installation Procedures 4. Measure the flush pipe. 5. Cut off the excess pipe. L1+5mm 6. Measure the drain pipe. 7. Cut off the excess pipe. L2+3mm... - Page 13 Installation Procedures 8. Bevel and deburr the sharp edges. 9. Apply silicone oil on the cutting surface. 10. Install the pad. 11. Remove the protective sleeve on bolts. Apply silicone oil on the in-wall flush pipe and drain pipe orifice.
- Page 14 Installation Procedures 12. Mount the flush pipe and drain 13. Apply silicone oil on the flush pipe pipe. and drain pipe. 14. Place the toilet against the wall. 15. Pass the water supply hose, off-seat auto flushing cable and power cord through the toilet.
- Page 15 Installation Procedures 16. Level the toilet. 17. Install the washer and tighten the nut. 18. Cut off the excess pad. 19. Seal gap around toilet with sealant.
- Page 16 Installation Procedures 20. Tighten the bidet and toilet connectors. Connect bidet and toilet water supply hose with a ball valve. Pass the off-seat auto flushing cable through the middle of two pipes, and connect it to bidet cable. Fix two velcro at the following positions. Avoid crossing and overlapping cables.
- Page 17 Installation Procedures 22. Wrap velcro on water supply hose and power cord coupler respectively, and then stick them to pre-installed velcro on both sides of the toilet, as shown below. Open cover and seat, install screws and decorative caps and then lock tight. Velcro hook facing outward Be careful not to fold or bend the hose.
Need help?
Do you have a question about the EP-W20 and is the answer not in the manual?
Questions and answers