Table of Contents
Advertisement
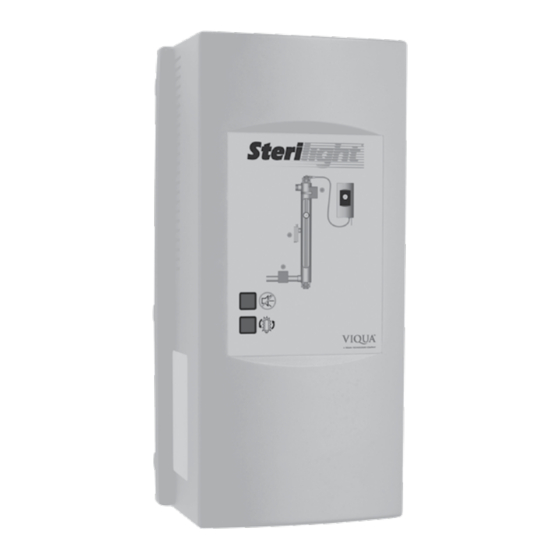
Owner's Manual
Ultraviolet Water Purification System
Congratulations. By purchasing this system, you
have taken the first step in ensuring safe drinking
water. Designed using the most advanced UV
technology available today, your UV system is
designed to provide you with years of trouble free
operation with minimal maintenance required.
Date of installation:
Installed by:
Installer phone#:
Serial #:
(Found on label on side of Power Supply)
KEY INFORMATION YOU SHOULD KNOW:
• A 5-micron (nominal) sediment filter must be installed upstream
of (before) any UV system.
• This product is for indoor use only. Keep all components clean
and dry.
• Clean the sleeve regularly for optimum performance.
425 Clair Road West, Guelph, ON N1L 1R1 Canada
t. 519 763 1032 t.f. 1 800 265 7246 f. 519 763 5069 www.viqua.com
S80, SM80, SV50
Sterilight ® SV50 model is USEPA UVDGM
2006 validated.
July 2010
P/N 520150-R revD
Advertisement
Table of Contents

Related Manuals for Viqua Sterilight S80


Summary of Contents for Viqua Sterilight S80
- Page 1 • Clean the sleeve regularly for optimum performance. Sterilight ® SV50 model is USEPA UVDGM 2006 validated. 425 Clair Road West, Guelph, ON N1L 1R1 Canada July 2010 t. 519 763 1032 t.f. 1 800 265 7246 f. 519 763 5069 www.viqua.com P/N 520150-R revD...
-
Page 2: Safety Instructions
SAFETY INSTRUCTIONS GROUNDING This product must be grounded. If it should malfunction or breakdown, grounding provides a path of least resistance for electric current to reduce the risk of electrical shock. This system is equipped with a cord having an equipment-grounding conductor and a grounding plug. -
Page 3: Table Of Contents
TABLE OF CONTENTS Overview Components Specifications Dimensions and layout Installation Installing the UV system Disinfecting the water lines Operation Control panel Troubleshooting Low UV alarms Maintenance Sleeve cleaning and lamp replacement Fuse replacement Warranty... -
Page 4: Overview
COMPONENTS For replacement components please contact your installer (listed on the front of this manual) or contact VIQUA directly for a referral: 1 800 265 7246 (North America), 519 763 1032, or info@viqua.com. Power supply SV50: Part #660023-R SM80: Part #660022-R... -
Page 5: Specifications
SPECIFICATIONS General (All Models) Operating Parameters Maximum operating pressure 100 PSI (689 kPa) Minimum operating pressure 4 PSI (27 kPa) Maximum ambient air F (40 temperature Minimum ambient air F (0 temperature Maximum humidity 100% Maximum hardness 120 ppm (7 grains per gallon) Maximum iron 0.3 ppm Minimum UVT... - Page 6 SPECIFICATIONS SV50 SM80 Color-coded plug and play connections Sensor with diagnostic test CoolTouch fan Communications ports (two, RJ45) Solenoid valve Optional Optional Optional Controls Audible alarm mute button New lamp button Lamp age indicator Lamp operation indicator Power supply operation indicator Solenoid operation indicator Fan operation indicator Sensor reading indicator...
-
Page 7: Dimensions And Layout
DIMENSIONS & LAYOUT Clearance for lamp removal OUTLET 72” ( 183cm ) Ø INLET Sampling and shut-off valves, fittings, and pre-treatment equipment not included. Ø Model (min.) (max.) (max.) SV50 41" 12" 4" 72" 6.5" 13" 48" (103cm) (30cm) (10cm) (182cm) (16.5cm) (33cm) - Page 8 UV system is unavailable. Shut-off valve: Required to allow maintenance of UV system. Solenoid valve: Optional piece of equipment supplied by VIQUA - a Trojan Technologies Company. Allows water supply to be shut-off when proper disinfection cannot be assured (2“...
-
Page 9: Installation
INSTALLING THE UV SYSTEM Do not touch Determine appropriate indoor glass with location of the power supply and bare hands. chamber, referring to Dimensions and Insert curved Layout drawing. Power supply should end of be installed higher than chamber sleeve first. away from all water sources. - Page 10 Install screw. Do not touch Lock wireform glass with into position. bare hands. Be sure to rotate lamp completely. “ (10.4cm) ¹⁄ Outlet must be Plug sensor protected by a into blue jack. Ground Fault (For SV50 and Circuit Interrupter SM80 only).
-
Page 11: Disinfecting The Water Lines
DISINFECTING THE WATER LINES UV systems disinfect the water using ultraviolet light, treating the water as it passes through the system. When there is a risk that water downstream of the UV system has been contaminated it is critical that these water lines be chemically disinfected. Disinfection of the water lines is therefore required after initial system installation and following any period of time during which the system is inoperative, whether due to an alarm condition, a power failure, or for any other reason. - Page 12 Let the bleach sit in the water lines Allow water to fill for at least four hours. UV chamber. Go to a water outlet and allow the cold water to flow until you can smell bleach, then stop the flow. Allow hot water (if present) to flow until you can smell bleach, then stop the flow.
- Page 13 Plug sensor into blue jack. Flush all water outlets until bleach can no longer be smelled (at least 5 minutes).
-
Page 14: Operation
CONTROL PANEL Buttons Button Meaning Mute Press this button in order to turn off the audible alarm. When the alarm is due to the lamp's age, the mute button will deactivate the audible alarm for 7 days; this may be repeated up to a maximum of 4 times. -
Page 15: Troubleshooting
TROUBLESHOOTING The table below is a list of possible causes and solutions. Before replacing parts, please contact Technical Assistance for any new troubleshooting techniques (1 800 265 7246). Symptom Possible Cause Possible Solution No power GFCI and/or breaker tripped Reset GFCI and/or breaker Power supply fuse has blown Replace power supply fuse - see Fuse Replacement section... -
Page 16: Low Uv Alarms
LOW UV ALARMS (SV50 & SM80 only) Low UV Alarm Problem is No audible Flush system corrected alarm Audible alarm Sensor test Audible alarm Replace sensor No audible alarm Sensor is operating normally No audible Problem is Clean sleeve & sensor alarm corrected Audible... -
Page 17: Maintenance
SLEEVE CLEANING & LAMP REPLACEMENT Sleeve cleaning Minerals in the water slowly form a coating on the sleeve. This coating must be removed because it reduces the amount of UV light reaching the water, thereby reducing disinfection performance. The need to clean the sleeve will be indicated by a low UV alarm (flashing red indicator light beside the sensor on control panel - see Control Panel section for details). - Page 18 Solenoid Close representative only. after all Not on all systems. water has drained. Solenoid Pinch Let the system cool for 10 minutes. wireform to release it.
- Page 19 Do not touch Remove glass with bare sleeve. hands. Water will escape - have bucket under chamber. Remove O-ring from top of sleeve. Remove screw. Remove O-ring from bottom of chamber. Ensure cloth used to clean the sleeve is soft, lint-free, and contains no chemicals Insert sleeve (no clean-wipes).
- Page 20 Ensure sleeve bolt is fully Wet O-ring rotated until with water positive then place over stop. bottom end of sleeve. Do not touch Ensure glass with sleeve bolt bare hands. is fully Insert sleeve rotated until with arrow positive pointing up. stop.
- Page 21 If lamp was replaced: Press and hold "New Lamp" button for 5 seconds until you hear a "beep". Disinfect the water lines. Refer to Disinfecting the Water Lines in Installation section. Lock wireform into position.
-
Page 22: Fuse Replacement
FUSE REPLACEMENT The system comes equipped with one functioning and one spare 250V 2.5A fuse. To access the fuses, first unplug system and disconnect the power cord from the power supply. Remove the fuse door by pushing in the tab on one side using a knife or other tool and gently prying outwards. Repeat on the other side. -
Page 23: Warranty
Ten-Year Limited Warranty for Sterilight ® UV Chamber VIQUA warrants the UV chamber on the Sterilight ® product to be free from defects in material and workmanship for a period of ten (10) years from the date of purchase. During this time, we will repair or replace, at its option, any defective Sterilight ® UV chamber. - Page 24 Sterilight ® SV50 model is USEPA UVDGM 2006 validated. Printed in Canada. Copyright ©2010 VIQUA - a Trojan Technologies Company Guelph, ON Canada.
Need help?
Do you have a question about the Sterilight S80 and is the answer not in the manual?
Questions and answers