Breckwell SP23 Owner’s Instruction And Operation Manual
Hide thumbs
Also See for SP23:
- Owner's manual (31 pages) ,
- Owner's manual (29 pages) ,
- Manual (44 pages)
Table of Contents
Advertisement
Quick Links
Owner's Instruction and Operation Manual
Model Number:
SP23
Report Number: F21-688
Certified to ASTM E1509-12 (2017)
and CAN/ULC S627:2023
Mobile Home/Transportable Building
Approved
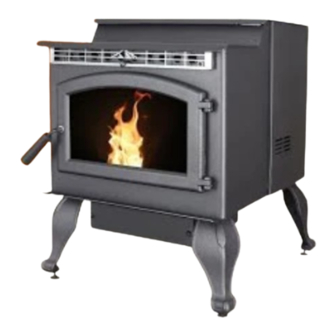
* All Pictures In This Manual Are For Illustrative Purposes Only. Actual Product May Vary.
SAFETY NOTICE: If this heater is not properly installed, a house fire may result. For your
safety, follow the installation instructions. Never use make-shift compromises during the
installation of this heater. Contact local building or fire officials about permits, restrictions
and installation requirements in your area. NEVER OPERATE THIS PRODUCT WHILE
UNATTENDED.
CAUTION! Please read this entire manual before you install or use your new room
heater. Failure to follow instructions may result in property damage, bodily injury, or
even death. Improper Installation Will Void Your Warranty!
U.S. Environmental Protection Agency
Certified to comply with 2020 particulate
emissions standards.
© 2024 Breckwell Hearth, South Pittsburg, TN 37380
R
Save These Instructions In A Safe Place For Future Reference.
THIS MANUAL IS SUBJECT TO CHANGE WITHOUT NOTICE.
CALIFORNIA PROPOSITION 65 WARNING:
This product can expose you to chemicals including carbon
monoxide, which is known to the State of California to cause
cancer, birth defects, and/or other reproductive harm. For
more information, go to
PH. 423-403-4031
852187N-5105M
www.P65warnings.ca.gov
Advertisement
Table of Contents

Subscribe to Our Youtube Channel
Related Manuals for Breckwell SP23


Summary of Contents for Breckwell SP23
- Page 1 State of California to cause emissions standards. cancer, birth defects, and/or other reproductive harm. For more information, go to www.P65warnings.ca.gov THIS MANUAL IS SUBJECT TO CHANGE WITHOUT NOTICE. © 2024 Breckwell Hearth, South Pittsburg, TN 37380 PH. 423-403-4031...
- Page 2 INTRODUCTION This manual describes the installation and operation of the Breckwell, SP23 wood heater. This heater meets the 2020 U.S. Environmental Protection Agency’s. OPTIMAL OPERATION - This pellet stove has been certified by the US EPA to meet strict 2020 guidelines. To insure this unit produces the optimal minimal emissions, it is critical to follow the following guidelines.
-
Page 3: Installation Checklist
Your wood stove should be installed by a qualified installer only. An NFI qualified Installer can be found at www.nficertified. org/public/find-an-nfi-pro/ For customer service, please contact your Breckwell dealer. COMMISSIONING CHECKLIST This checklist is to be completed in full by the qualified person who installs this unit. Keep this page for future reference. -
Page 4: Installation
OR SEVER THE GROUNDING PLUG. DO NOT ROUTE THE ELECTRICAL CORD UNDERNEATH, IN FRONT OF, Breckwell highly recommends your stove be installed by a OR OVER THE HEATER. DO NOT ROUTE THE CORD IN qualified NFI (US) or WETT (Canada) technician. To find the... -
Page 5: Floor Protection
(229 mm) (sidewall) rear. A rodent guard (minimum 1/4” (7 mm) wire mesh)/ wind hood must be used at the terminus. All connections must © 2024 Breckwell Hearth... -
Page 6: When Outside Air Is Not Used
CAP UNDER CERTAIN CONDITIONS AND CAN AFFECT and horizontal pipe as much as possible. THE PERFORMANCE OF YOUR STOVE, AS WELL AS, • Do not connect this unit to a chimney flue serving another OTHER UNFORESEEABLE ISSUES. appliance. © 2024 Breckwell Hearth... -
Page 7: Assembling Leg Set
3” (77 mm) min THIMBLE CLEARANCES TO 6” MINIMUM CLEARANCE COMBUSTIBLES TO ANY COMBUSTIBLE VENT SURFACE ADAPTER CLEAN-OUT TEE A 90 DEGREE ELBOW L-VENT ADAPTER MAY ALSO BE USED APPLIANCE 6” MINIMUM CLEARANCE 45° ELBOW APPLIANCE CLEANOUT TEE © 2024 Breckwell Hearth... -
Page 8: Vertically Into Existing Masonry Fireplace
Install EXISTING and seal with non-hardening mastic to prevent water CHIMNEY SYSTEM leakage. Install vent cap. PIPE ADAPTER CLEAN-OUT TEE APPLIANCE FIGURE 13 NOTE: PELLET THIS METHOD VENT IS PREFERRED © 2024 Breckwell Hearth... -
Page 9: Installation Through Side Of Masonry Chimney
Refer to “Venting” for proper exhaust configurations. the tee. Push the pipe into the tee while twisting it to lock it into the tee. © 2024 Breckwell Hearth... -
Page 10: Operation
DO NOT USE THIS CONTROL DURING NORMAL prevent the stove from tripping the high temp Thermodisc. If OPERATION BECAUSE IT COULD SMOTHER THE FIRE AND the high temp Thermodisc does trip see “Safety Features”. LEAD TO A DANGEROUS SITUATION. © 2024 Breckwell Hearth... -
Page 11: Manual Mode
4. Materials containing plastic; • In this mode the stove will operate only from the control 5. Waste petroleum products, paints or paint thinners, or panel as detailed in the “OPERATION” section of this asphalt products; owner’s manual. © 2024 Breckwell Hearth... -
Page 12: Proper Fuel
Do not burn wet pellets. The stove’s performance depends heavily on the quality of your pellet fuel. Avoid pellet brands that display these characteristics: © 2024 Breckwell Hearth... -
Page 13: Optimal Operation
IN PERMANENT DAMAGE TO THE HEATER. run until the stove cools. This will take 30 to 45 minutes. • After the stove components stop running the “Power” and the bar graph lights stay on for 10 minutes. © 2024 Breckwell Hearth... -
Page 14: Shutdown Procedure
RISE TO OPERATIONAL LEVELS; ONE OF THE SENSORS your stove. COULD THEN MAKE THE STOVE START ON ITS OWN. IT IS RECOMMENDED THAT THE STOVE BE UNPLUGGED WHEN NOT IN USE FOR EXTENDED AMOUNTS OF TIME (I.E. DURING THE SUMMER MONTHS). © 2024 Breckwell Hearth... -
Page 15: Maintenance
THE EXHAUST SYSTEM SHOULD BE CHECKED MONTHLY bin through the opening in the bottom of the firebox. DURING THE BURNING SEASON FOR ANY BUILD-UP OF Scrape inner section with cleaning tool. Make sure SOOT OR CREOSOTE. holes are not plugged. © 2024 Breckwell Hearth... -
Page 16: Spring Shutdown
The exhaust system should be thoroughly cleaned. a vacuum designed for ashes. Some regular vacuums and shop vacs leak ash into the room. Your vacuum or shop vac may have a special filter or bag available to eliminate this leakage. © 2024 Breckwell Hearth... -
Page 17: Maintenance Schedule
450 mm (18 in) beyond the of the building. appliance on any side equipped with a door, and at least 200 mm (8 in) beyond the appliance on other sides, shall DO NOT INSTALL IN AN ALCOVE © 2024 Breckwell Hearth... -
Page 18: Troubleshooting Guide
(you may want to remove the hose entirely off the stove and the air switch first and make sure it is clear). If you hear a click, the air switch is working. BE CAREFUL! TOO MUCH VACUUM CAN DAMAGE THE AIR SWITCH. © 2024 Breckwell Hearth... - Page 19 Check the voltage going to the igniter during startup. It should be a full current. If the The control board is not sending voltage is lower than full current, check the wiring. If the wiring checks out good, the power to the igniter. board is bad. © 2024 Breckwell Hearth...
- Page 20 If possible, try a different brand of pellets. You might also want to try a brand ‘SOOTS’ UP AT A VERY FAST that is made from a different type of wood (softwood vs. hardwood). Different woods RATE” only) have different characteristics when being burned. © 2024 Breckwell Hearth...
-
Page 21: Smoke Smell Or Soot Build-Up
All joints should be properly sealed. Also, clean your stove following instructions in “MAINTENANCE.” If problem persists, contact your dealer. © 2024 Breckwell Hearth... -
Page 22: Electrical Diagram
Other information that may be needed would be the part number and part description of the item(s) in question. Part numbers and descriptions can be found in the “Repair Parts” section of this manual. Once this information has been gathered you can contact your Breckwell dealer or visit www.Breckwell.com Model Information Model Number Dealer’s Name... -
Page 23: Replacement Parts
REPLACEMENT PARTS © 2024 Breckwell Hearth... - Page 24 1/8 X 1 Window Gasket W/ 88174 Adhesive IN ORDER TO MAINTAIN WARRANTY, COMPONENTS MUST BE REPLACED USING ORIGINAL MANUFACTURERS PARTS PURCHASED THROUGH YOUR DEALER OR DIRECTLY FROM THE APPLIANCE MANUFACTURER. USE OF THIRD PARTY COMPONENTS WILL VOID THE WARRANTY. © 2024 Breckwell Hearth...
-
Page 25: Service Record
Engineer Name: _________________________________ Engineer Name: _________________________________ License No.: _____________________________________ License No.: _____________________________________ Company: ______________________________________ Company: ______________________________________ Telephone No.: __________________________________ Telephone No.: __________________________________ Stove Inspected: Chimney Swept: Stove Inspected: Chimney Swept: Items Replaced: __________________________________ Items Replaced: __________________________________ © 2024 Breckwell Hearth... - Page 26 NOTES © 2024 Breckwell Hearth...
- Page 27 NOTES © 2024 Breckwell Hearth...
Need help?
Do you have a question about the SP23 and is the answer not in the manual?
Questions and answers