Breckwell Tradition P23FSA Owner's Manual
Tradiotion p23 series
Hide thumbs
Also See for Tradition P23FSA:
- Owner's manual (19 pages) ,
- Replacement parts list (2 pages) ,
- Owner's manual (17 pages)
Table of Contents
Advertisement
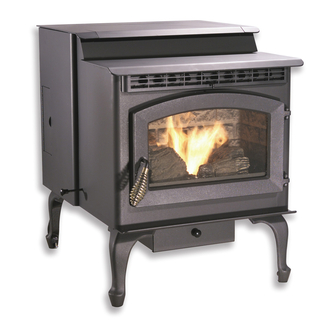
TRADITION SERIES P23
P23FSL
P23I
P23FSA
OWNER'S MANUAL
WARNING: If your appliance is not properly installed a house fire may result. For your safety,
follow the installation directions. Contact local building or fire officials about restrictions and
installation inspection requirements in your area.
PLEASE read this entire manual before installation and use of this pellet fuel-burning room heater.
Failure to follow these instructions could result in property damage, bodily injury, or even death.
Save these instructions.
PROFESSIONAL INSTALLATION IS HIGHLY RECOMMENDED
Manufactured by
Breckwell Hearth Products
Eugene, Oregon
BRECKWELL HEARTH PRODUCTS
Grand Prairie, Texas
C-L-068
7/04
Advertisement
Table of Contents

Related Manuals for Breckwell Tradition P23FSA


Summary of Contents for Breckwell Tradition P23FSA
- Page 1 PLEASE read this entire manual before installation and use of this pellet fuel-burning room heater. Failure to follow these instructions could result in property damage, bodily injury, or even death. Save these instructions. PROFESSIONAL INSTALLATION IS HIGHLY RECOMMENDED Manufactured by Breckwell Hearth Products Eugene, Oregon BRECKWELL HEARTH PRODUCTS Grand Prairie, Texas C-L-068...
-
Page 2: Introduction
Keep this manual handy for future reference. Your Breckwell P23 comes as a fireplace insert or as a freestanding stove with legs or a pedestal. This stove has been independently tested to ASTM E1509-95 Standard Specification for... -
Page 3: Safety Precautions
Check with local building officials. front of, or over the stove. The exhaust system should be Breckwell Hearth Products checked, at a minimum, at least twice a grants no warranty, implied or stated, for year for any build up of soot or creosote. -
Page 4: Table Of Contents
Room Air Fan -------------------------------------------------------------------------------------- Re-Starting a Warm Stove ---------------------------------------------------------------------- If Stove Runs Out Of Pellets -------------------------------------------------------------------- Damper Control ------------------------------------------------------------------------------------ Refueling --------------------------------------------------------------------------------------------- Breckwell Maintenance Tool -------------------------------------------------------------------- Shutdown Procedure ----------------------------------------------------------------------------- Safety Features ------------------------------------------------------------------------------------ Optional Thermostat ------------------------------------------------------------------------------ Thermostat Installation -------------------------------------------------------------------------- (Please Read This) Operating Safety Precautions... -
Page 5: Specifications
(See installation instructions provided with the circuit board) NOTE: Normally, your dealer will perform these functions. CLEARANCES The Breckwell P23 Freestanding has been tested and listed for installation in residential, mobile home and alcove applications. The P23 Insert is approved for installation into code complying masonry fireplaces. -
Page 6: Combustion Air Supply
The flashing should not necessarily seal the fireplace face. VENTING The Breckwell P23 Freestanding is certified for use with listed TYPE L-Vent, 3” or 4” diameter in size. The stove was tested with Simpson Duravent brand. Class “A” FIGURE 6 chimney is not required. -
Page 7: Freestanding Installations
If using a pedestal, follow the instructions inside the Breckwell P23 Pedestal w/ Ashpan. If using cast legs, follow the instructions inside the Breckwell P23 Leg Set w/ Ashpan. Legs are installed by inserting the four bolts provided in the kit into the four holes in the bottom plate of the stove at each corner from the top, thread on the nuts from the bottom and tighten. - Page 8 INSTALLATION HORIZONTALLY THROUGH WALL (refer to Figure 9) NOTE: Follow L-Vent chimney manufacturer’s instructions. Position stove, adhering to clearances shown in Figures 1 & 2. Locate position of hole in wall; directly behind stove exhaust vent (refer to figure 5). Always maintain 3”...
- Page 9 INSTALLATION VERTICALLY WITH NEW CHIMNEY SYSTEM (Refer to Figure 10) NOTE: Follow L-Vent chimney manufacturer’s instructions. OPTION: To achieve a center vertical installation a 45º elbow and a clean-out tee can be used to offset the pipe from the exhaust outlet to the rear center of the stove.
- Page 10 INSTALLATION VERTICALLY INTO EXISTING MASONRY FIREPLACE NOTE: Follow L-Vent chimney manufacturer’s instructions. Have the masonry chimney inspected by a qualified chimney sweep or installer to determine its structural condition. You will need a pipe length equal to the chimney height from the hearth. If outside combustion air is to be used, you will need a pipe length equal to the chimney height plus 18 inches.
-
Page 11: Insert Installations
In zero- clearance fireplace installations, when the fireplace opening is above the floor or raised hearth, the adjustable “Breckwell P23 Z- C Legs” (part # A-S-ZCLEGS) can be used to bridge the gap between the hearth and stove bottom. - Page 12 INSTALLATION WHEN VENT PIPE EXTENDS TO CHIMNEY TOP (Refer to Figures 16 and 17) You will need a pipe length equal to the chimney height (from hearth) plus 6 inches. If outside combustion air is to be used, you will need a pipe length (see “COMBUSTION AIR SUPPLY”) equal to the chimney height plus 12 inches.
- Page 13 INSTALLATION AS A BUILT-IN FIREPLACE Figures 18 and 19 describe a P23 installation vented into either a special chase built outside an outer wall or a false inside wall. This is especially suited for new construction or remodeling. The equipment compartment (sides and rear of the stove in fireplace) must be enclosed per the applicable electrical standards.
-
Page 14: Electrical Installation
In zero-clearance fireplace installations, when the fireplace opening is above the floor or raised hearth, the adjustable “Breckwell P23 Z-C Legs” (part # A-S-ZCLEGS) can be used to bridge the gap between the hearth and stove bottom. Refer to figure 14. -
Page 15: Operation
OPERATION PANEL CONTROLS (See Figure 21) The blowers and automatic fuel supply are controlled from a panel on the left-hand side of the P23. The control panel functions are as follows. ON/OFF SWITCH When pushed the stove will automatically ignite. No other firestarter is necessary. The igniter will stay on for at least 10 and up to 15 minutes, depending on when Proof of Fire is reached. -
Page 16: Proper Fuel
You will have to empty the burnpot plus vacuum the entire system more often. Poor quality pellets could damage the auger. Breckwell cannot accept responsibility for damage due to poor quality pellets. Your dealer can recommend a good quality pellet dealer in your area. -
Page 17: Re-Starting A Warm Stove
Scrape ashes from burnpot. SHUTDOWN PROCEDURE Turning your Breckwell stove off is a matter of pressing the “On/Off” control panel switch. The green light will go out. The blowers will continue to operate until internal firebox temperatures have fallen to a preset level. -
Page 18: Optional Thermostat
A thermostat may help you maintain a constant house temperature automatically. A millivolt thermostat is required. A fixed wall mount or Breckwell’s hand held model can be used. The control panel can be set up two ways to operate your stove in thermostat mode. -
Page 19: (Please Read This) Operating Safety Precautions
Pellets should be stored in a dry place. The pellets should not be stored within 12” of the stove. e. DO NOT STORE OR USE FLAMMABLE LIQUIDS, ESPECIALLY GASOLINE, IN THE VICINITY OF YOUR BRECKWELL STOVE. NEVER USE A GAS OR PROPANE TORCH, GASOLINE, GASOLINE- TYPE LANTERN FUEL, KEROSENE, CHARCOAL LIGHTER FLUID OR SIMILAR FLUIDS TO START OR “FRESHEN UP”... -
Page 20: Maintenance
MAINTENANCE FAILURE TO CLEAN AND MAINTAIN THIS UNIT AS INDICATED CAN RESULT IN POOR PERFORMANCE AND SAFETY HAZARDS. NEVER CLEAN WHEN HOT. NOTE: Inspect burn pot periodically to see that holes have not become plugged, if so, clean thoroughly. ASH REMOVAL Ashes should be placed in a metal container with a tight-fitting lid. -
Page 21: Vacuum Use
(C-E-200) eliminate this leakage. CLEANING Heat Exchange Tubes – Your Breckwell stove is designed with a built-in heat exchange tube cleaner. This should be used every two or three days to remove accumulated ash on the tubes, which reduces heat transfer on the P23. Insert the... -
Page 22: Chimney Cleaning
Dispose of all broken glass properly. Return the damaged door to your Breckwell Dealer for repair or replacement. Neither the appliance owner nor any other unauthorized person(s) should replace the door glass. An authorized Breckwell dealer must perform all repairs involving door glass. -
Page 23: Troubleshooting Guide
TROUBLESHOOTING GUIDE When your stove acts out of the ordinary, the first reaction is to call for help. This guide may save time and money by enabling you to solve simple problems yourself. Problems can be caused by to only five factors: 1) poor fuel; 2) poor operation or maintenance; 3) poor installation;... - Page 24 TROUBLESHOOTING GUIDE STOVE SHUTS OFF AND THE # 3 LIGHT FLASHES Possible Causes: Possible Remedies: (Unplug stove first when possible) The hopper is out of pellets. Refill the hopper. The air damper is too far open for a low feed setting. If burning on the low setting, you may need to close the damper all the way (push the knob in so it touches the side of the stove).
- Page 25 TROUBLESHOOTING GUIDE STOVE FEEDS PELLETS, BUT WILL NOT IGNITE Possible Causes: Possible Remedies: Air damper open too far for ignition. Push the air damper in closer to the side of the stove for startup. In some situations it may be necessary to have the damper completely closed for ignition to take place.
- Page 26 TROUBLESHOOTING GUIDE STOVE WILL NOT FEED PELLETS, BUT FUEL FEED LIGHT COMES ON AS DESIGNED Possible Causes: Possible Remedies: Fuse on control board blew Remove the control board. On the back there is one fuse. If it appears to be bad, replace it with a 5 Amp 250 Volt fuse. Plug the stove back in and try to run the unit.
- Page 27 TROUBLESHOOTING GUIDE GLASS “SOOT’S” UP AT A VERY FAST RATE FLAME IS LAZY, DARK, AND HAS BLACK TIPS AFTER STOVE HAS BEEN ON FOR A WHILE, THE BURNPOT OVERFILLS Possible Causes: Possible Remedies: Stove or vent pipe is dirty, which restricts airflow through the Follow all cleaning procedure in the maintenance section of the burnpot.
-
Page 28: Smoke Smell Or Soot Build-Up
SMOKE SMELL OR SOOT BUILD-UP Because it is a wood-burning device, your Breckwell may emit a faint wood-burning odor. If this increases beyond normal, or if you notice any soot build-up on walls or furniture, check your exhaust system carefully for leaks. All joints should be properly sealed. Also clean your... -
Page 29: Electrical Diagram
ELECTRICAL DIAGRAM FIGURE 30... -
Page 30: Replacement Parts List
REPLACEMENT PARTS Contact an Authorized Breckwell Pellet Stove Dealer to obtain any of these parts. Never use substitute materials. Use of non-approved parts can result in poor performance and safety hazards. ITEM PART # Air Switch C-E-200 Air Switch Hose... -
Page 31: Warranty
Breckwell’s sole responsibility is to repair or replace the defective part as stated herein. Breckwell will not be liable for consequential or indirect damages to property or persons resulting from use of this product.
Need help?
Do you have a question about the Tradition P23FSA and is the answer not in the manual?
Questions and answers