
Related Manuals for Zip HydroChill HC45T130


Summary of Contents for Zip HydroChill HC45T130
- Page 1 Installation instructions and user guide HydroChill Model HC45T130 Installation instructions & user guide T210055 HC45T130 installation instructions & user guide v1.01 Aug 2022...
-
Page 2: Table Of Contents
Table of contents SECTION 1 Using these instructions ..............3 Before you start ....................3 Explanation of symbols ..................3 Introduction ....................... 3 SECTION 2 IMPORTANT SAFETY INSTRUCTIONS ..........4 SECTION 3 WARNINGS & REGULATORY INFORMATION ........5 SECTION 4 Technical data .................. 7 4.1 Technical data table.................. -
Page 3: Section 1 Using These Instructions
• Your new appliance is designed to give you years of trouble-free service provided that the instructions contained in this manual are followed. • All new Zip products are energy efficient, simple to operate and easy to service. • Find out more about Zip products at www.zipwater.co.uk. -
Page 4: Section 2 Important Safety Instructions
OBSTRUCTION. The appliance uses HIGHLY FLAMMABLE R290 refrigerant under pressure. Check the rating plate or contact Zip before commencing work. Maintenance of the refrigeration unit must be carried out by an accredited service provider or qualified refrigeration technician. Do not use mechanical devices or other means to accelerate the defrosting process, other than those recommended by the manufacturer. -
Page 5: Section 3 Warnings & Regulatory Information
SECTION 2 IMPORTANT SAFETY INSTRUCTIONS satisfactorily only if the recommended air gaps are provided. Installation The appliance must be installed on a horizontal surface sufficiently robust to support its weight. Locate in a space sufficient to use the appliance safely (e.g. free from risk of congestion and tripping hazards). Sanitising Once your system is installed it is recommended that during the commissioning process it is sanitised to the current guidelines before first... - Page 6 • Zip cannot be held responsible for any appliance malfunction if the water pressure exceeds that stated. If in doubt, consult your water supply company.
-
Page 7: Section 4 Technical Data
SECTION 3 WARNINGS & REGULATORY INFORMATION process, contact us on 0345 6 005 005 to book a commissioning service. • For safe operation, the appliance is designed to be installed, commissioned and used within 48 hours. Should it not be required for an extended period of time, do not fill and commission until ready for first use. -
Page 8: Section 5 Parts Supplied
10mm x 5/8" Pozi Screw 3/4" BSP - 1/4" Push fit connector 1/4" push fit equal elbow 93705 Micropurity filter for chillers ,3 micron Zip Filter Head side outlet external 5.2 Filter identification • The filter is identified on its front label. -
Page 9: Section 6 Installing The Appliance
SECTION 6 Installing the appliance 6.1 Positioning and ventilation If the appliance has been shipped horizontally or on an angle, stand upright and allow 24 hours before the electricity supply is connected. • Install the appliance within reach of a mains wholesome (cat 1) water supply, and a 230V 50Hz mains electricity supply. - Page 10 • It is essential that ventilation openings at the rear of the appliance remain clear of obstruction, and that the clearance envelope is observed. • If cupboard temperatures exceed 32 C call Zip on 0345 6 005 005 for advice and guidance on ventilation improvement. Installation instructions & user guide...
-
Page 11: Installation Layout And Features
SECTION 6 Installing the appliance 6.2 Installation layout and features Mains water supply Dispensing tap Font waste pipe, flexible drain Isolation valve (install rail) hose (if using a font) Waste to drain Water block Mains electricity supply 3/4" BSP - 1/4" adapter HC45 chiller 1/4"... -
Page 12: Install The Tap
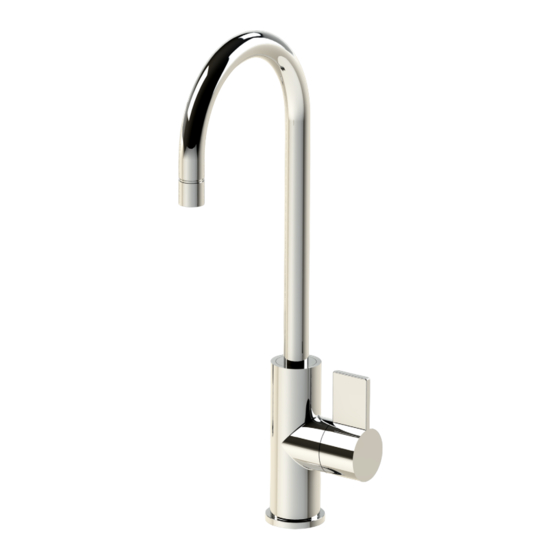
SECTION 6 Installing the appliance 6.3 Install the tap • Cut a 22mm hole in the worktop / sink. Ø • Mount the tap on the hole. (see configuration below). • Tighten tap nut to secure in place, do not over tighten. Worktop Ø22mm Washer... -
Page 13: Manifold Connections And Controls
SECTION 6 Installing the appliance 6.4 Manifold connections and controls • Using the installation diagrams, see page 11-12 as a guide, connect the system together. Blue pipe Cable pipe WATER WATER INLET OUTLET Installation instructions & user guide T210055 HC45T130 installation instructions & user guide v1.01 Aug 2022... -
Page 14: Push Fit Best Practice
If the mains water pressure exceeds 8.6 bar a suitable water pressure reducing valve must be fitted. Zip cannot be held responsible for any appliance malfunction if the water pressure is not within the range stated. If in doubt, consult your water supply company. - Page 15 SECTION 6 Installing the appliance 6.6.1 Mains water connection (Using the filter, install rail & Water block) Use instructions supplied with the individual system components. • Water purification filters ensure fresh tasting water. • The Water Block limits the amount of water flowing to a predetermined flow rate, lowering the 15mm mains water risk of harm to people...
- Page 16 SECTION 6 Installing the appliance 6.6.2 Water block This device must be installed vertically with Fig. 1 the direction of flow downwards (inlet at the top, outlet at the bottom). See Fig. 1. • The Water block should be installed in a convenient location on the water supply line to the appliance.
-
Page 17: Connect The Electricity Supply
SECTION 6 Installing the appliance 6.7 Connect the electricity supply Before you start, read : SECTION 2 IMPORTANT SAFETY INSTRUCTIONS. SECTION 3 WARNINGS & REGULATORY INFORMATION. Do not switch on the mains electricity supply until installation is complete, The system earth must be verified once the mains electricity supply connection has been established. -
Page 18: Earth Continuity Test
SECTION 6 Installing the appliance 6.8 Earth continuity test One probe connected to the mains cable All accessible metal earth wire / pin parts must be earthed. • At installation, the earth continuity must be checked. Use an insulation tester, appliance tester , DMM or One probe connected... -
Page 19: Section 7 Commissioning And Operation
SECTION 7 Commissioning and operation 7.1 Switch on, commissioning and operation • Secure all pipes and cables. • Turn on the mains water supply and check for leaks. • Switch on the mains power supply. • Due to the factory sanitisation process, residue from the sanitisation liquid might remain in the appliance, which requires the appliance to be flushed with... -
Page 20: Section 8 Maintenance
SECTION 8 Maintenance 8.1 Replace and flush the filter The filter must be replaced every six months, or earlier if there is a noticable reduction in the flow rate of the dispensed water. Insert Remove • Turn off the mains water supply isolation valve. •... -
Page 21: Cleaning
SECTION 8 Maintenance 8.2 Cleaning Do not use air-drying disinfectant sprays. Do not use abrasive cleaning agents to clean the appliance. The appliance must never be located near or cleaned with water jets. • To clean the appliance and tap, wipe surfaces with a damp cloth and then wipe dry with a clean, dry cloth. -
Page 22: Environmental Information
Environmental information Waste electrical and electronic equipment • The symbol above means that according to United Kingdom and European Union member countries laws and regulations, your product and / or its battery shall be disposed of separately from household waste. •... -
Page 23: Warranty
• Subject to the exclusions set out below and in Clause 5 of the Terms and Conditions, faulty parts and products will be replaced or repaired free of charge by Zip, or its Distributor or Service Provider in respect of those Goods and Services where such fault arises during the applicable Warranty Period. - Page 24 Zip Water Trafalgar House, Rash’s Green, Dereham, Norfolk, NR19 1JG 0345 6 005 005 sales@zipindustries.co.uk specify.zipwater.co.uk Installation instructions & user guide T210055 HC45T130 installation instructions & user guide v1.01 Aug 2022...
Need help?
Do you have a question about the HydroChill HC45T130 and is the answer not in the manual?
Questions and answers