
Related Manuals for Gardner Denver 9CDL R Series


Summary of Contents for Gardner Denver 9CDL R Series
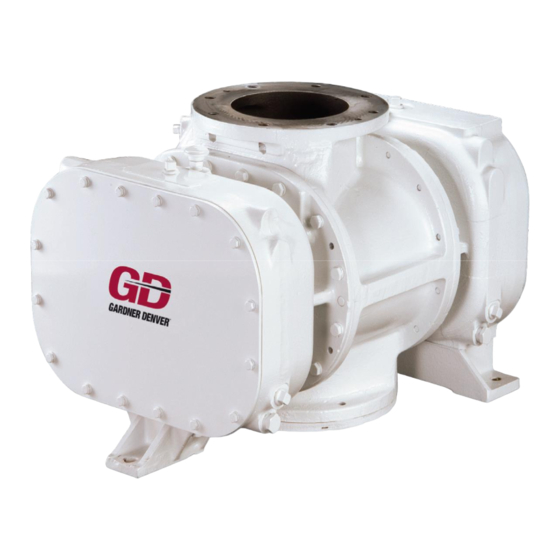
- Page 1 PARTS LIST OPERATING AND SERVICE MANUAL BLOWERS/VACUUM PUMPS 9CDL - -R SERIES 37-1-615 Version 05 August 30, 2018...
-
Page 2: Maintain Blower Reliability And Performance
They are ready to respond and assist you by providing fast, expert maintenance and repair service. For the location of your local authorized Gardner Denver blower distributor refer to the yellow pages of your phone directory, check the Web site at www.gardnerdenver.com... -
Page 3: Foreword
FOREWORD â CycloBlower blowers are the result of advanced engineering and skilled manufacturing. To be assured of receiving maximum service from this machine, the owner must exercise care in its operation and maintenance. This book is written to give the operator and maintenance department essential information for day-to-day operation, maintenance and adjustment. -
Page 4: Table Of Contents
TABLE OF CONTENTS Maintain Blower Reliability And Performance ................... 1 Foreword ..............................2 Index ............................... 4 List Of Illustrations ........................... 7 Safety Precautions ..........................8 Introduction Your Key To Trouble Free Service ..................9 Section 1 Equipment Check ........................9 Section 2 Installation.......................... -
Page 5: Index
INDEX 9CDL Series,Top Inlet, Main Rotor Drive ..16 Safety Devices 9CDL Series, Top Inlet, Main Rotor Drive ..15 Check Valve ..........13 Altitude ............20 Relief Valve ..........13 Blower Startup Checklist .........22 Safety Devices ..........13 Discharge Piping ..........14 Safety Precautions ........... 6 Drive Installation ..........10 Section 1............ -
Page 6: List Of Illustrations
LIST OF ILLUSTRATIONS FIGURE 2-1 – OPERATING PRINCIPLE..........................10 FIGURE 2-2 – ACCESSORIES AND SAFETY DEVICES ..................... 11 FIGURE 2-3 - BELT DRIVE OVERHUNG LOAD CALCULATIONS ..................14 FIGURE 2-4 – OUTLINE DIMENSIONS ..........................17 FIGURE 2-5 – OUTLINE DIMENSIONS (CONTINUED) ....................... 18 FIGURE 3-1 –... -
Page 7: Safety Precautions
SAFETY PRECAUTIONS Safety is everybody’s business and is based on your use of good common sense. All situations or circumstances cannot always be predicted and covered by established rules. Therefore, use your past experience, watch out for safety hazards and be cautious. Some general safety precautions are given below: Failure to observe these notices could result in injury to or death of personnel. -
Page 8: Introduction Your Key To Trouble Free Service
It is the purpose of this manual to help you properly install, maintain and service your Gardner Denver blower. It is important that no section be overlooked when preparing to install your blower. -
Page 9: Section 2 Installation
SECTION 2 INSTALLATION FIGURE 2-1 – OPERATING PRINCIPLE GENERAL – The CycloBlower® is a compact, rotary lobe type axial flow blower/compressor. The meshing of two screw type rotors synchronized by timing gears provides controlled compression of the air for maximum efficiency and pulsation-free discharge. OPERATING PRINCIPLE –... -
Page 10: Figure 2-2 - Accessories And Safety Devices
FIGURE 2-2 – ACCESSORIES AND SAFETY DEVICES LOCATION – Select a clean, dry, well-ventilated area for installing blower and allow ample room for normal maintenance. Proper ventilation is necessary for blower cooling and cool air intake. Do not electric weld on the blower or base; bearings can be damaged by the passage of current. FOUNDATIONS –... - Page 11 Inlet Filter or Filter-Silencer – For pressure service handling air, the blower inlet must be protected by a filter or suitable size to allow full flow of air to the blower inlet. The filter must be of adequate efficiency to trap any foreign materials which may be in the general area of the air inlet.
- Page 12 Belt drives must be carefully aligned. Motor and blower pulleys must be parallel to each other and in the same plane within 1/16 inch. Belt tension should be carefully adjusted and belts tightened only enough to prevent slippage and per the belt manufacturer’s recommendations. NOTICE The sheave should be positioned as close as possible to the drive cover.
-
Page 13: Figure 2-3 - Belt Drive Overhung Load Calculations
FIGURE 2-3 – BELT DRIVE OVERHUNG LOAD CALCULATIONS 37-1-615 Page 12... - Page 14 Bypass Valve – Installation of a bypass valve at the blower discharge (FIGURE 2-2) will allow the blower to be started under no-load. Bypass line may be discharged at atmosphere or to blower inlet depending on local requirements or material being handled. Heat Exchanger –...
- Page 15 DISCHARGE PIPING – In general, the type system used will govern the piping arrangement. However, the following suggestions should be followed for blower protection and efficiency. An expansion joint should be installed as close to the blower opening as possible to protect the blower housing from stresses.
-
Page 16: Figure 2-4 - Outline Dimensions
9CDL SERIES, TOP INLET, MAIN ROTOR DRIVE FIGURE 2-4 – OUTLINE DIMENSIONS 37-1-615 Page 15... -
Page 17: Figure 2-5 - Outline Dimensions (Continued)
9CDL SERIES, TOP INLET, MAIN ROTOR DRIVE OUTLINE MODEL DIMENSIONS (inches) (inches) (inches) DRAWING NO. 9CDL13R 1475 38.56 24.16 32.04 301CBP800 9CDL18R 1680 43.56 6.50 29.16 37.04 302CBP800 9CDL23R 1905 48.56 11.50 34.16 42.04 303CBP800 MODEL E – INLET F – DISCHARGE 8.00 FLANGE, 13.5 O.D., 8 HOLES 8.00 FLANGE, 13.5 O.D., 8 HOLES 9CDL13R... -
Page 18: Section 3 Operation
---- * Pressures or vacuums are gauged at immediate blower discharge or inlet and include inlet and discharge losses. For booster applications, consult Gardner Denver Compressor Division Customer Service. For suggested maximum ratings at reduced speeds, See FIGURE 3-6. FIGURE 3-1 – MAXIMUM RATING... -
Page 19: Figure 3-2 - Water Quality Requirements
TYPE OF SERVICE – The blower can be operated in either pressure or vacuum service. Pressure – Never operate the blower above the maximum pressure shown in FIGURE 3-1. Excessive pressure may cause overheating and blower failure, it is therefore most important to have an accurate pressure gauge in the discharge line as close to the blower discharge as possible. -
Page 20: Figure 3-3 - Liquid Rate
If the injection water supply is allowed to run after blower shutdown, both the blower and adjacent discharge piping may fill with water and present a serious overload problem at the next attempted start. To prevent this, it is strongly recommended that an electric solenoid valve (normally open) be installed at the lowest point in the discharge elbow and/or connecting piping. -
Page 21: Figure 3-5 - Altitude - Pressure/Vacuum
14.2 Inches Hg. Gauge readings are taken as close as possible to blower openings and include inlet and discharge losses. Above 5000 feet, consult the nearest Gardner Denver Compressor Division Customer Service. FIGURE 3-5 – ALTITUDE – PRESSURE/VACUUM ALTITUDE – Maximum allowable discharge pressure and/or inlet vacuum with be decreased with operation at altitudes. -
Page 22: Figure 3-6 - Minimum Speed, Maximum Pressure Or Vacuum
EMERGENCIES – In event of system failures, shutdown the blower immediately. Inspect the blower for foreign material backflow. If materials are found inside the blower housing, a thorough cleaning is necessary before restarting. Do not operate a blower which is noisy, vibrating, or heating excessively. Minimum Speed (RPM) –... - Page 23 BLOWER STARTUP CHECKLIST This startup procedure should be followed during the initial installation and after any shutdown periods or after the blower has been worked on or moved to new location. It is suggested that the steps be followed in sequence and checked off (√) in the boxes provided. Check the unit and all piping for foreign material and clean if required.
-
Page 24: Section 4 Maintenance
Refer to FIGURE 4-2. One filling of AEON PD will last a minimum of 4 times longer than a premium mineral oil, depending on actual operating conditions. Order AEON PD from your Gardner Denver distributor or call Gardner Denver directly. Convenient... -
Page 25: Figure 4-2 - Synthetic Lubricant Chart
Ambient Temperatures Less than 10° F 10°F to 32° F 32°F to 90° F Greater than 90° F AEON PD AEON PD Less than 32°F AEON PD FG AEON PD FG AEON PD AEON PD AEON PD 32°F to 100° F AEON PD FG AEON PD FG AEON PD FG... - Page 26 Check the oil level at both ends of the blower daily. The oil change period is governed by operating conditions, such as load, temperature, dirt, humidity, fumes and the quality of the oil used. Under severe operating conditions the oil should be changed every 100 hours or more often. Under ideal operating conditions non-synthetic oil may be used up to 1000 hours.
-
Page 27: Figure 4-4 - Oil Bath Filter
TEMPERATURE OIL USED Mixture of 2/3 SAE 10W -20° F to 0° F and1/3 Diesel Fuel 0° to 30° F SAE 10W 30° to 50° F SAE 20 50° to 110° F SAE 30 110° to 112° F SAE 50 FIGURE 4-4 –... -
Page 28: Figure 4-6 - Dry Type Filter And Filter-Silencer
Dry Type Filter and Filter-Silencer (FIGURE 4-6) – When the outside surface of the element appears to be evenly coated with dirt, it should be cleaned as follows: Remove wing nuts and lift off the hood. Loosen the outside retaining strap to remove the media. Vibrate or blow off heavy dirt accumulation. - Page 29 PERIODIC INSPECTIONS – A well-organized maintenance program will provide for periodic inspection of the blower, drive and components. These inspections may prevent major repair and downtime. Observe the blower for vibration, heating, noise, oil seal leaks, and excessive shaft air leaks. Check for proper operation of the filters, coupling, drive, power unit, relief and check valves, gauges and other controls.
-
Page 30: Section 5 Parts List
SECTION 5 PARTS LIST FOR LIST OF PARTS SEE PAGES 32 & 33. 37-1-615 Page 29... - Page 31 Order by Part Number and Description. Reference Numbers are for your convenience only. Ref. Model Model Model Name of Part Qty. 9CDL13R 9CDL18R 9CDL23R HOUSING ........... 300CBP002 301CBP002 302CBP002 ROTOR GROUP (Includes Items 2 & 3) ..200CBP010B 203CBP010A 205CBP010A ROTOR –...
- Page 32 Order by Part Number and Description. Reference Numbers for your convenience only. * Model Model Model Ref. 9CDL13R 9CDL18R 9CDL23R Name of Part Qty. Part No. Part No. Part No. KEY – SQUARE ......... 42 * 8502822 8502822 8502822 PIN – DOWEL ..........43 * 62M3 62M3...
- Page 33 OVERHAUL KIT -- 311CBP6010 Description Qty. Part Number Installation Sleeve For Oil Seal ..............303CBP074 Installation Sleeve For Oil Seal ..............304CBT074 Installation Sleeve For Oil Seal ..............305CBP074 Bearing Spacer..................8500037 Bearing Spacer..................8504506 Shaft Air Seal ..................8500390 Shaft Air Seal ..................
-
Page 34: Section 6 Disassembly Instructions
SECTION 6 DISASSEMBLY INSTRUCTIONS FIGURE 6-2 – ADAPTOR PLATE FIGURE 6-1 – ADAPTOR PLATE NOTICE Illustrations for Disassembly Instructions are taken from various sizes of CycloBlower. Minor variations in construction of some parts need cause no concern. 1. Provide adaptor plate, Figure 6-1, for pulling the gear hub (9), and for installation gate rotor bearings (29, 32). -
Page 35: Figure 6-5 - Puller
FIGURE 6-5 The adaptor plates shown are designed for a jaw type hydraulic puller, FIGURE 6-4 and FIGURE 6-5. Other type pullers are available, and if used, suitable adaptor plates should be provided. Pulling directly on pinion teeth will damage teeth making timing difficult and will cause gear wear. -
Page 36: Figure 6-7 - Carrier Flange
FIGURE 6-8 FIGURE 6-7 Remove all gear end bearing carrier to housing screws (50, 51) and lockwashers (55). With four jack screws in tapped holes in the carrier flange, FIGURE 6-7, pull the carrier. This also pulls bearings from the rotor shaft. Tighten jack screws evenly to prevent binding carrier on dowel pins and bearings. - Page 37 10. When the rotor shaft is free of bearings, work the rotor through the housing (1) and rig a sling to complete removal of the rotor from the housing, Error! Reference source not found.. Handle with care to prevent burrs on rotors and housing. Repeat Steps 9 and 10 on the second rotor. 11.
-
Page 38: Section 7 Assembly Instructions
SECTION 7 ASSEMBLY INSTRUCTIONS NOTICE Illustrations for Assembly Instructions are taken from variations in construction of some parts should not cause concern. NOTICE Numbers in parentheses ( ) refer to key numbers in assembly drawings on pages 31 and 32. The CycloBlower®... -
Page 39: Figure 7-1 - Rotor Shaft Seals
FIGURE 7-2 FIGURE 7-1 With the spacer seated against the face of the rotor, spin the spacer on the shaft several times to evenly spread the Loctite 620. Make sure there are no burrs on either end of the spacer or end of the rotor. -
Page 40: Figure 7-5 - Angular Contact Bearing Assembly
FIGURE 7- 5 – ANGULAR CONTACT BEARING FIGURE 7-6 ASSEMBLY The CycloBlower is designed for no metal-to-metal contact with parts within the housing. To achieve this, some preliminary measurements are necessary before completing the assembly. The first set of measurements are used to determine the shaft shim set thickness necessary for positioning the rotors in the housing to give the required clearance between the end of the rotors and the carrier face at the discharge end. -
Page 41: Figure 7-7 - Discharge End Bearing Carrier
EXAMPLE FOR 9CDL18 BLOWER: Micrometer reading of .015” plus .009” discharge end clearance, FIGURE 7-8, plus .002” crush gives shaft shim set thickness of .026”. Figure shaft shim set for each rotor and record measurements which will be used later in the assembly under Steps 15 and 16. FIGURE 7-7 The second set of measurements is used to determine total end clearance. -
Page 42: Figure 7-11 - Discharge Opening & Dowel Pins
FIGURE 7-11 FIGURE 7-12 11. Coat the I.D. of the shaft seals in the discharge end bearing carrier with “Moly” type grease. Remove bearings from the carrier. Tag bearings so they will be reassembled in the same bearing bore from which the measurement was made. Match the cavity of the carrier, FIGURE 7-7, with the discharge opening of the housing FIGURE 7-11, and lower the carrier, suspended plumb, in place on the housing. -
Page 43: Figure 7-13 - Seal Installation Guide
14. Using the correct installation tool, press the seal down into the bore. Verify that the seal face is below the bearing spacer face. Repeat for other shaft. 15. With micrometer, FIGURE 7-14, measure the thickness of shaft shim sets (22, 23) established in Step 5 thru 8. -
Page 44: Figure 7-15 - Micrometer - Thickness Of Shaft Shim Set
FIGURE 7-14 FIGURE 7-15 NOTICE It is not recommended to hammer bearings of this size in place. 18. Install lockwashers (35, 36) and bearing retainer nuts (33, 34) on both shafts and drive up tight. This operation pulls the rotor shaft through the bearings until the shaft shims and bearing spacer are clamped solidly between the rotor end and bearing, assuring a fixed position of the rotor. -
Page 45: Figure 7-17 - Bearing Press Plates
FIGURE 7-16 FIGURE 7-18 FIGURE 7-19 FIGURE 7-17 20. Bend the ear of the lockwasher (35, 36) into the slot of the nuts (33, 34) on the shaft extension. Oil the bearings generously. Install the oil slinger (6) with three (3) “Nylok” type screws (61). Tighten screws to 118 –... -
Page 46: Figure 7-21 - End Cover Assembly
NOTE: It is recommended to apply a thin coat of Dow Corning 736 sealant on each side of gaskets (58, 24) prior to installation. The third important measurement for clearance is to provide for floating bearings at the gear end. 22. -
Page 47: Figure 7-22 - Bearing Bore
FIGURE 7-21 FIGURE 7-22 23. Remove tape from the shaft holding the bearing spacers in place. Tap the spacer to be sure it is solidly against the end of the rotor. This is important for the next measurement. With a depth micrometer on the same parallel bar used above, measure the distance to the end of the bearing spacer, FIGURE 7-22. -
Page 48: Figure 7-26 - Press Plate And Jack Screw Assembly
FIGURE 7-25 27. Install the bearing clamp plates (10, 11) with “Nylok” type screws (47), FIGURE 7- 26, tighten screw to 51-68 ft-lb. Check the fit of the key (41) in the gear hub (9) and pinion (7). Check the pinion, hub and shaft extensions for burrs. -
Page 49: Figure 7-29 - Smallest Minus Reading
FIGURE 7-28 FIGURE 7-29 29 FINDING SMALLEST MINUS READING – . Hold the gear under clockwise pressure to FIGURE 7-28 maintain metal-to-metal contact. Rotate the shaft counterclockwise two complete revolutions with a wrench. (Do not rotate by moving the gear.) If at any time the indicator hand moves to the plus side, reset at zero, and again rotate two complete revolutions. - Page 50 32. Hold the gear and shaft from turning and evenly tighten five gear to hub “Nylock” type screws (48) (FIGURE 7-31). Tighten screws to 100-110 ft-lbs. Be sure the indicator reading does not change while tightening the screws. The rotors are held in time by the clamping action of the screws and distortion of the flat washers into the gear holes.
-
Page 51: Warranty
GENERAL PROVISIONS AND LIMITATIONS Gardner Denver (the “Company”) warrants to each original retail purchaser (“Purchaser”) of its new products from the Company or its authorized distributor that such products are, at the time of delivery to the Purchaser, made with good material and workmanship. No warranty is made with respect to: Any product which has been repaired or altered in such a way, in the Company’s judgment, as to affect the product adversely. - Page 52 1800 Gardner Expressway, Quincy, Illinois 62301 Phone: (800) 682-9868 ● Fax (217) 221-8780 E-mail: pd.blowers@gardnerdenver.com Visit our web site: www.gardnerdenver.com Specifications subject to change without notice © Copyright 2015 Gardner Denver, Inc. Litho in U.S.A. Sales and Service in all major cities...
Need help?
Do you have a question about the 9CDL R Series and is the answer not in the manual?
Questions and answers